
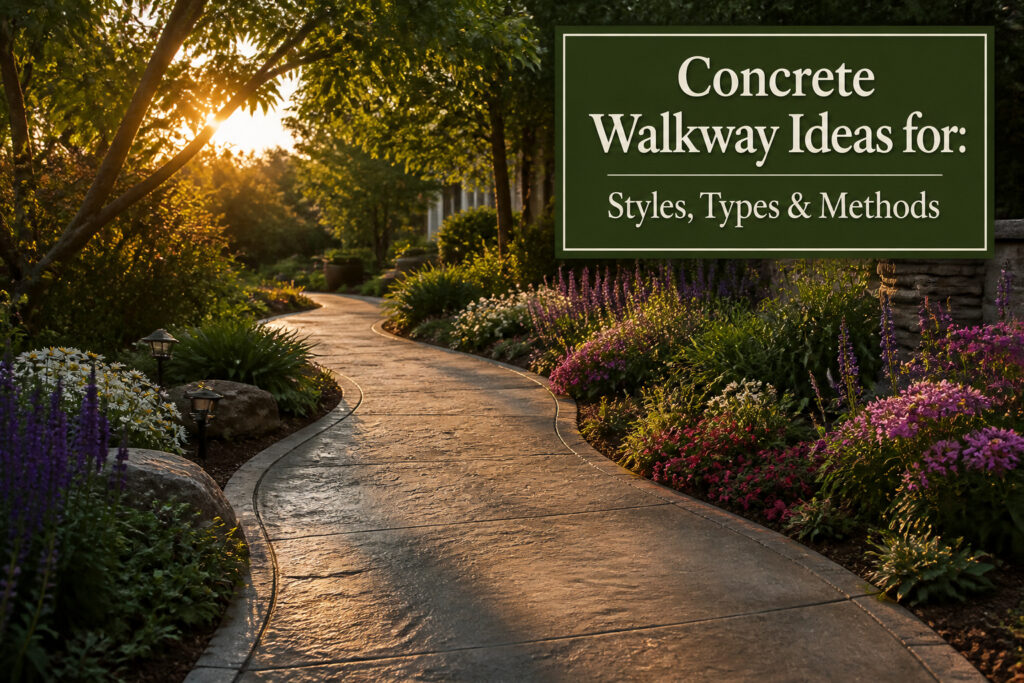
A concrete walkway is either a plain slab you forget exists, or it is the thing that makes someone pause before reaching your door. The difference is not the concrete itself, which runs roughly $5.50–$14 per square foot for a basic pour, but the finish you choose and whether you account for what comes after. A stamped pattern without sealer fades to cheap in five years; a broom finish stays honest for decades but never pretends to be stone. The right choice depends on whether your path carries wheelbarrows, morning dew, or the neighbor’s judgment.
1. Exposed Aggregate
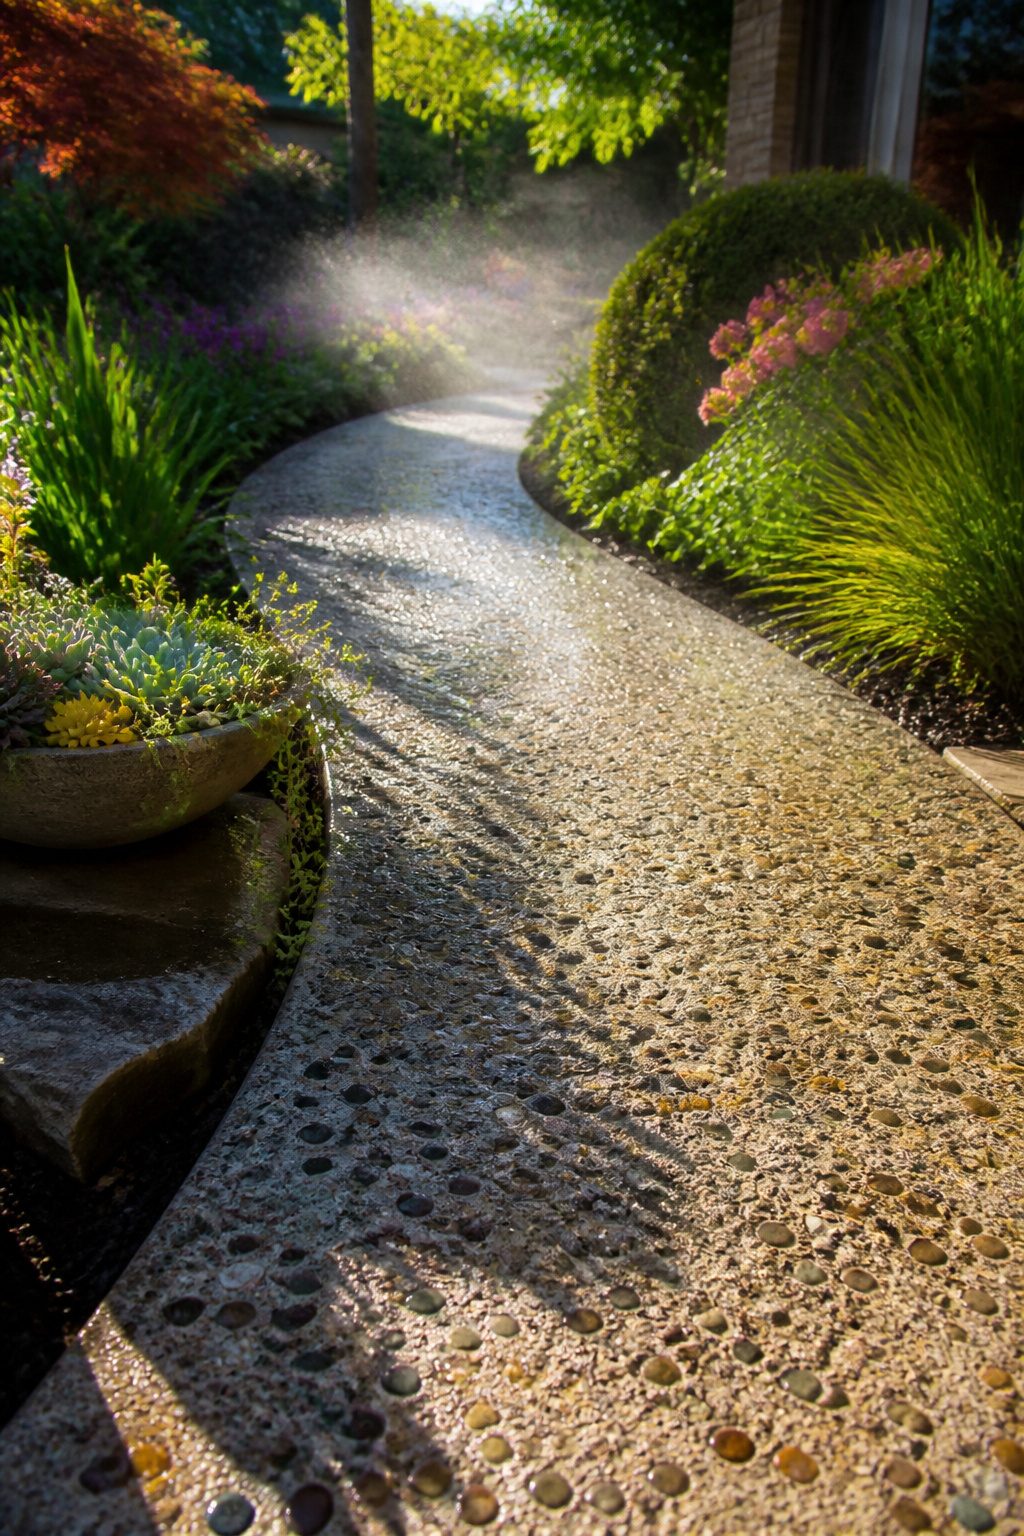
Exposed aggregate concrete washes away the top layer to reveal whatever sits beneath: river stone, crushed shell, colored glass, or local pebbles. The result is a rough surface that grips wet shoes far better than any smooth pour, which matters on garden paths that see morning dew and hose spray. The 8,000–9,500 PSI compression rating of concrete pavers gives this stuff durability comparable to any standard walkway, and the exposed finish can outlast ordinary concrete when an epoxy resin method sets the stone.
Light moves across the embedded material differently through the day. Morning sun catches the quartz or glass and sends it back; late afternoon flattens everything into texture instead of sparkle. That variation costs nothing extra and asks nothing of the gardener except attention.
The tradeoff is the same as any textured surface: leaves and pollen settle into the pockets and need a stiff broom or a pressure washer kept at an angle low enough not to blast the finish away. A leaf blower does the daily work. For sloped paths or anywhere a hose runs, the slip resistance repays the effort.
2. Stamped Concrete
Stamped concrete presses rubber mats or texturizing mats into wet concrete to leave the pattern of wood, stone, brick, or slate. The result carries the look of expensive materials without the matching bill, and the concrete underneath keeps its durability and low upkeep. The pattern can run the full walkway or just the borders, which changes the cost and the visual weight both at once.
Color comes from integral tints or surface hardeners mixed before the pour, but the real question is sealing. A good sealer locks the color in place; without it, UV and foot traffic fade the tone unevenly over seasons. Letting that sealer wear through is the mistake that turns a five-year-old stamped path into something that reads as cheap rather than thrifty.
On a limited yard budget this matters more. Stamped concrete gives the effect of natural stone or weathered wood at roughly the cost of a standard pour plus the stamping labor, which runs higher than bare concrete but well below quarried flagstone or kiln brick. For a small yard that needs to look finished, that spread is worth weighing against how much of the pattern you actually need.
3. Concrete Pavers
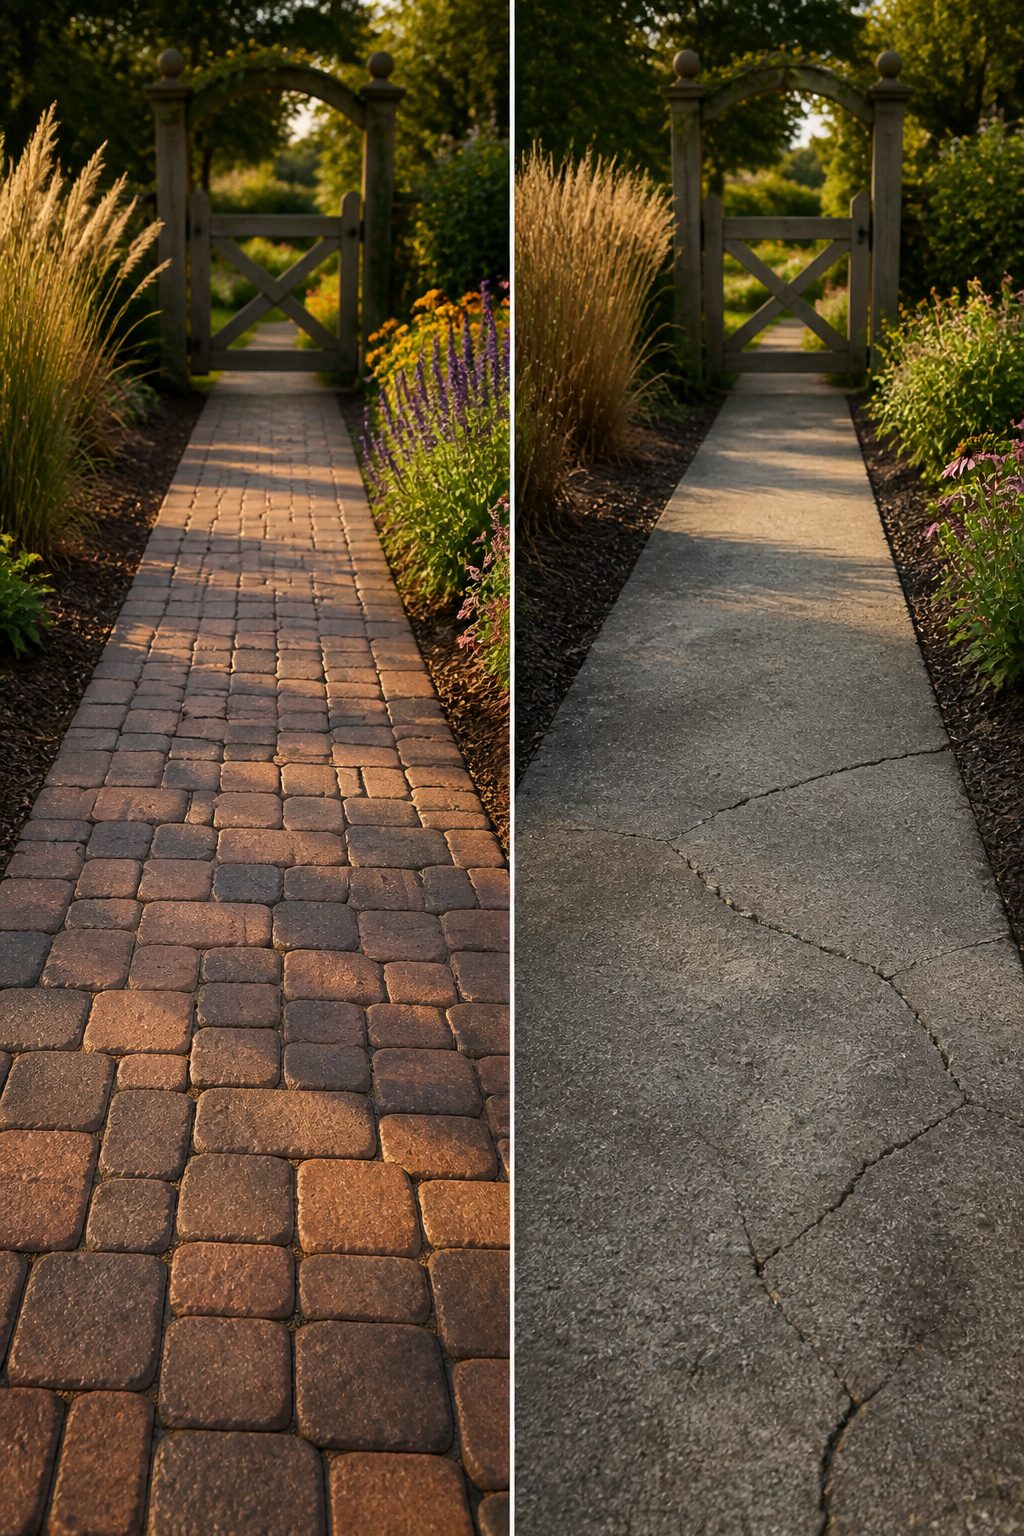
Concrete pavers arrive as individual pre-cast units, usually rated at 8,000–9,500 PSI in compression. That density is what lets them survive freeze cycles and the occasional delivery truck cutting across your front path. I started noticing pavers because of the repair logic: lift one cracked unit, sweep out the joint sand, drop in a replacement, and tap it level. Compare that to calling out a crew to cut out and repour an entire monolithic slab for a single fault line.
The joints between pavers do more than make repair possible. Gaps filled with fine aggregate let rainfall filter through rather than sheeting across the surface, which matters in yards where municipal runoff rules are tightening or where you simply want less water pooling by the basement stair.
Shapes run from crisp rectangular slabs that read as modern to rounded cobble-style impressions that riff on old European streets without the ankle-turning irregularity of actual historic cobbles. Cast in standardized dimensions, they install faster than hand-laid stone and carry less of the price premium. Australian pricing for concrete pathways runs roughly AUD $60–$150 per square meter depending on finish complexity; expect U.S. equivalencies to track closely after currency and local material transport.
4. Textured Concrete
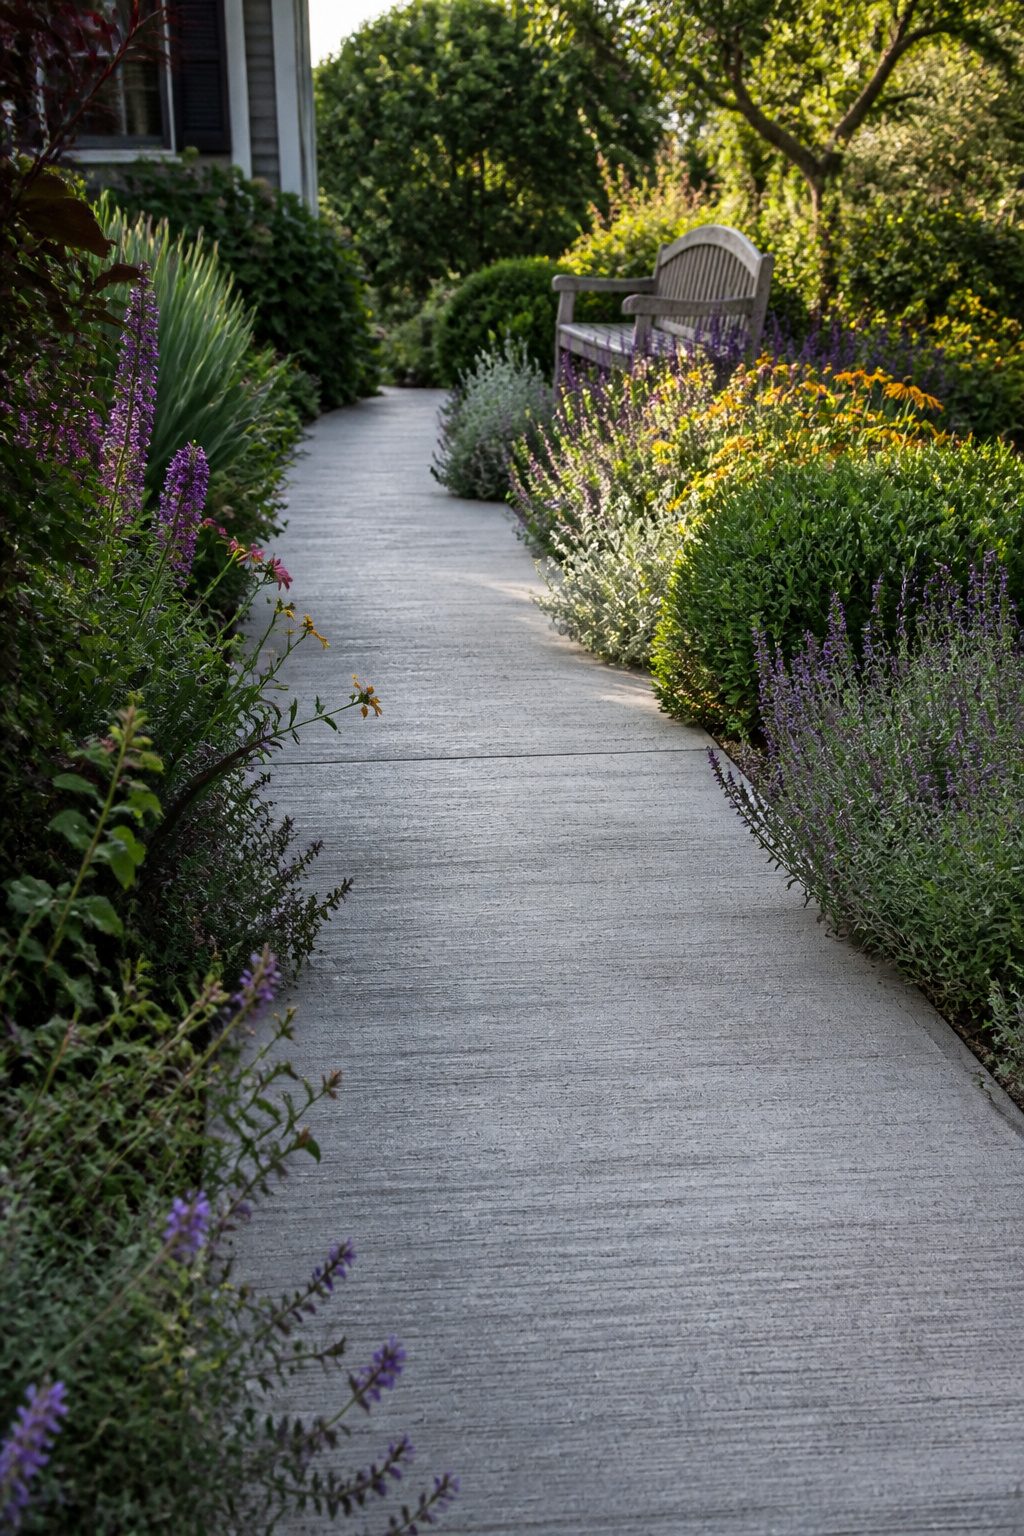
A broom finish is the most common texture you will see on municipal sidewalks, and that frequency is worth noticing. Cities use it because the raised lines give real grip underfoot without adding cost or complexity, and the same logic works for a front walk or garden path at home.
The tool is exactly what the name says: a push broom pulled across the surface once the concrete has set enough to hold the impression. The bristles leave subtle, parallel grooves that break up the flat plane and catch shoe tread. A worker can pull the broom in straight passes or sweep it in arcs; either way, the texture stays understated compared to stamped patterns that press in faux stone or brick.
Unlike exposed aggregate, which washes away the top cream to reveal the stones inside, a broom finish keeps the concrete body intact. That surface is easier to maintain over years of freeze-thaw cycles. The texture also hides the minor flaws that appear on any hand-finished slab, which matters when you are pouring a curve to a patio or fitting a walk between established beds.
What you lose is the decorative punch of other finishes. The broom does not disguise concrete as slate or granite; it looks like what it is. For a back service path or a primary walk where the plantings do the visual work, that plainness is often the right choice.
5. Geometric Designs
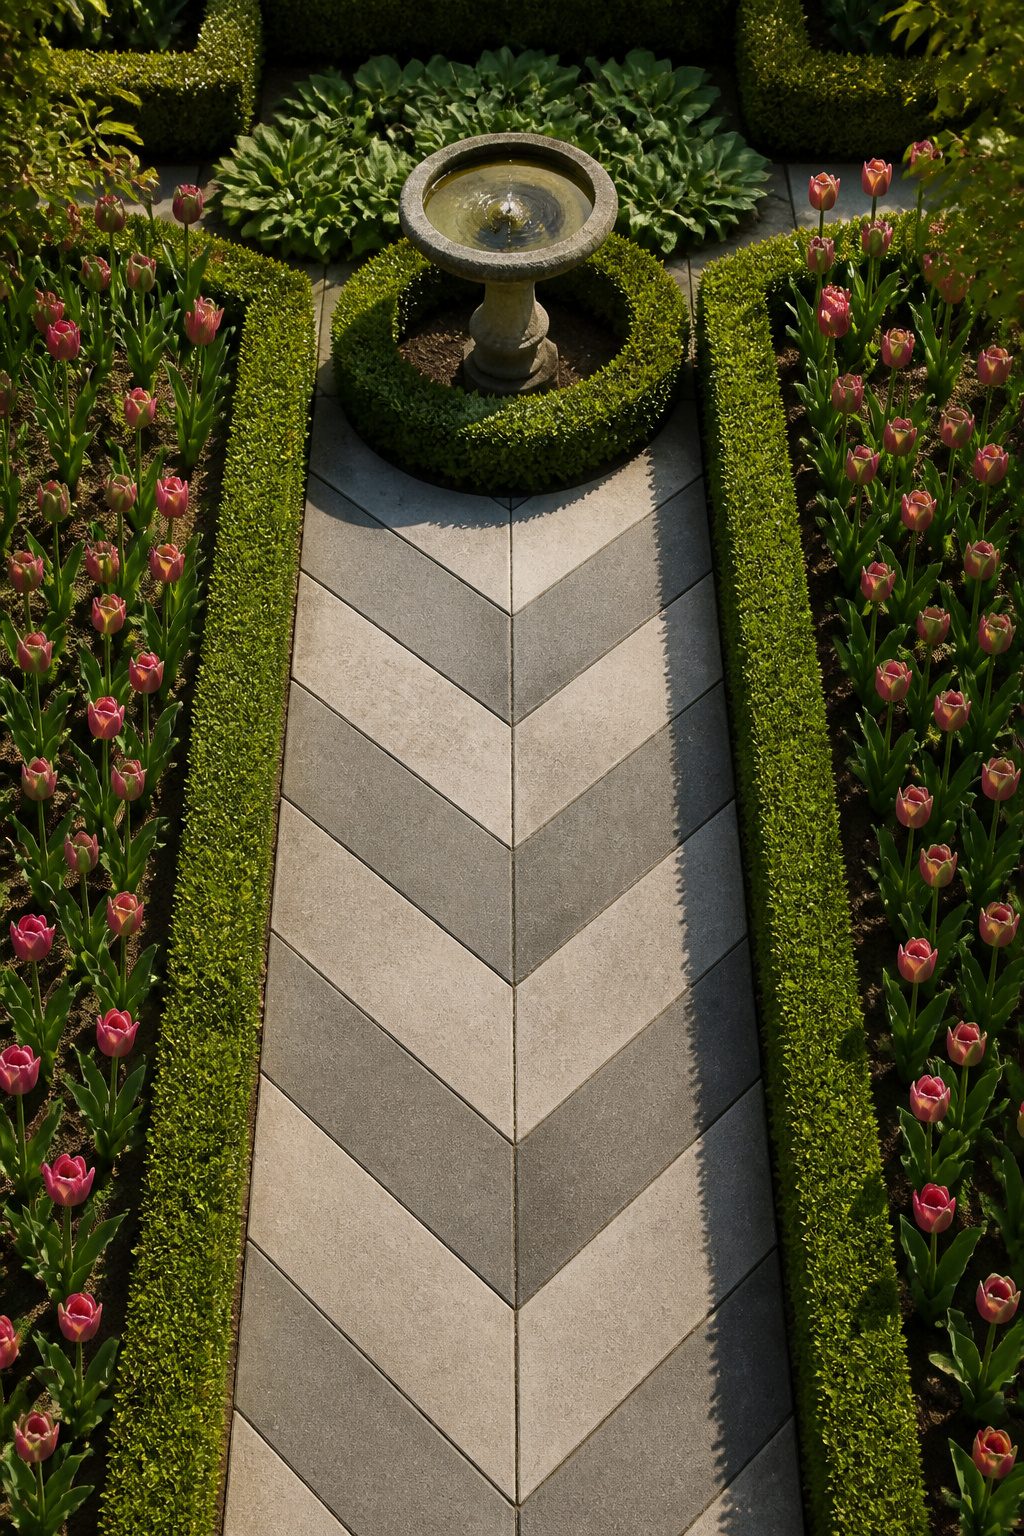
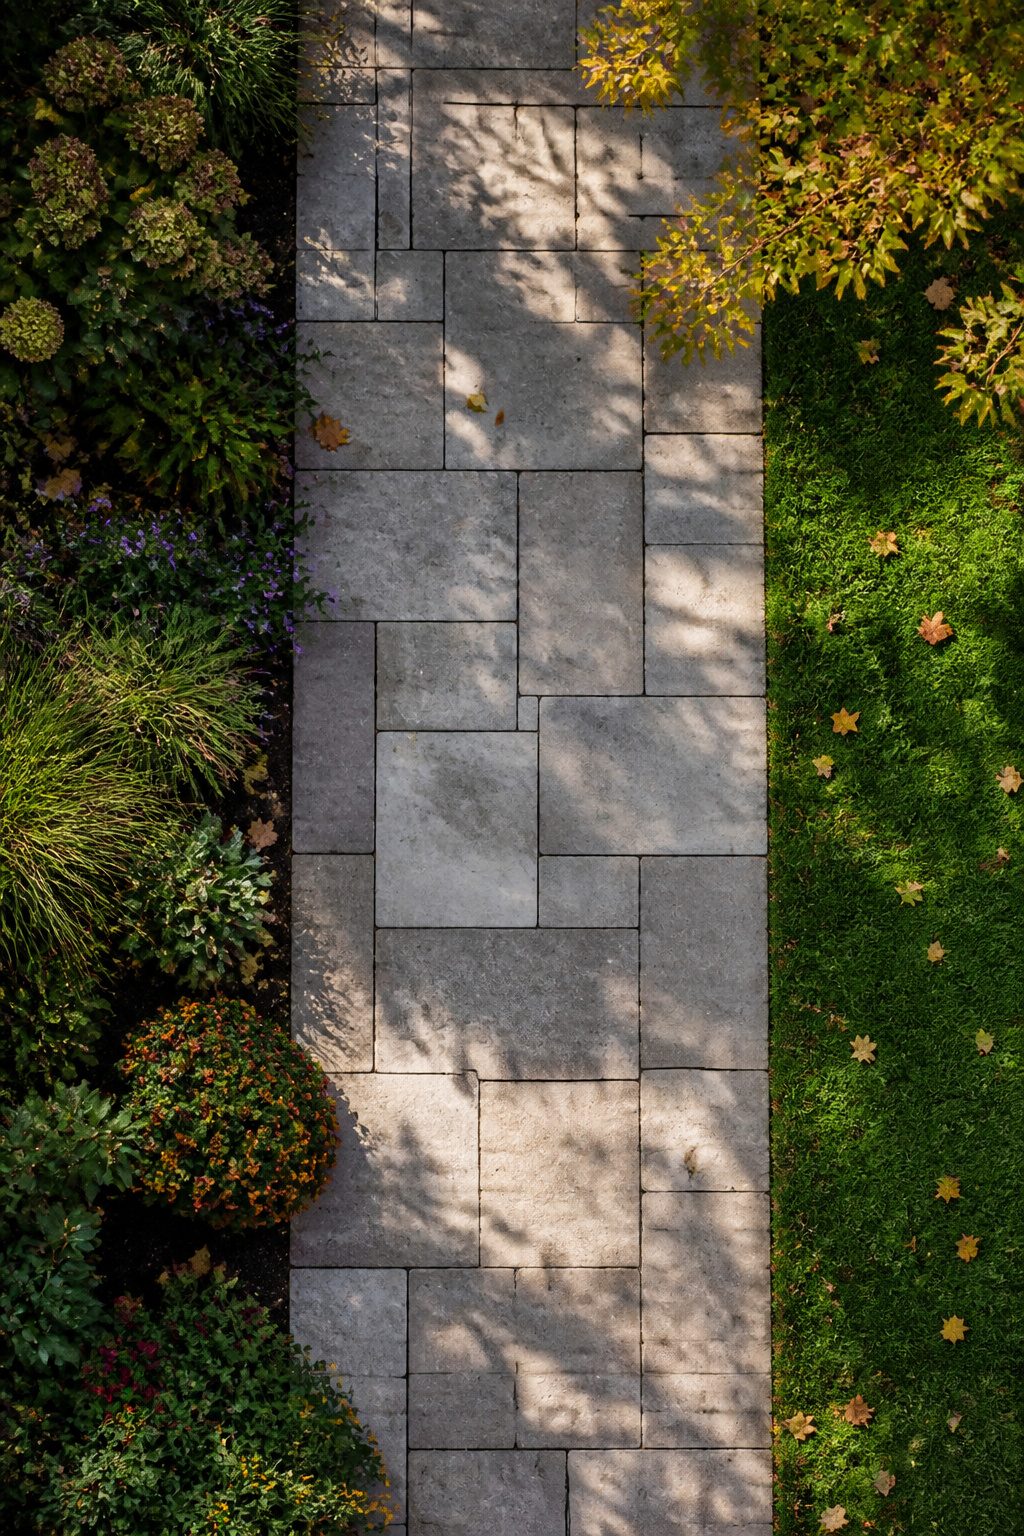
Angular cuts turn a flat path into something that pulls the eye forward. Hexagons, diamonds, and chevrons each create their own rhythm, and the pattern does more than sit there; it speeds up or slows down how someone moves through the yard. A chevron aimed at the front door draws visitors straight in, while a meandering hexagon layout, like the one at the White Plains Library Plaza, lets traffic wander.
Poured concrete can be scored into these shapes, but pavers make the geometry sharper. Wausau Tile casts hexagonal and rectangular pavers in molds, some as thin as 1 1/4 inches, others up to 4 inches for driveways that take the weight. The H-Series line runs 73 molds and 9,500 PSI compression, so the pieces hold up to real use. Custom shapes are possible too. The tradeoff is labor: every angle you add means more cuts, more fitting, more hours billed.
Where the walkway meets planting beds, a geometric edge becomes a frame. A diamond pattern run perpendicular to a border bed creates visual tension that makes the plants pop without extra ornament. I would skip mixing too many shapes in one path, though. One repeating unit, carried consistently, reads as intentional. Two or three fight each other and look like the install went wrong.
6. Mixing Materials
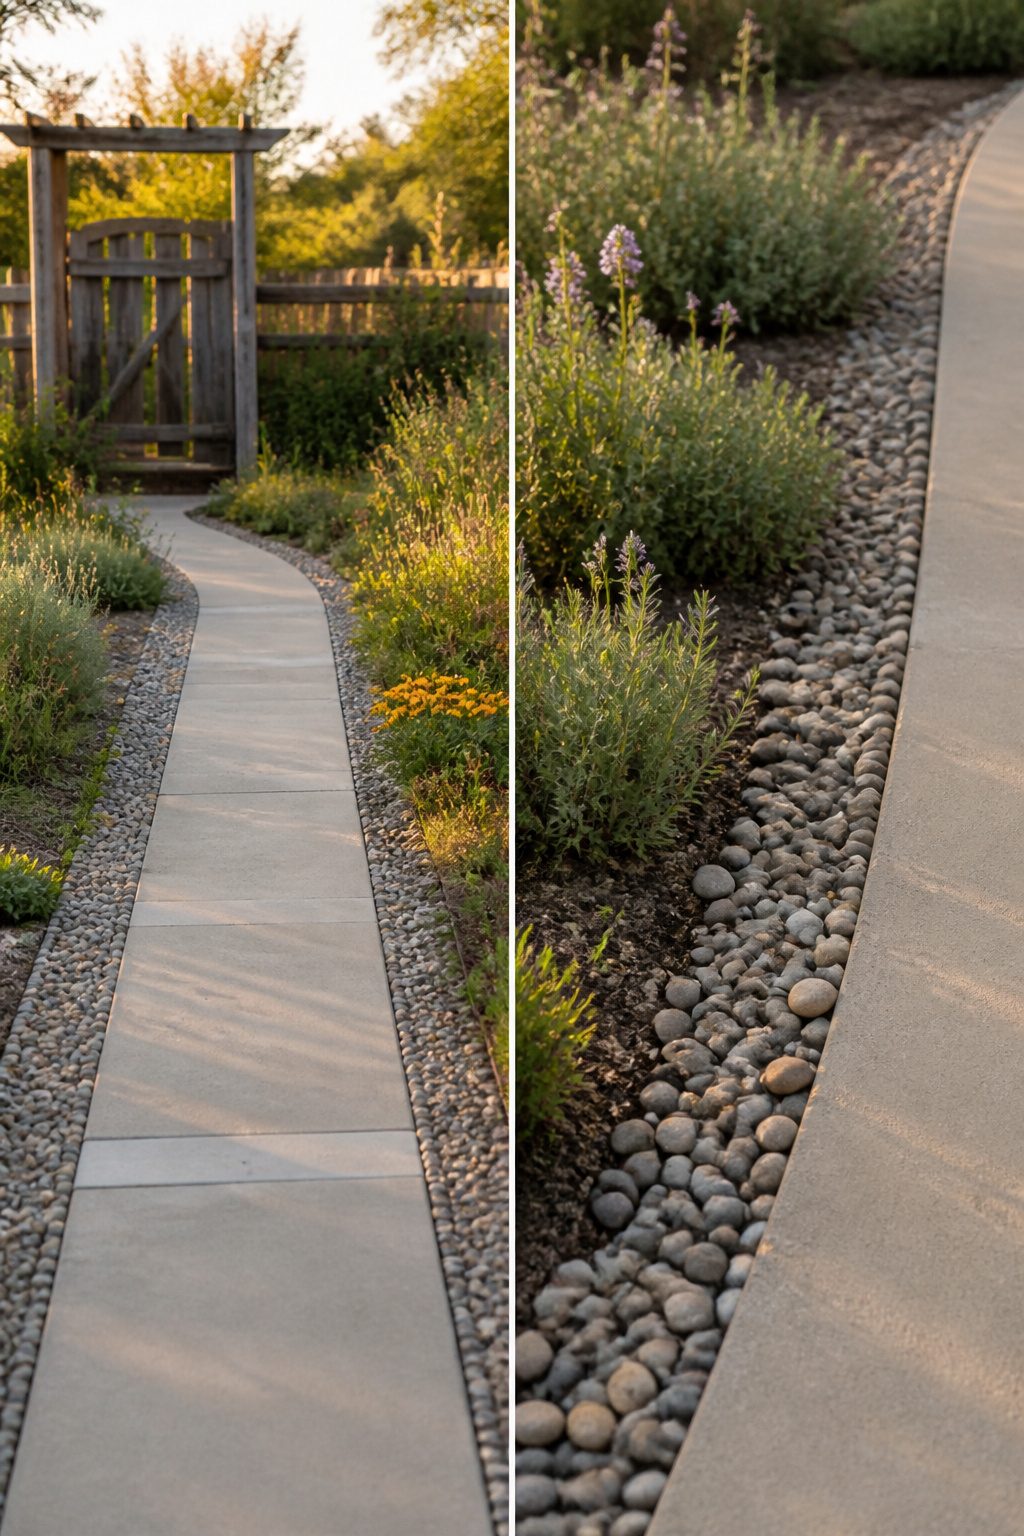
A concrete band with gravel infill runs about two feet wide in the layout I ended up preferring, just enough for a wheelbarrow to track without the rattle of loose stone underfoot. The concrete carries the load, the gravel drains what the weather throws at it, and the change between the two marks where the herb bed ends and the main path begins.
Concrete pads between larger stone pieces work the same way, though the jointing mattered more than I expected going in. Stone barely moves as seasons shift; concrete expands and contracts enough to crack where the two meet without a control joint. I set a half-inch gap filled with polymeric sand, not mortar, so each material could shift on its own schedule.
Wood decking meeting concrete at a threshold is the trickiest pairing. Wood swells in humid months and shrinks back in winter, while concrete holds steady once cured. A gap wide enough for a putty knife, plus a metal flashing strip tucked under the deck edge, keeps the toe-stubbing and rot to a minimum. The visual break signals a door zone, a threshold in the older sense: you notice the change underfoot before your eyes catch up.
7. Illuminated Walkways
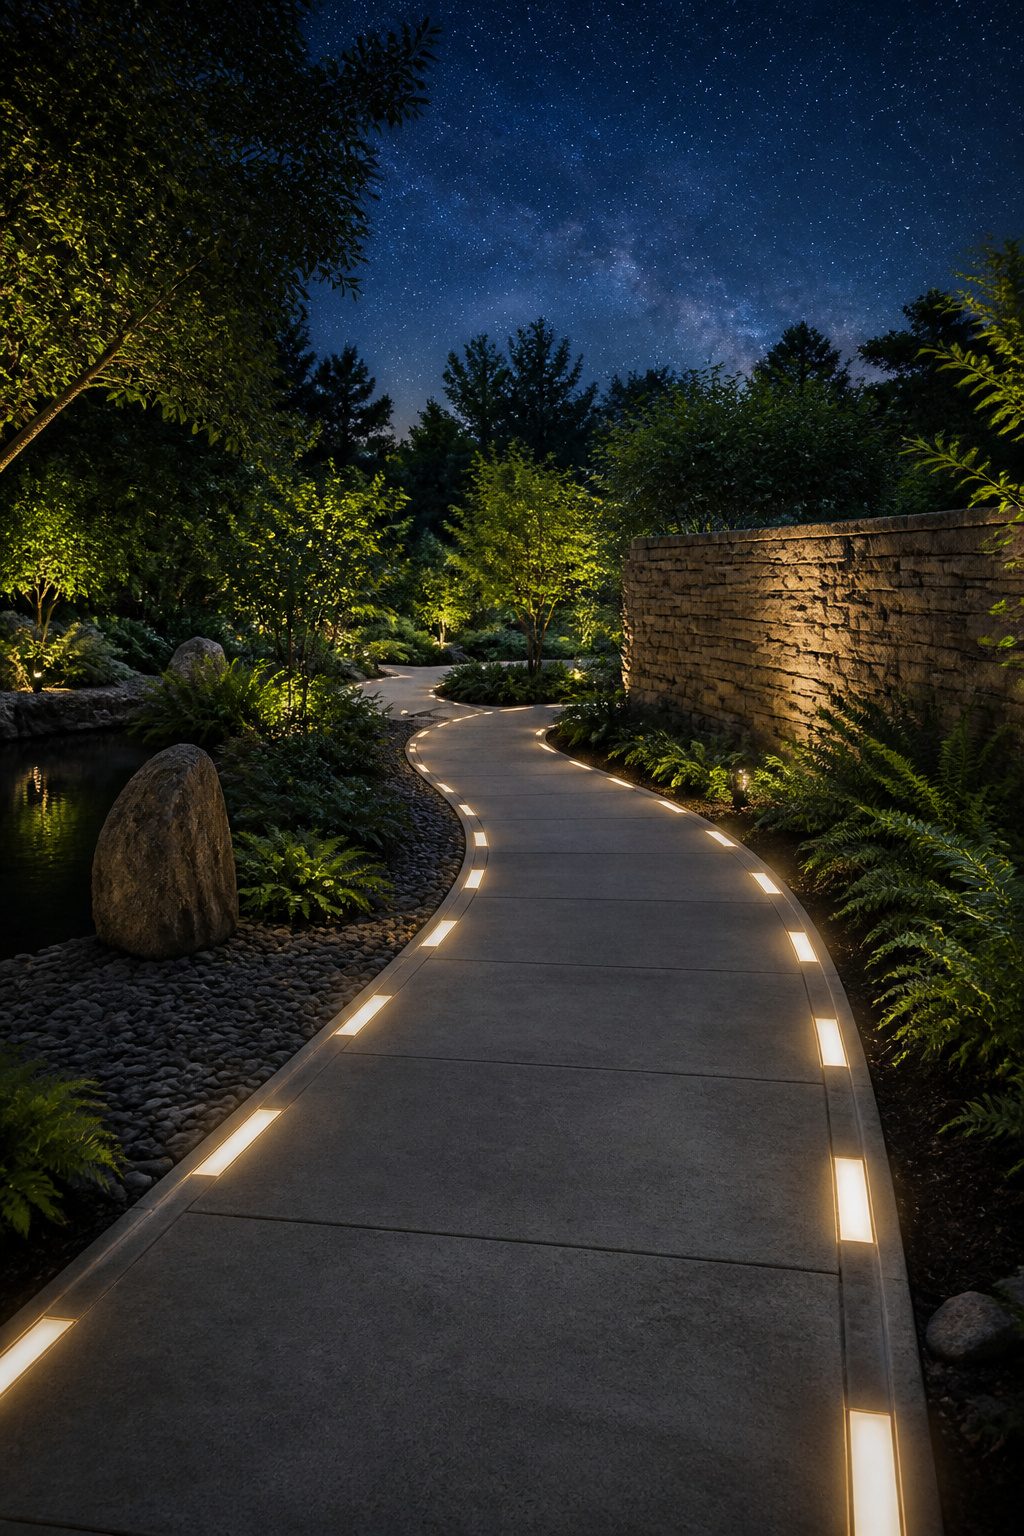
Solar bricks set flush with the surface are the simplest way to light a concrete path after dark. They charge during the day and glow at night without wiring, though in heavy shade they dim by morning and a whole row can fade together. I have watched a walkway turn into a breadcrumb trail of dim spots where trees overgrew.
LED strip channels cast into the edges during the pour give a cleaner line and stay out of the footpath entirely. The light washes sideways across the concrete rather than upward into your eyes, which matters more than it sounds: a fixture placed wrong ahead of you kills your night vision and makes the next ten feet harder to read.
Border beds with low uplighting separate the path from plantings you do not want stepped on, but the fixtures sit in soil that shifts and settles. One winter of frost heave can tilt a light to glare straight across the walkway instead of up through the leaves, and you notice only when the bulb blows or the stake leans. Fixing it means digging around a root mass that grew toward the warmth.
When an embedded fixture fails, the whole unit often has to come out. Solar bricks lift individually unless roots have locked them in. Cast-in channels need the wiring traced back to a junction, which means cutting a clean rectangle in concrete you would rather not scar. Uplights in beds are the easiest swap, if you left enough slack in the burial cable to pull a replacement through. Most people do not.
8. Freeform Designs
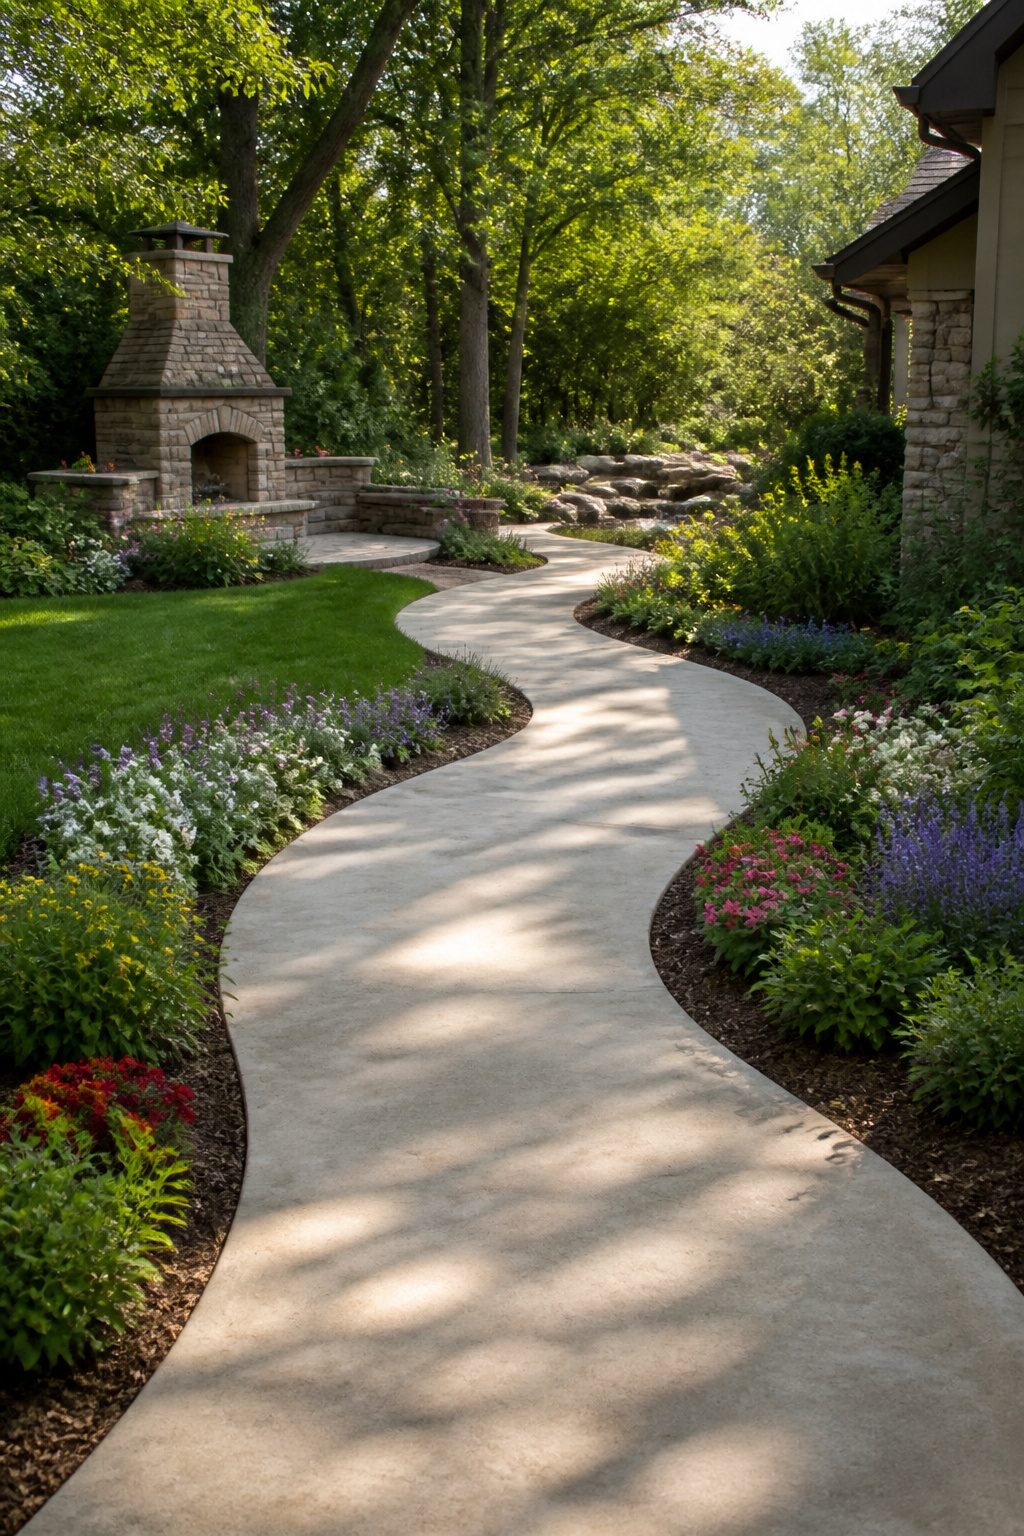
Curved concrete walkways follow the land instead of fighting it. I learned this after hauling wheelbarrow loads of fill to flatten a slope that would have looked better with a path bending gently around it. Freeform layouts work best with informal gardens where roses spill over edges or ground-huggers soften the margins. The eye travels differently along a curve, slowing your steps and forcing you to notice what comes next, a corner of the compost bin, then the hydrangea, then the back gate. That sequential reveal is the reason informal gardens use them at all.
The tradeoff is in the build. Curves need more formwork because every bend is a fresh cut and brace. Screeding gets harder too; a straight 2×4 rest on both sides of a form, but a curve needs you to work shorter sections or use a flexible screed board, something I have seen done with a strip of plywood bent to match. On a sloped site, the curve lets you step the grade gradually rather than making one long, tilted plane that feels like a ramp.
9. Modern Lighting
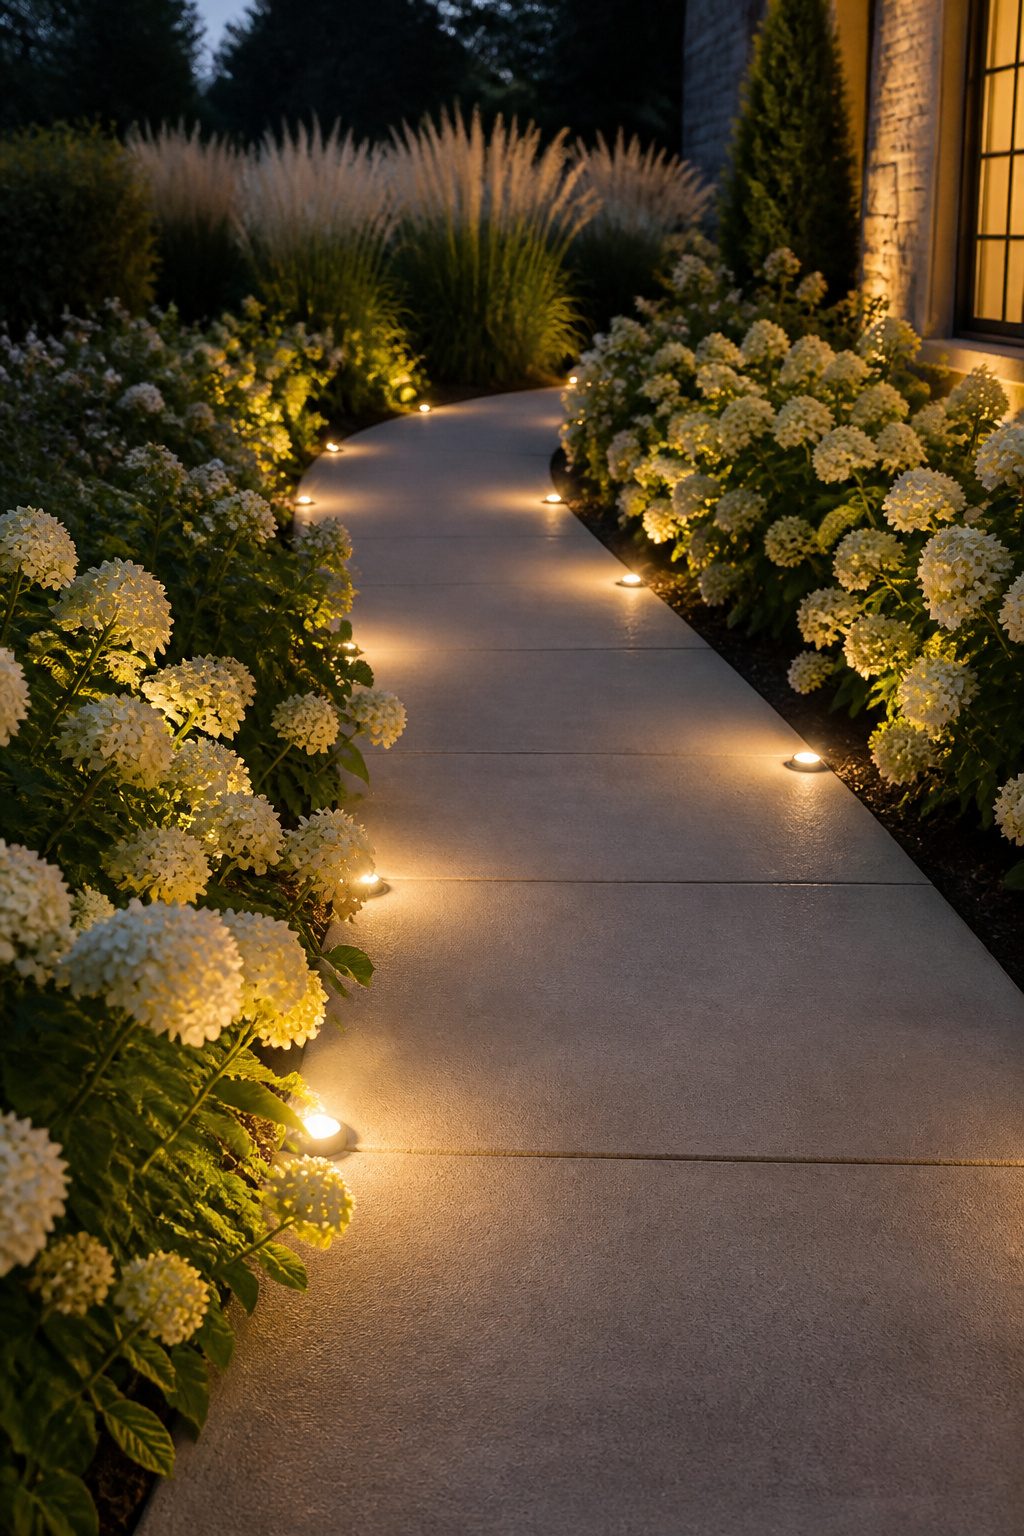
Lighting a concrete walkway after dark used to mean a lone porch bulb casting a long shadow. Recessed ground spots changed that for me once I saw them tucked beside a neighbor’s path, washing upward across a hydrangea’s underside without a fixture in sight. Place them at the base of planting edges, angled back toward stems rather than straight up, and leaves read as layered shapes instead of flat silhouettes.
Linear channel lights sit flush with the slab edge or run in the gap between concrete and lawn. I resisted them at first, thinking they would look like airport runway markings, but at low output they act more like a drawn horizon line that keeps feet steady and eyes relaxed. Their spread is narrow, so spacing matters more than brightness; every four to six feet carried the line evenly in the installations I have walked.
Bollards divide opinion, and I think rightly. At three feet they become obstacles in small yards. Shorter ones, knee height or below, mark turns without dominating the view. I would skip them entirely on paths under five feet wide.
Color temperature is where plantings live or die at night. Cool white, 5000K and above, flattens green into gray and bleaches flower color. Warm white around 2700K keeps foliage readable and lets blues and purples hold their saturation. I notice the shift most on silver-leaved plants; cool light erases that shimmer entirely, while warm light lets it carry.
10. Brick Pavers
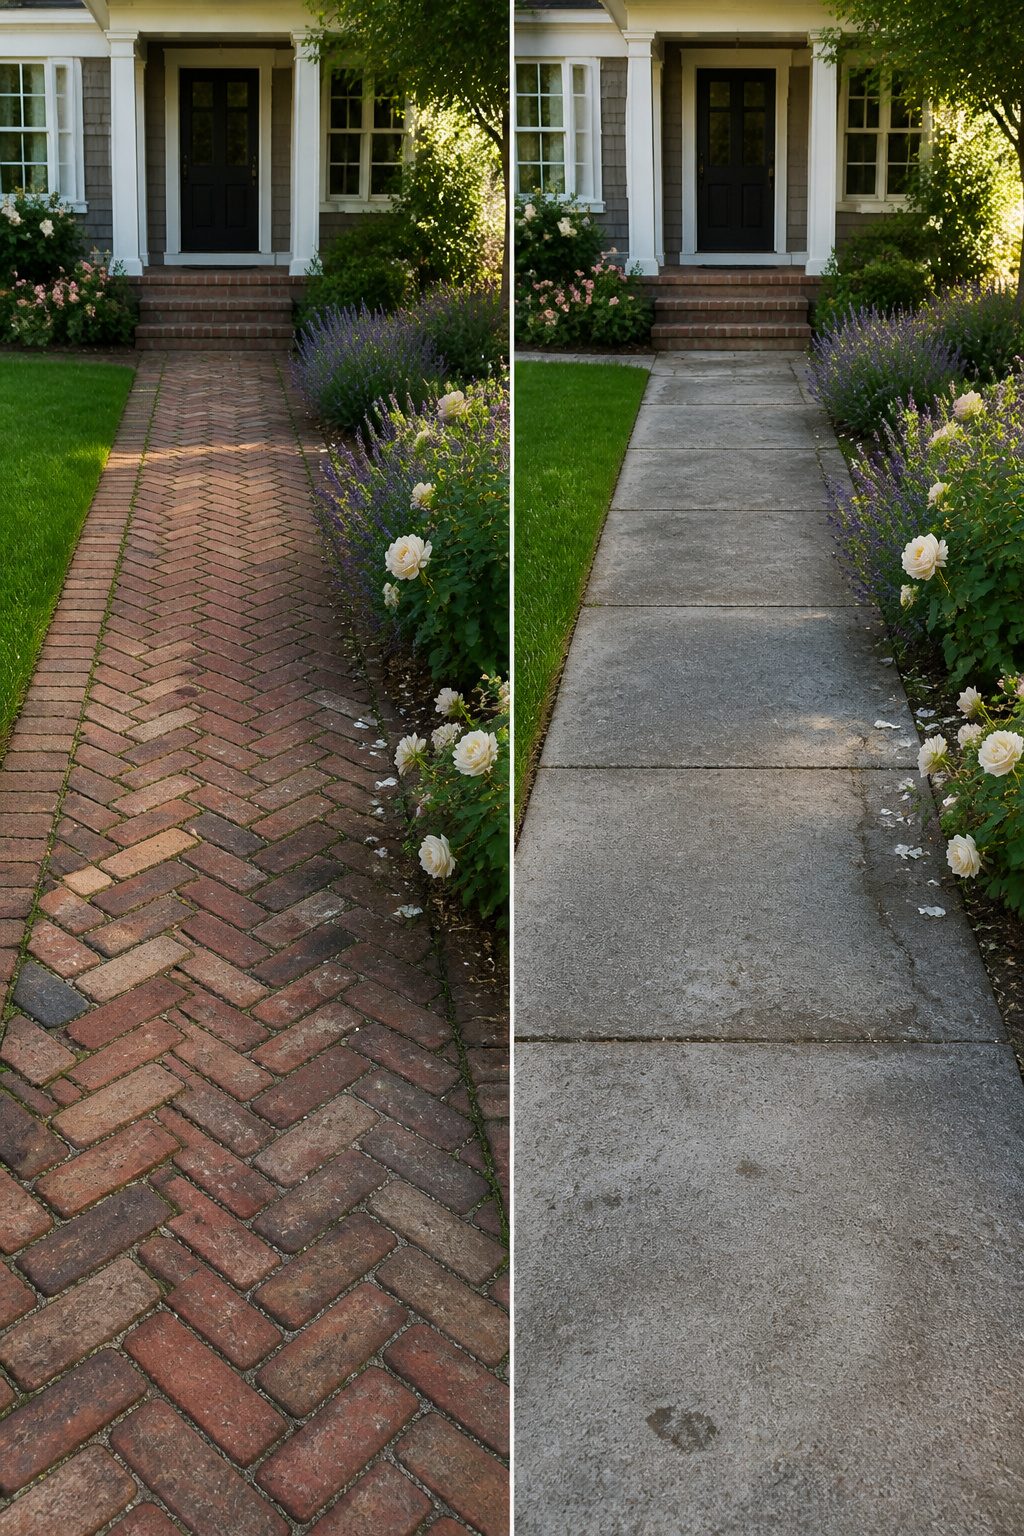
Brick carries the longest memory of any hardscape material I know. A long path of clay units calls up colonial dooryards and garden entries built before concrete ever mixed on site, and designers still borrow that weight to soften a modern walk. The colors run from soft reds through dark browns, and the weathering deepens them over decades; the brick does not fade so much as settle into itself.
You can set brick in sand for easier repair or in mortar for permanence, and either way it works well as edging or infill alongside a concrete slab. Tumbled bricks with rounded corners will push the look toward antique if that is what the house asks for. Patterns are nearly infinite: herringbone, running bond, basket weave, jack on jack. Damage fixes easily, but only if the initial layout was done correctly; a poorly set brick path will shift and warp over seasons.
The trade is real. Brick costs more and takes longer to install than manufactured concrete pavers, which are uniform and fast to lay. I would not use brick to cover a long approach on a tight budget or a weekend schedule. Where it earns its place is short runs, borders, or any spot where the walkway needs to speak in the same tone as an older house or a traditional garden plan.
11. Concrete Paver-Edged Pathways
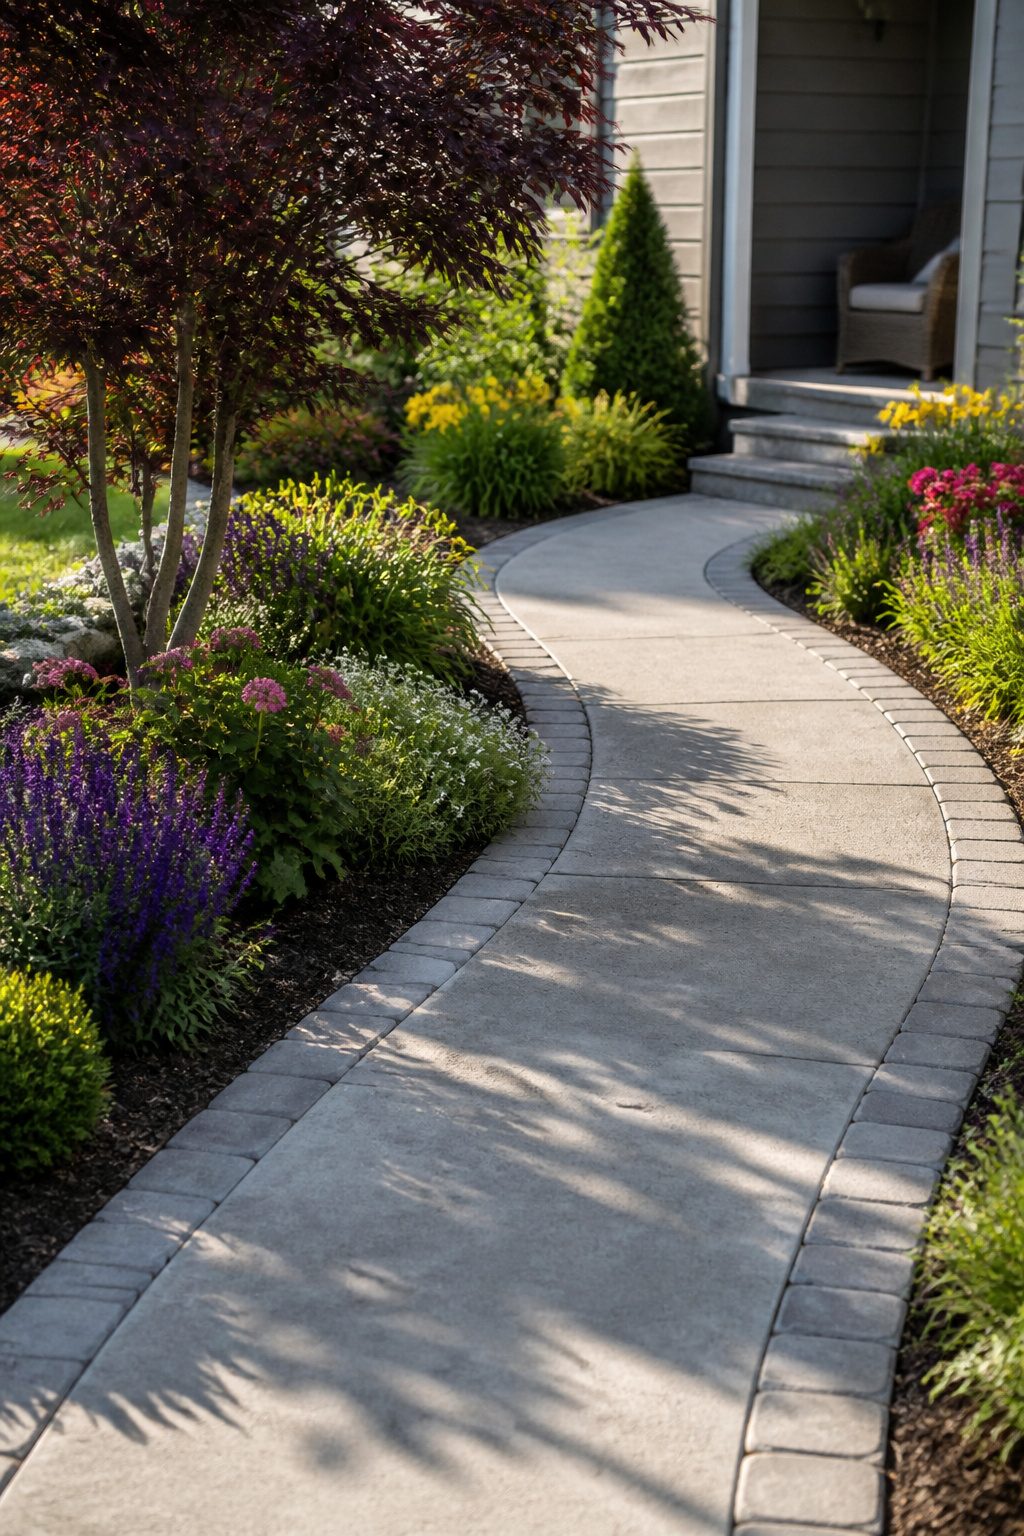
A concrete path without something at its edges tends to crumble where lawn meets slab, and the line goes fuzzy with grass and soil migration inside of a season or two. A paver border locks that edge in place, containing the pour and giving your eye a clean frame to read against the garden.
For a narrow side yard path, four inches of brick or concrete paver on either side reads proportional; on a broader front walk, six to eight inches keeps the scale from looking like afterthought trim. The border width should feel intentional, not leftover.
The timing matters more than most sources let on. Set your pavers in a bed of compacted sand and true them with a level before the pour, not after; trying to cut and seat hard edging against cured concrete invites chipped corners and a gap that collects debris. I watched a contractor once try the reverse on a neighbor’s job, and the result was a wobble you could see from the curb. If you pause to let the concrete set overnight before edging, you are essentially building two separate surfaces that will drift apart.
12. Resurfacing
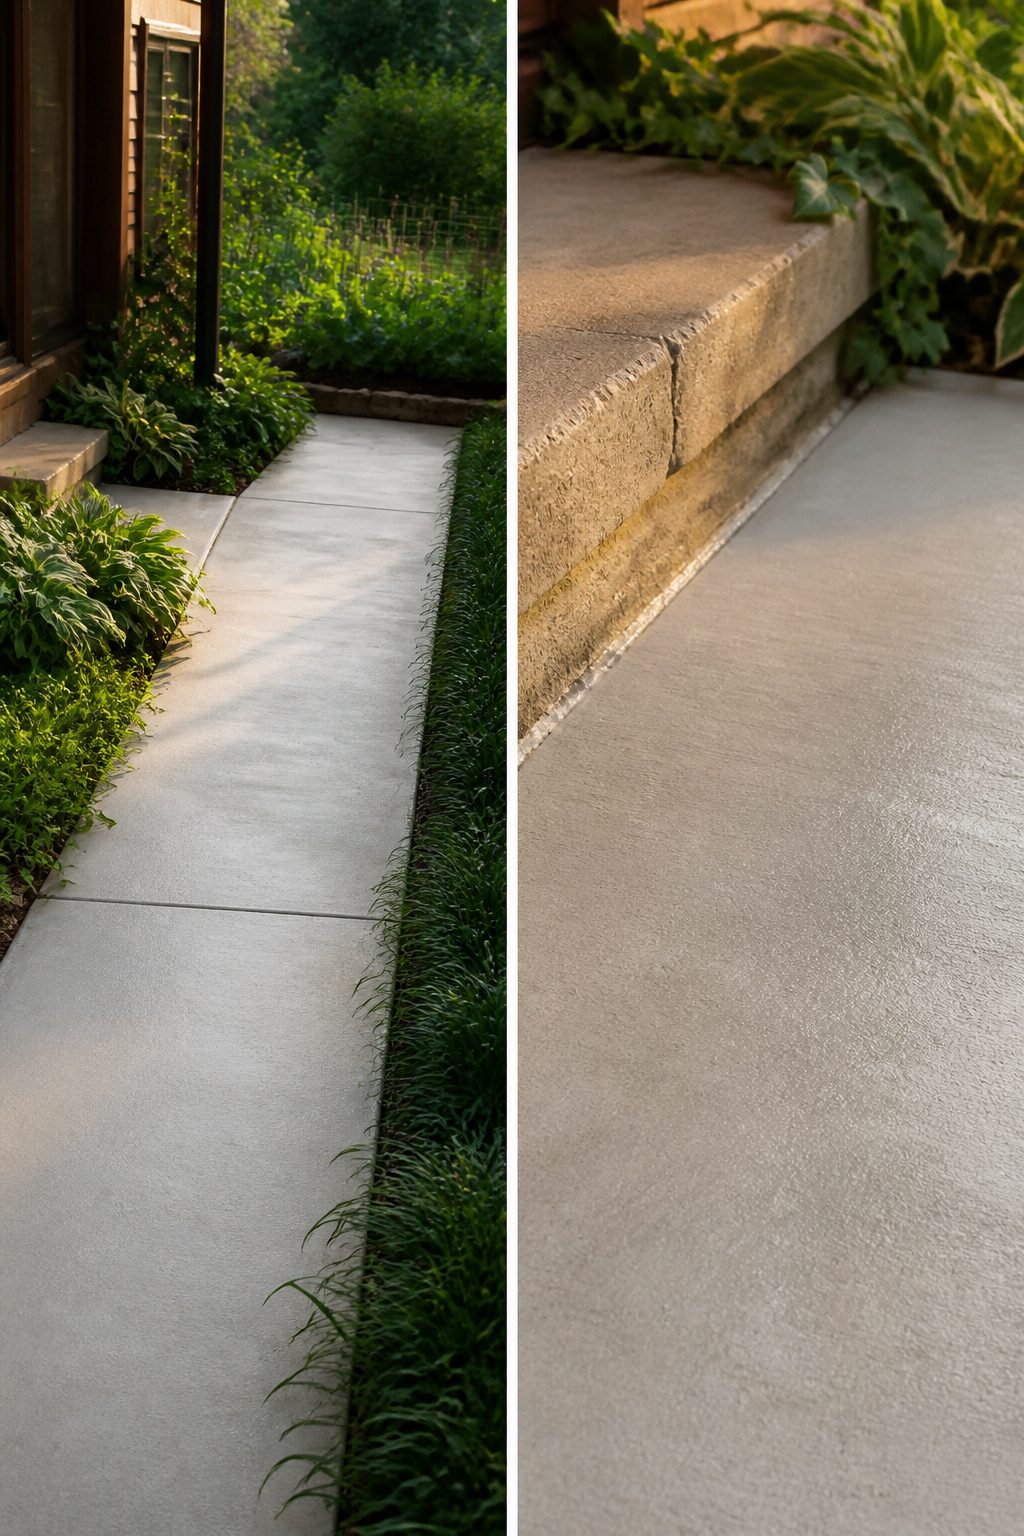
Resurfacing an old walkway beats tearing it out, but only when the slab underneath is sound. I tap every section with a hammer and listen for the hollow ring that means delamination; hairline surface cracks are fine, but anything that shifts underfoot or drains toward the house is a disqualifier. Water needs somewhere to go.
Overlay products run from paper-thin microtoppings up to stampable coatings closer to a quarter inch. Each step up in thickness eats into your threshold height, and that quarter inch can stop a screen door or create a puddle trap where the walkway meets the stoop. I check the math before ordering material.
Microtoppings smooth out weathering and small stains but won’t hide deep damage. Thinner stamped coatings carry a pattern and can fake the look of new pour, though the texture sits closer to the surface than full-depth stamping and wears faster at the edges. Either way, the bond lives or dies on prep: pressure wash, etch, and let the slab dry to the right moisture level per the product specs. One shortcut there, and the new surface shells off in sheets by next spring.
What Concrete Walkways Cost
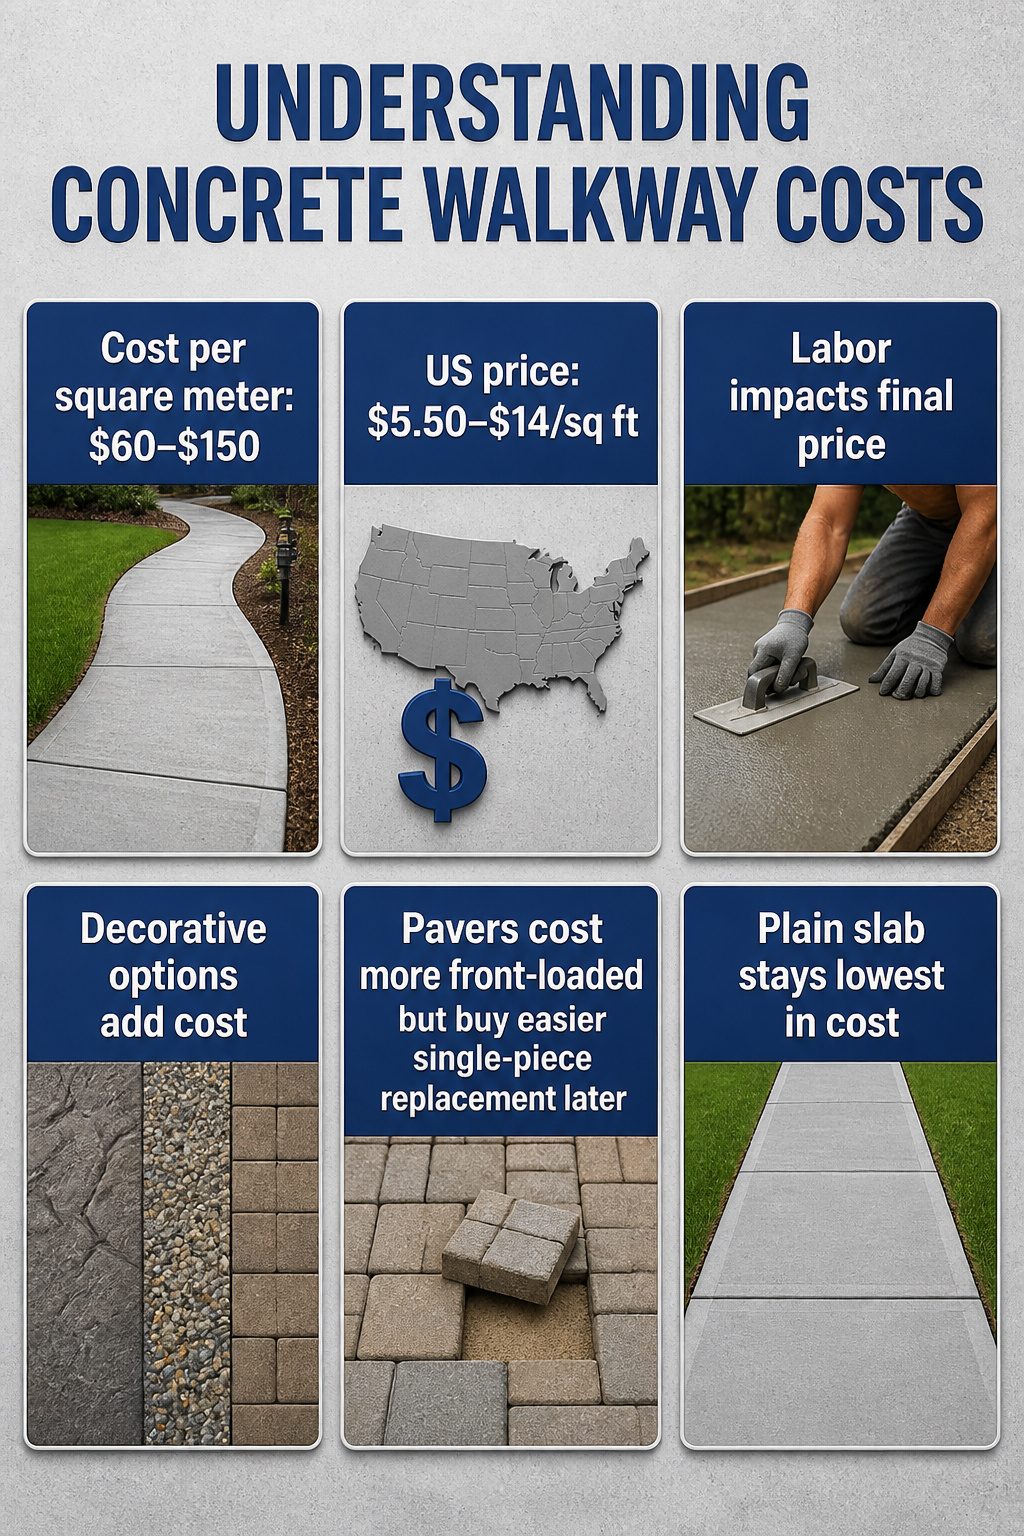
Concrete runs cheaper upfront than natural stone or brick, and that gap widens over decades. The Australian figures land at $60–$150 per square meter, which translates to roughly $5.50–$14 per square foot in US pricing, though your actual bid in Kansas versus California will swing on local labor rates and how elaborate the finish gets.
Stamped patterns add labor. Exposed aggregate adds material. Pavers cost more front-loaded but buy easier single-piece replacement later. A plain poured slab sits at the bottom of that range and stays there if you skip the decorative step. What you choose is less about the concrete itself than about what hours and specialty mixes you tack on.
How Long Concrete Lasts
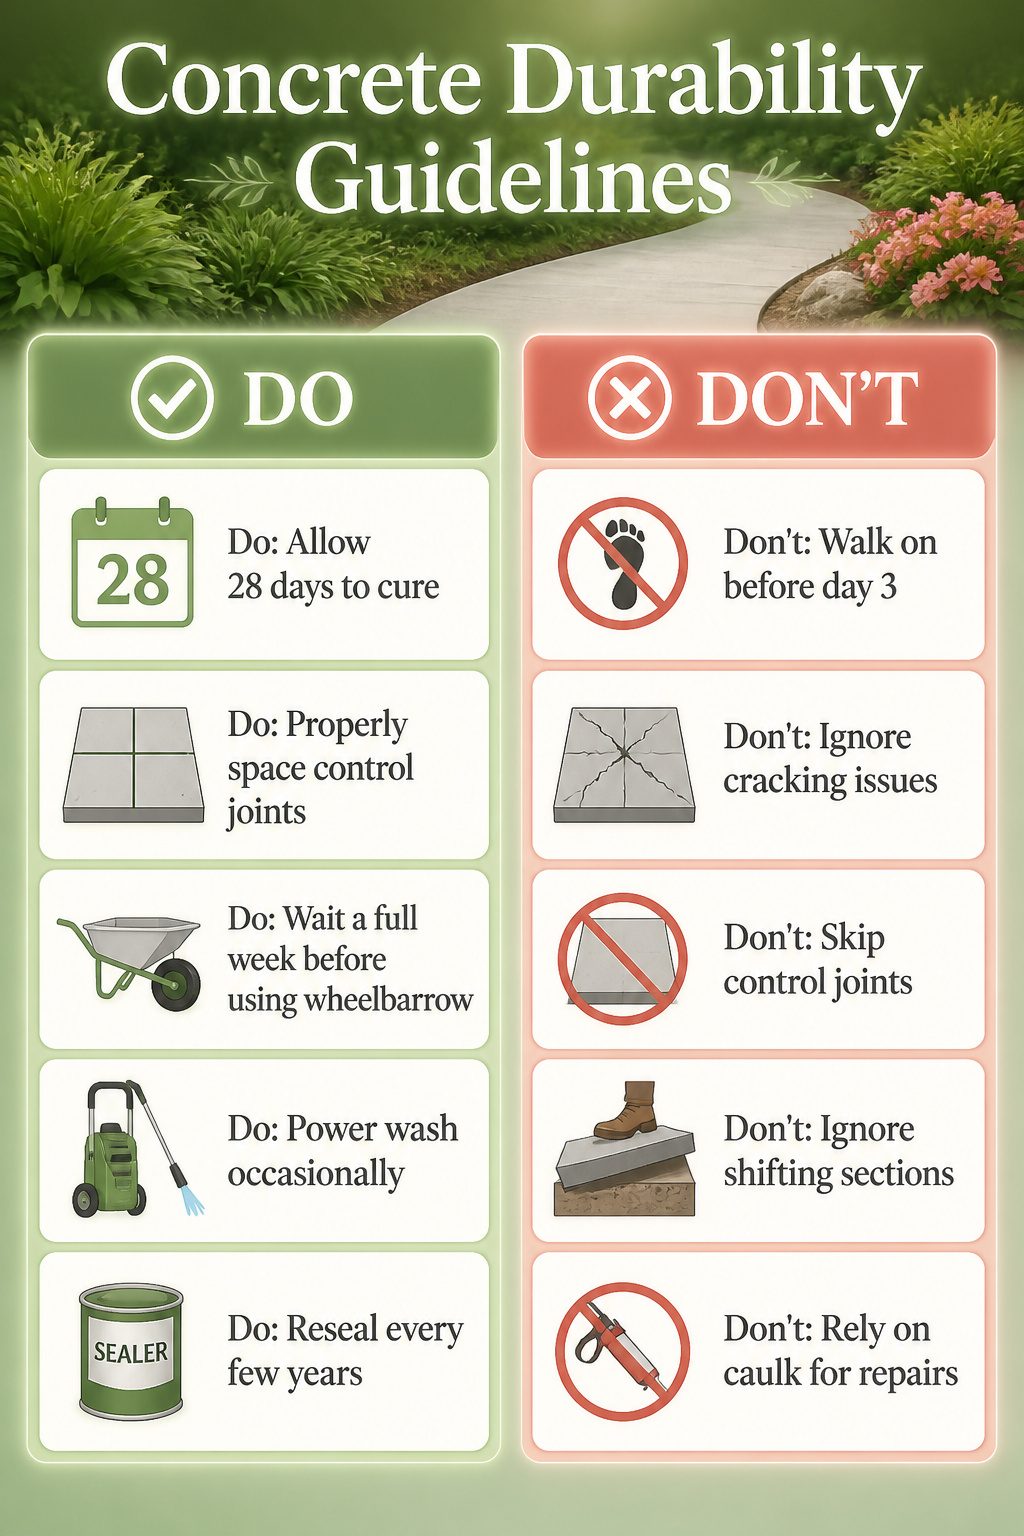
Concrete handles frost and daily wear better than almost any walkway material, but only if the base and curing are handled right from the start. The surface needs roughly 28 days to reach its rated strength, and walking on it before day three risks permanent scoring. I wait a full week before moving a wheelbarrow across a new pour.
Control joints are the detail that separates a 30-year walkway from one that spiders within five years. Spaced at intervals matching the slab’s depth in feet, then converted to inches, a four-inch slab wants joints every four feet. Without them, the concrete will crack anyway, just not where you planned.
After ten years, hairline cracks are usually cosmetic, settling that happened despite your best prep. Diagonal cracks running corner to corner, or any section that shifts when you step on it, means the base failed underneath. That repair is excavation, not caulk.
The maintenance once cured is minimal, occasional power washing and resealing every few years. The real work is front-loaded, getting the pour right while you still can.
Permeable Options
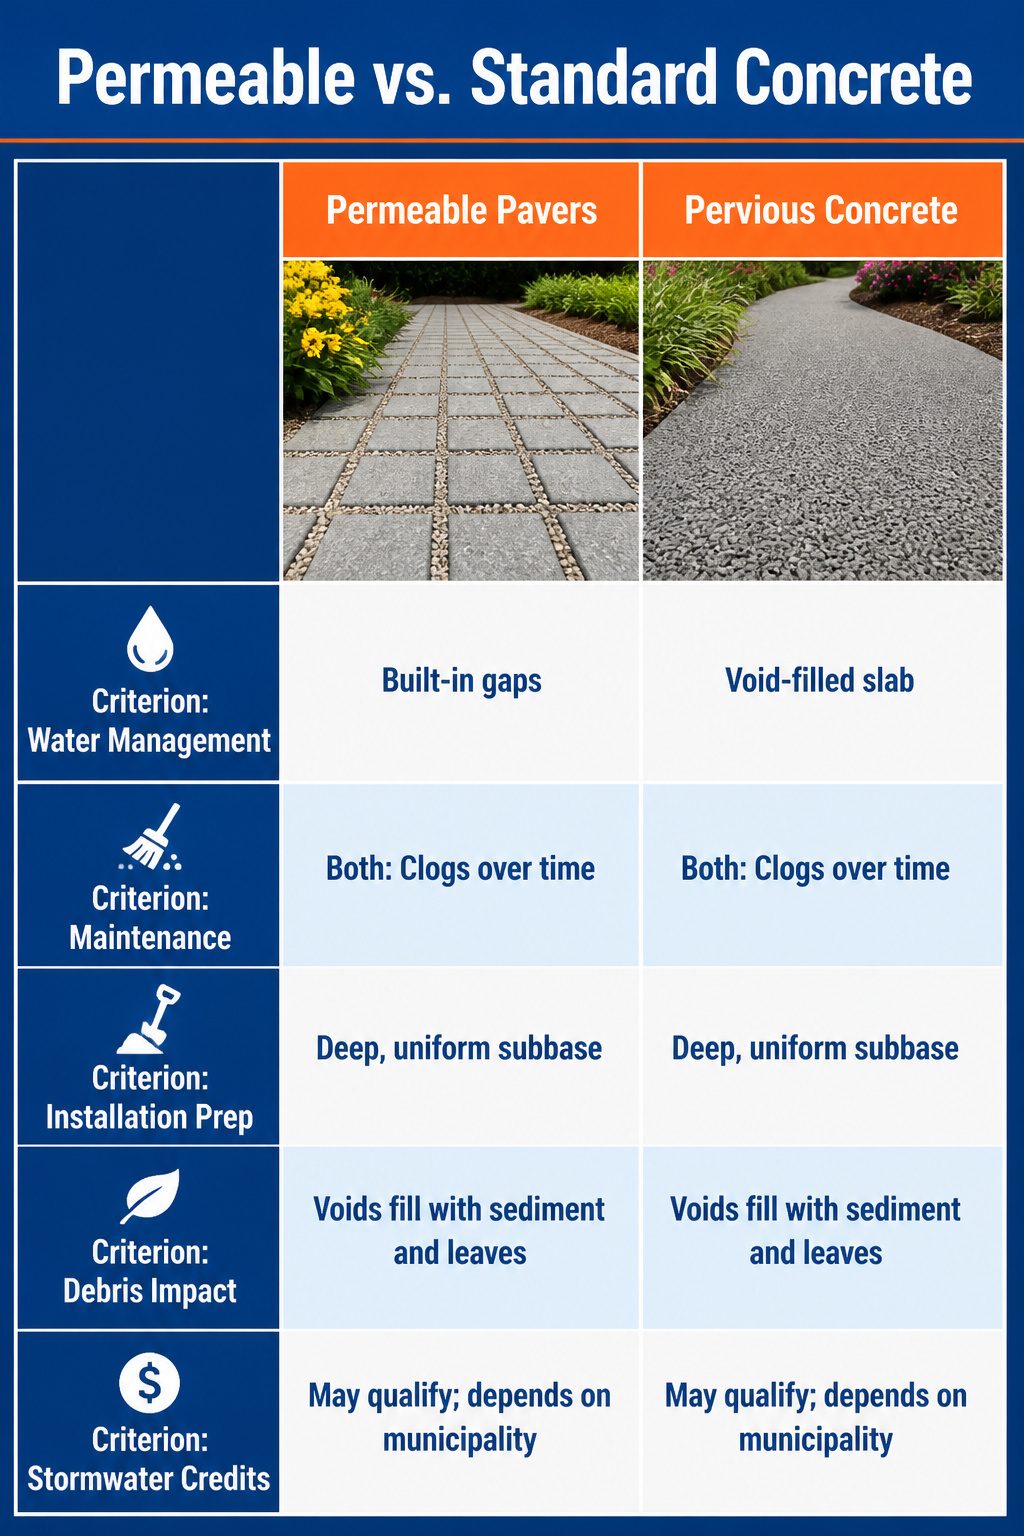
Rain has to go somewhere, and a standard concrete walkway sends most of it racing toward the street. Permeable options let it sink through instead, which matters more than I expected once I started reading how many cities now charge stormwater fees by the square foot of impervious surface on your lot.
Two approaches handle this. Permeable pavers are concrete units with built-in gaps filled with small stones; water drains through the joints into a prepared gravel bed below. Pervious concrete is a single pour where the mix leaves interconnected voids, so water filters straight through the slab itself. Either one can reduce runoff enough to qualify for local stormwater credits, though the paperwork varies by municipality and the savings are real only if your utility bills for volume.
The catch is base preparation. Both systems need a deep, uniform subbase of washed aggregate, graded and compacted so water moves downward rather than pooling. Install it wrong and the walkway holds water like a bathtub. They also clog over time: sediment and leaf debris slowly fill the voids, so you need to vacuum or pressure-wash the surface every season or two to keep the flow rate up. Skip that maintenance and you end up with an expensive impervious slab that just looks different.
Color and Finish Choices
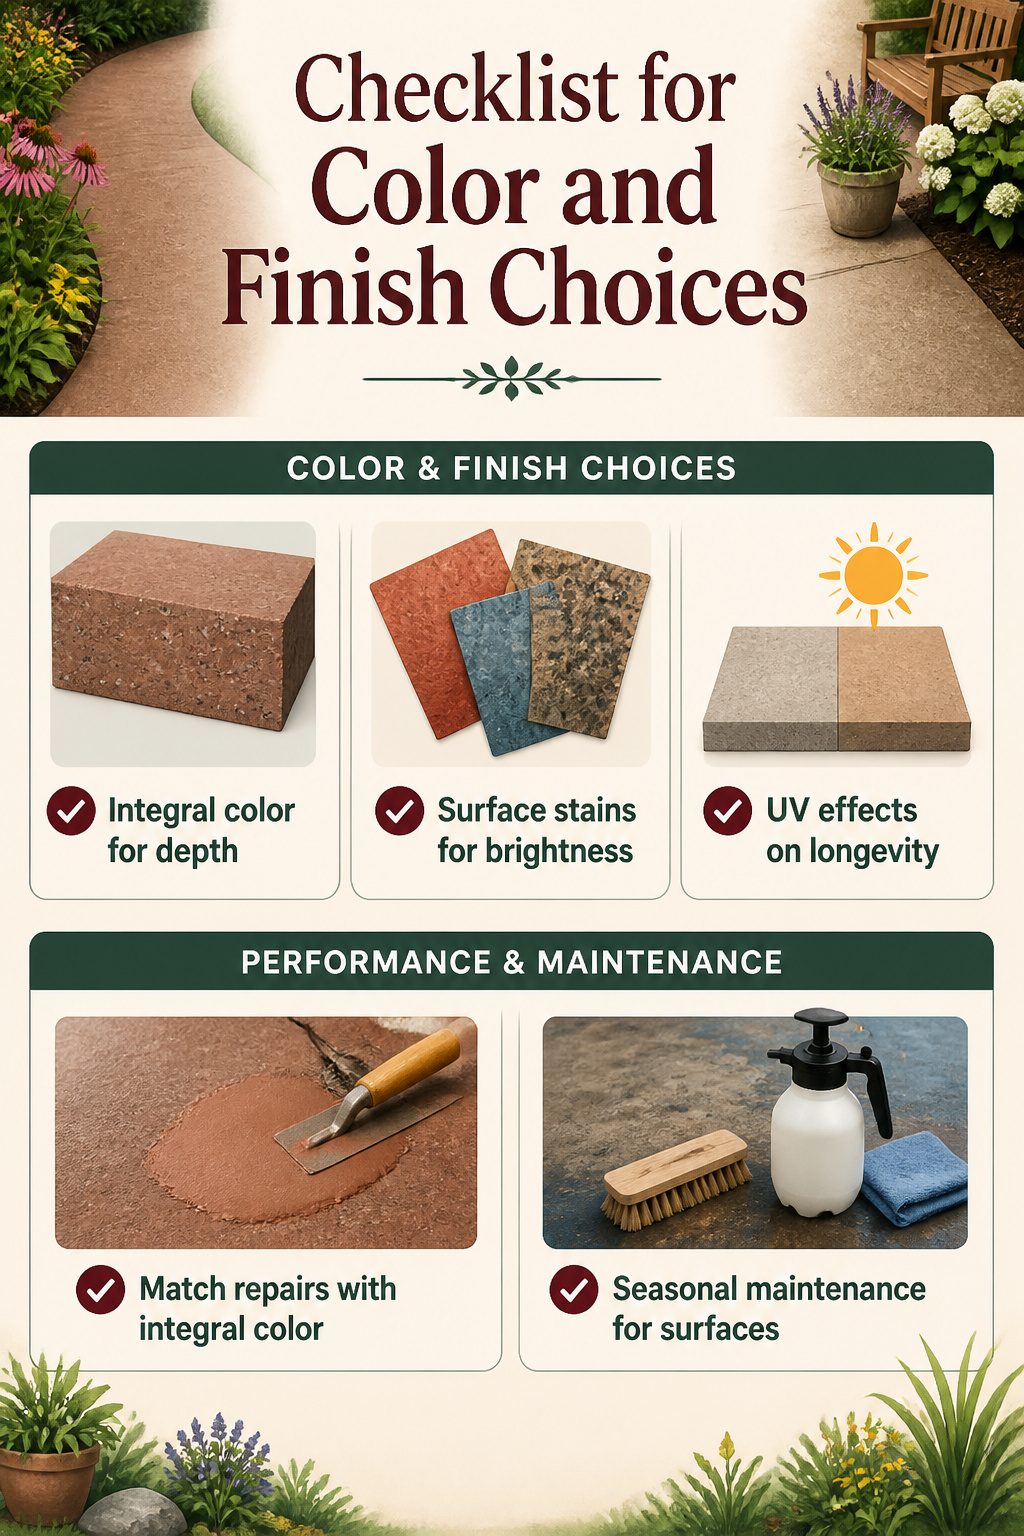
Integral color gets mixed into the batch before the pour. That color runs the full depth of the slab, so scrapes and chips show the same tone underneath rather than gray concrete. It costs more upfront than plain gray, but matching repair patches becomes simple because any new pour from the same mix will read as identical in daylight.
Surface-applied stains and dyes sit on top or penetrate a thin skin of the surface. They open up brighter reds, blues, and mottled patterns that integral color rarely achieves. The tradeoff comes with wear; heavy foot traffic or a dragged garden cart wears through that colored layer, and the repair means reapplying the treatment across a whole section, not just touching a spot.
Sun exposure separates them further. Integral color fades slowly and evenly. Acid-based stains hold up longest against UV, while water-based dyes and acrylic tints can shift noticeably within two or three seasons on a south-facing path. A shaded side yard or heavily trellised route handles dyes well enough; a front walk catching full afternoon sun wants integral color or a quality acid stain if the palette allows it.
My own call runs toward integral for hard-working paths that carry the wheelbarrow and take the weather straight on. Stain earns its place on a showpiece route or a landing pad where the color itself is the design point and the traffic stays light.
Frequently Asked Questions
What are some modern concrete walkway ideas?
Geometric designs like hexagons and chevrons, stamped concrete that mimics wood or stone, and illuminated pathways with LED strip channels or solar bricks are all modern options. Stamped concrete gives upscale material looks at lower cost, while geometric pavers at 9,500 PSI compression handle real use. LED channels cast into edges during the pour wash light sideways across the surface without blinding walkers.
How do I maintain my concrete walkway?
Wait a full week before moving wheelbarrows across a new pour, and let it cure 28 days for rated strength. Reseal stamped or colored surfaces every few years, pressure wash at a low angle on exposed aggregate, and vacuum or pressure-wash permeable options seasonally to prevent clogging. Control joints spaced at the slab depth in feet, converted to inches, prevent unplanned cracking.
What are the benefits of concrete walkways?
Concrete walkways run about $5.50–$14 per square foot, cheaper upfront than natural stone or brick, and last 30 years with proper base and curing. The 8,000–9,500 PSI compression rating of pavers matches standard walkway durability, while repair of individual paver units beats replacing entire monolithic slabs. Customization options range from integral color through the full depth to surface stains and embedded lighting.