Home birthday decoration ideas span from five-dollar crepe paper to custom acrylic toppers, and the only reliable way to choose is matching the effort to how long the party actually runs.
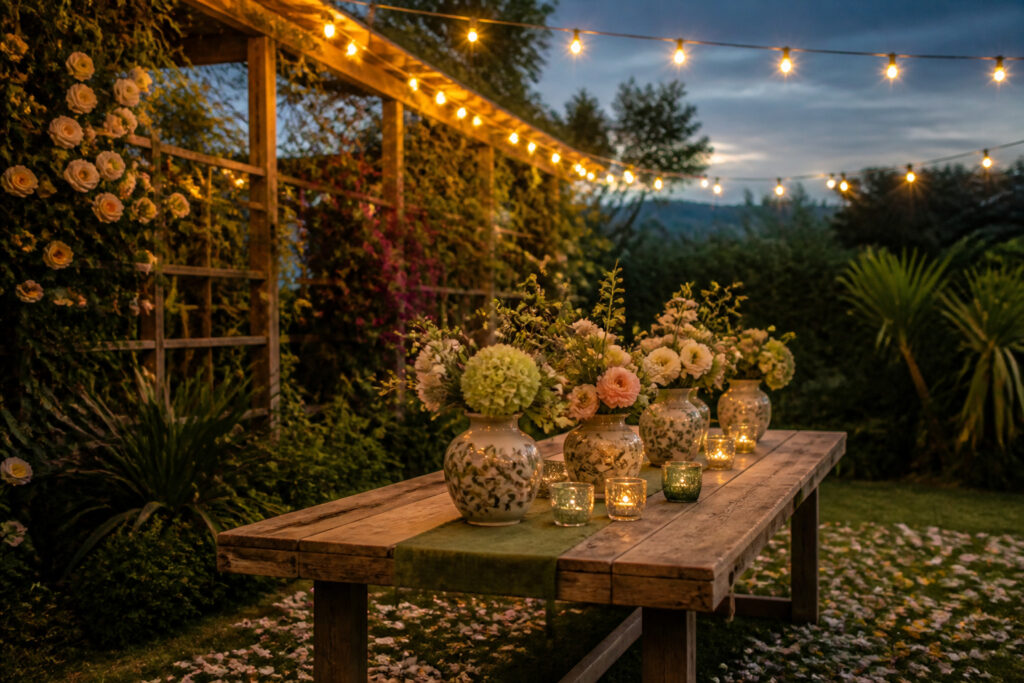
Battery fairy lights dim after two hours; plug-in strands do not, which matters once cake stretches past dusk and someone relights the candles.
A balloon arch eats 100–120 balloons whether you build it over a door or tape clusters flat to the wall, and the difference is whether guests pause for photos or walk right past.
1. Balloon Arch
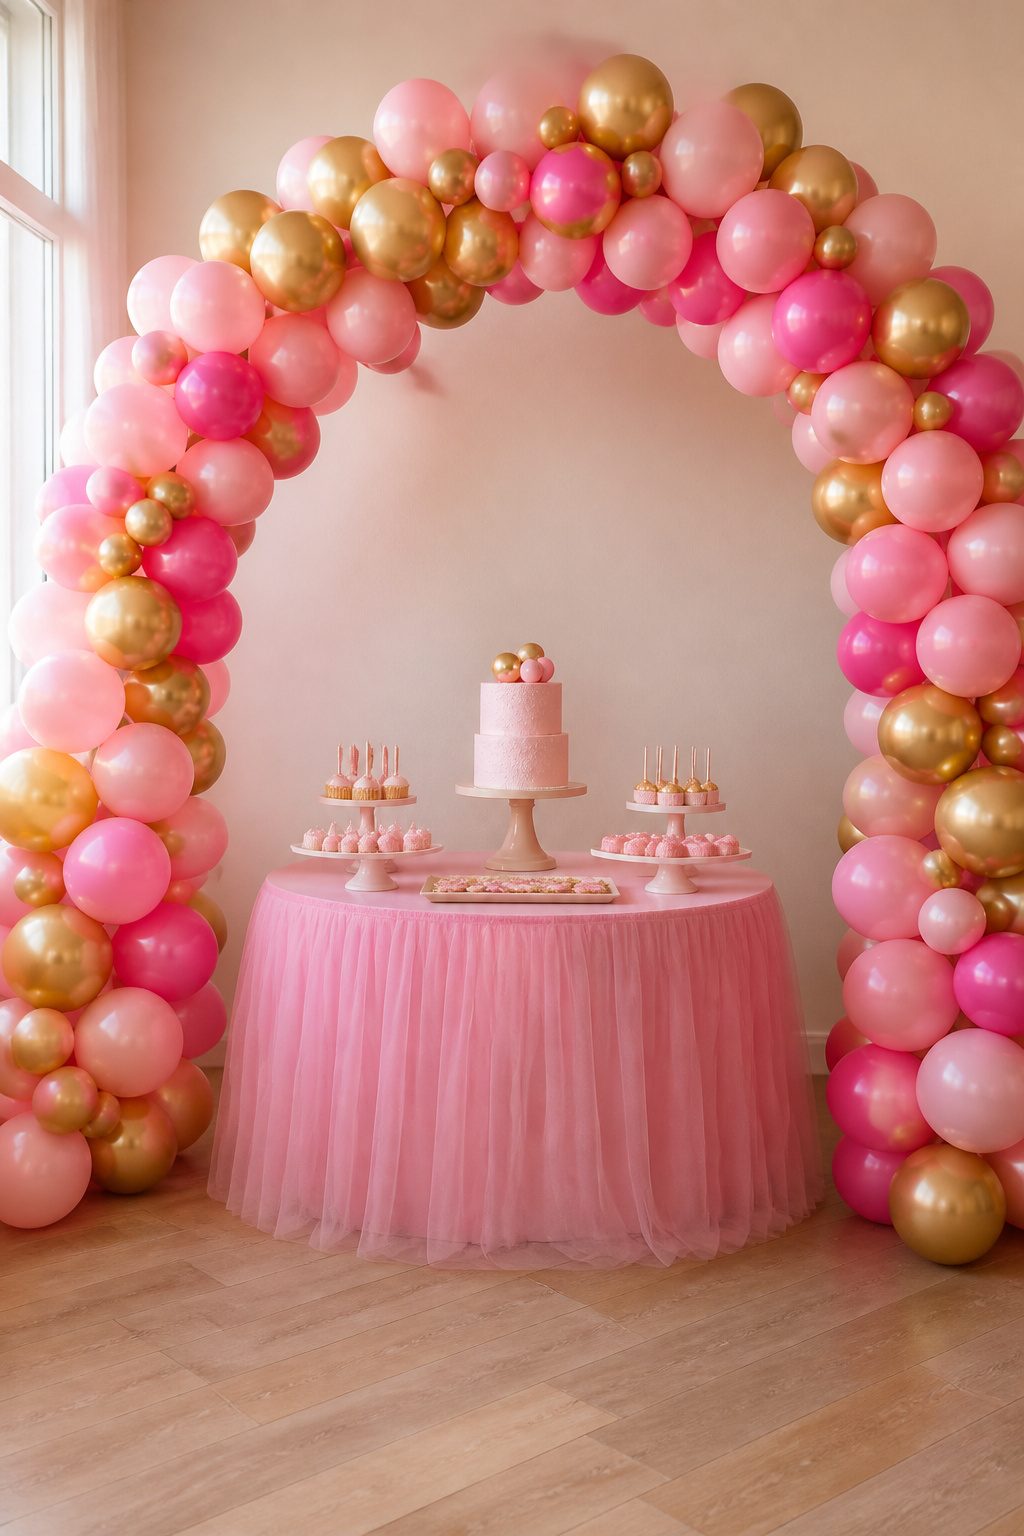
A balloon arch does the heavy lifting for party guests before anyone says hello. Built over a front door or behind the cake table, it frames every photo with height and color that flat wall decorations never quite match.
The latex ones in 11–12 inch size hold their shape through the evening without the thin, risky look of smaller sizes.
A standard arch for a single doorway takes roughly 100–120 balloons, which sounds like a lot until you see the full curve it produces.
Clusters of five, tied and looped onto a strip of fishing line or a ready-made arch strip, build faster than individual placement and hide gaps when some balloons deflate slightly.
I have watched hosts skip the arch frame entirely and tape clusters to the wall in an arch shape, which saves money but loses the depth that makes guests pause for photos.
2. Personalized Birthday Banner
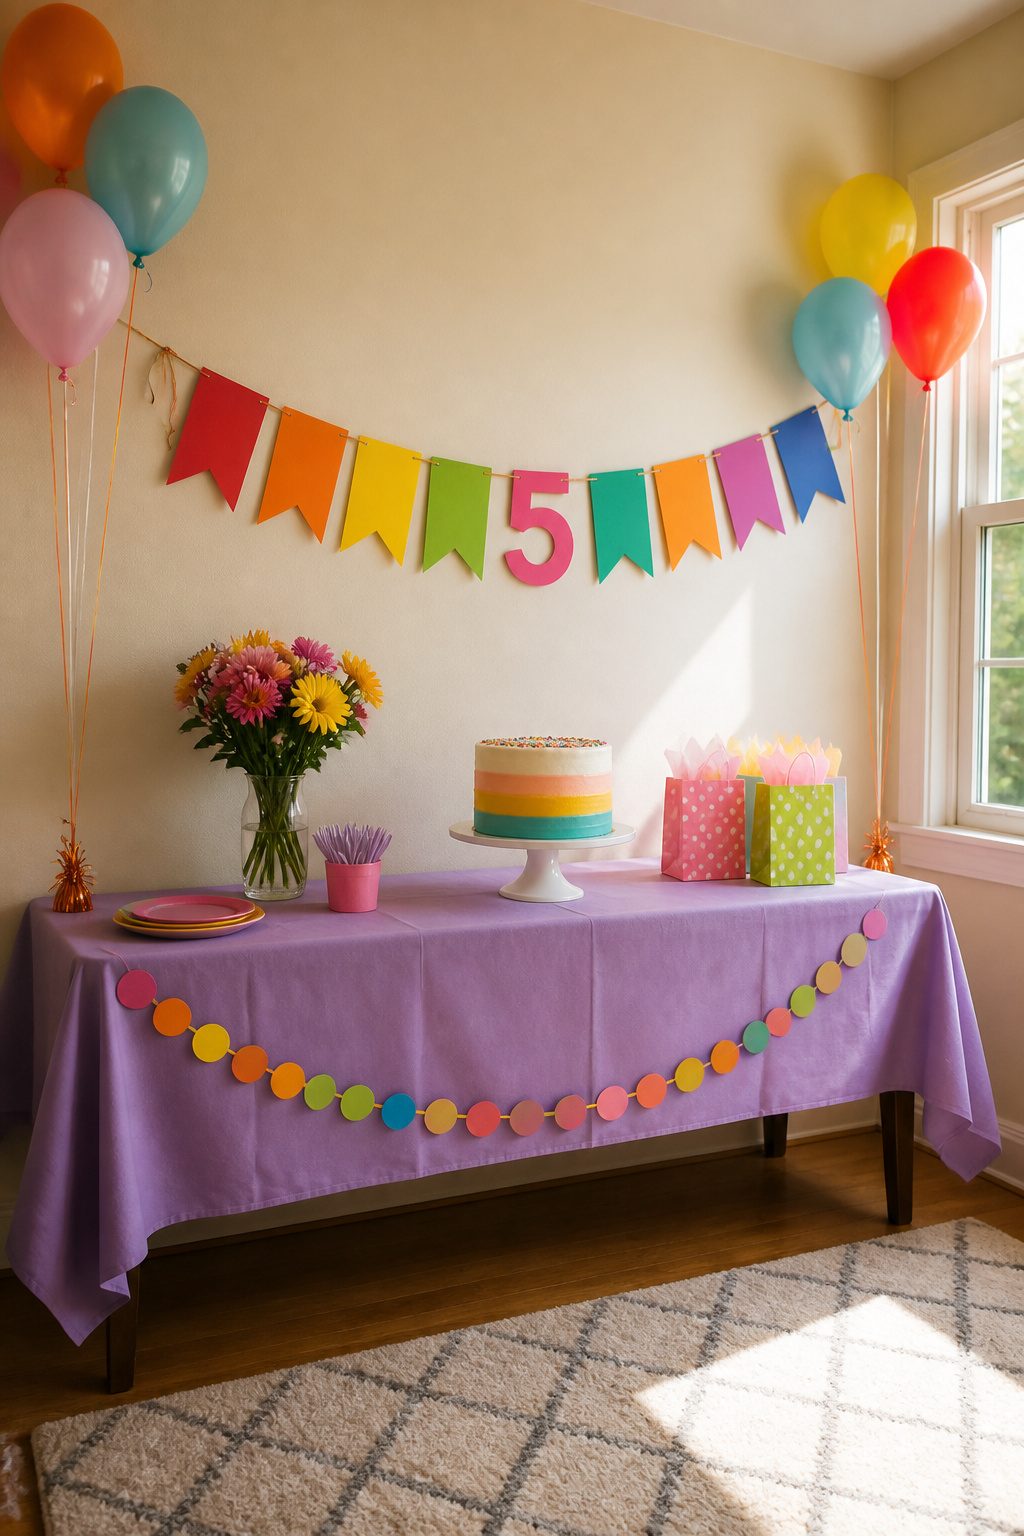
Colorful cardstock or fabric and a pair of scissors are enough for a banner that names the birthday person and their age, and it still does more to set the tone than almost anything else you unpack that day.
The letters can be cut freehand or traced from a cereal box template, strung with kitchen twine, and hung across the wall behind the cake table or over a fireplace.
Sources describe this as one of the simplest DIY projects for home parties, which matches my own sense of it: the whole build takes under an hour once the template is done, and the finished piece reads as intentional rather than last-minute.
If the cardstock is light, a dab of glue at each corner keeps the letters from spinning on the string; heavier fabric needs only a folded channel at the top. Either way, the person walking in sees their name first.
That is the whole point.
3. DIY Photo Booth
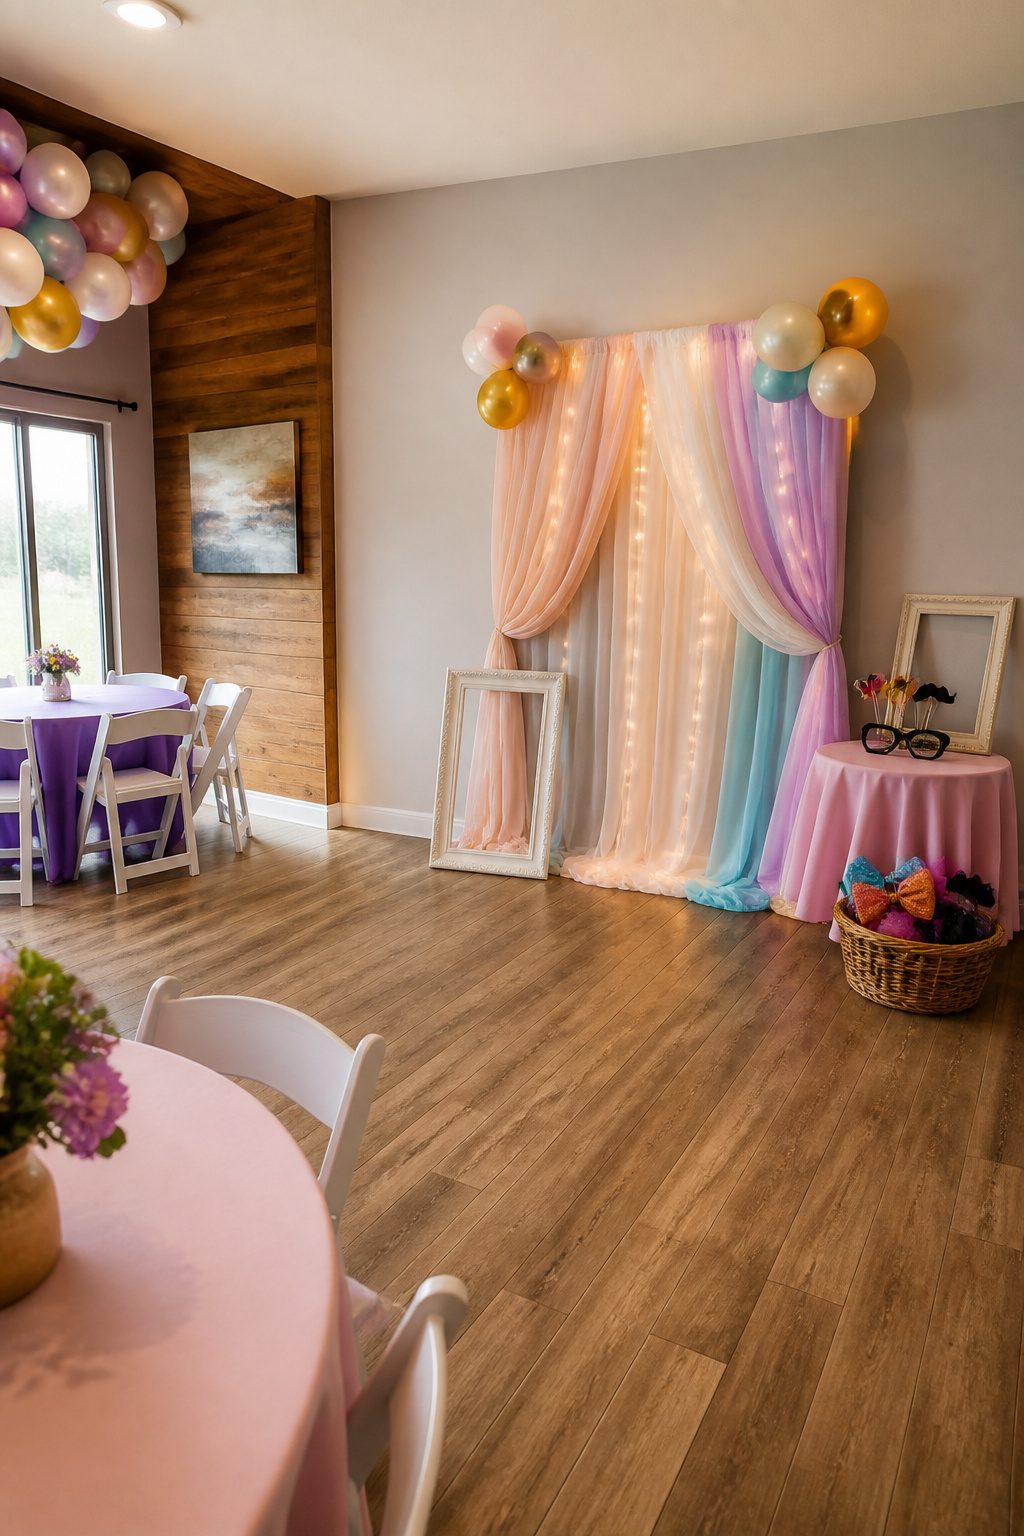
A curtain rod stretched across a corner or a pair of large thrifted frames pinned with colorful fabric builds a booth in about ten minutes.
Dollar-store sunglasses, paper mustaches cut from printed sheets, and plastic crowns give guests something to do with their hands besides hold a drink.
The same props that felt cheesy at 7:00 PM are what people reach for after cake, when the light softens and someone digs out a phone to record it.
Keep a basket of clip-on bow ties and speech-bubble signs by the camera so no one has to ask where things are.
An instant camera changes the stakes: guests walk away with a print, and the host gets a stack of actual photos afterward, not just a camera roll everyone forgets to airdrop.
The backdrop and props cost maybe $15 if you already own a bedsheet worth using, and the whole station earns its floor space by keeping people busy and producing the one souvenir that outlasts the balloons.
4. Fairy Lights
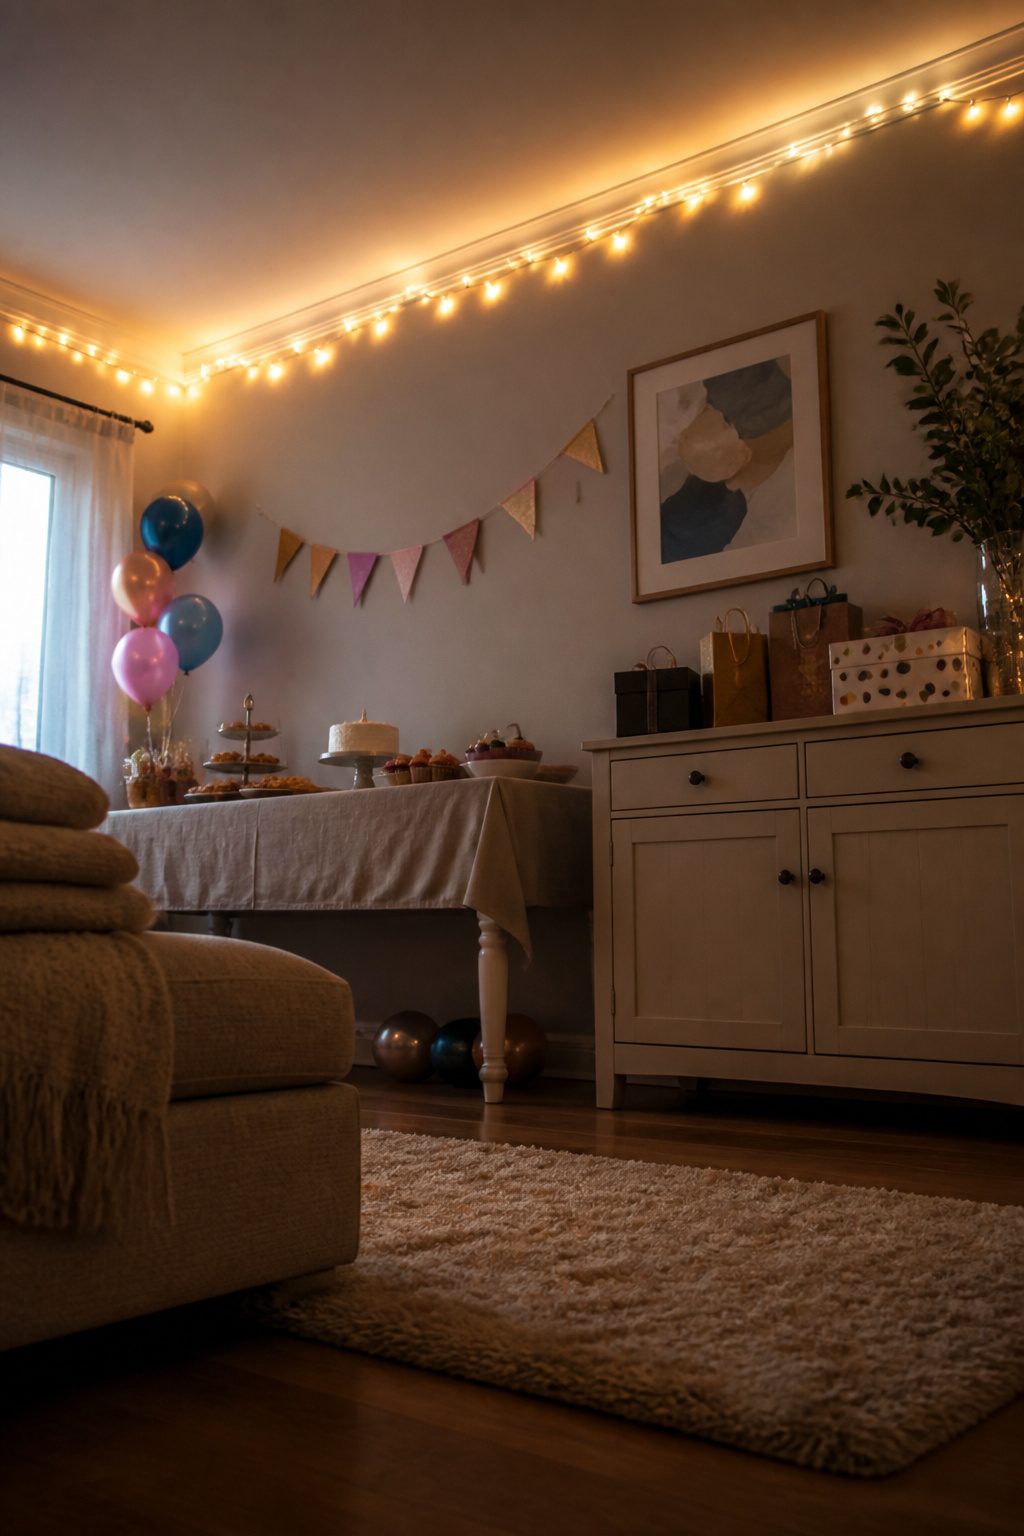
Warm white LEDs on copper wire drape better than any other strand type, because the wire bends without fighting back and the tiny bulbs sit close together.
I ran them along the top of my living room wall last year, tucking the wire behind crown molding where the white paint swallowed it entirely after dusk.
Copper wire also knits neatly through ceiling hooks if you want a loose canopy overhead, though the weight of glass bulbs on stiff cord would sag and show.
Plug-in strands win for any party running past three hours, which most birthdays do once guests arrive, dinner stretches, and someone decides cake needs candles again.
Battery packs dim visibly after the second hour, and swapping them mid-party means finding the pack, darkening that section, and restarting. The plug stays constant.
If your outlet sits in the wrong place, a small cord cover the same color as your baseboard disappears against the wall and costs less than the premium markup on a battery set long enough to matter.
5. Themed Table Settings
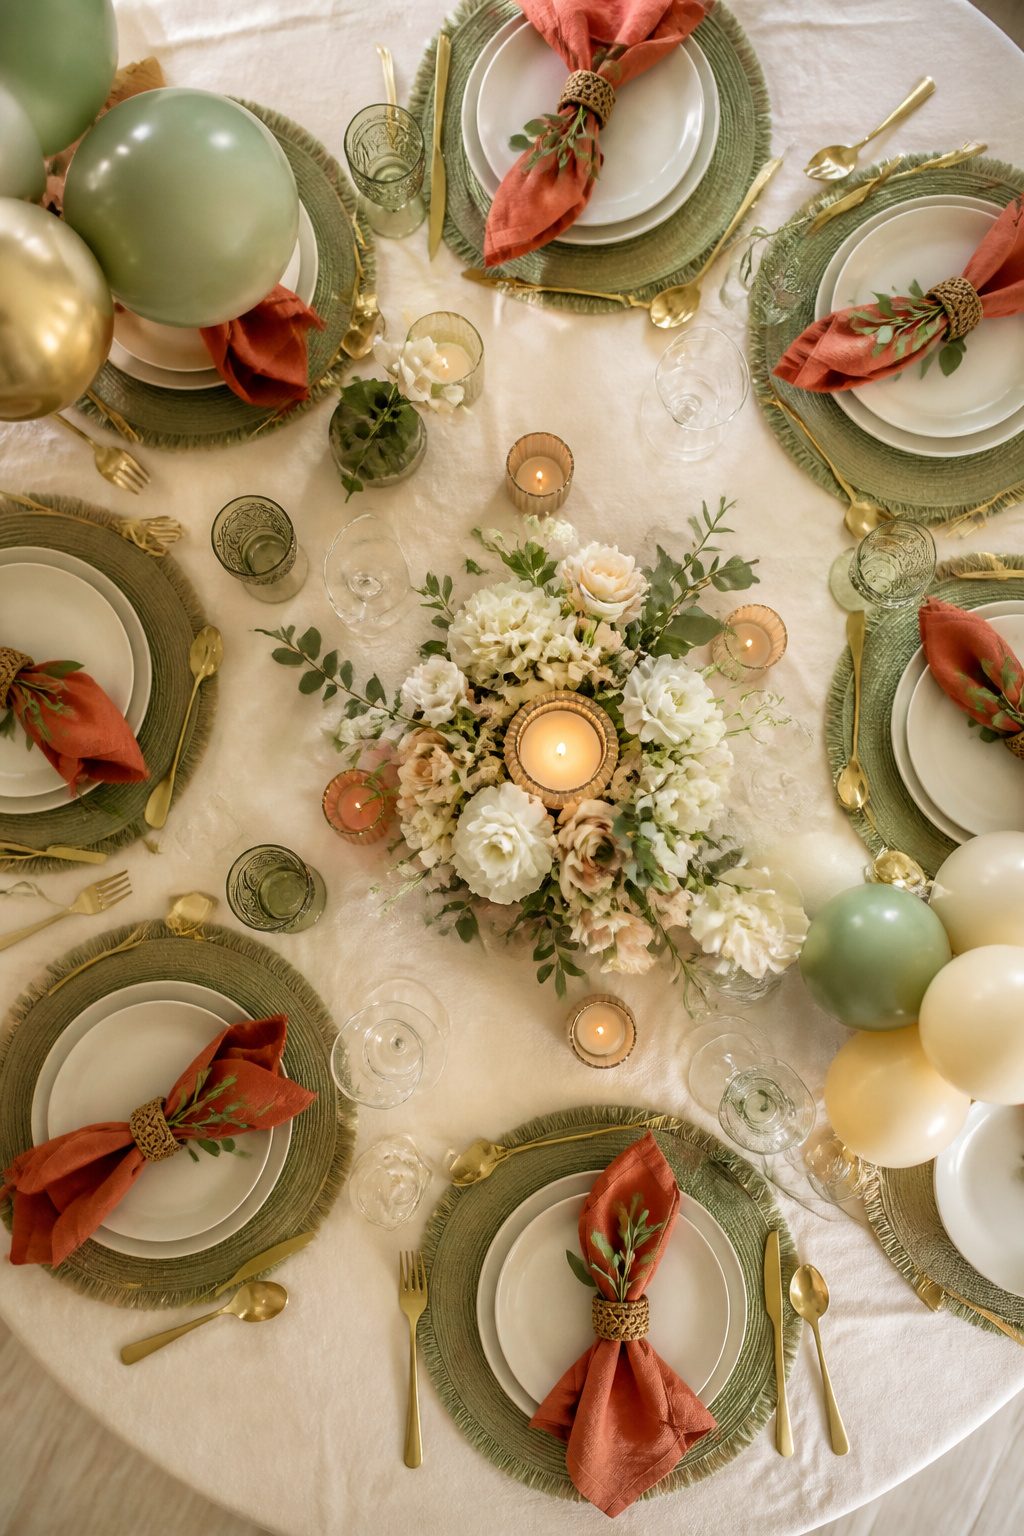
Tablecloths and placemats either pull a party together or make it look like you grabbed whatever was left on the shelf.
After a few birthdays where the colors fought each other, I settled on a rule that still holds: pick two colors and one metallic. Sage and cream with gold, navy and blush with copper.
The metallic does the work of making paper plates feel intentional rather than desperate.
Napkins are where most of us overbuy. A single stack in your secondary color, folded simply at each place, reads cleaner than scattered confetti or printed patterns that compete with the cake.
For my daughter’s last party, I used solid terracotta napkins against a cream cloth and let the copper flatware carry the warmth. No pattern on pattern, no guest wondering what theme they had wandered into.
The shops that sell party paper goods usually group by palette now, which saves the guesswork. Buy the table cover and napkins from the same line, or the whites will clash in ways you notice only after the guests arrive.
6. Hanging Paper Lanterns
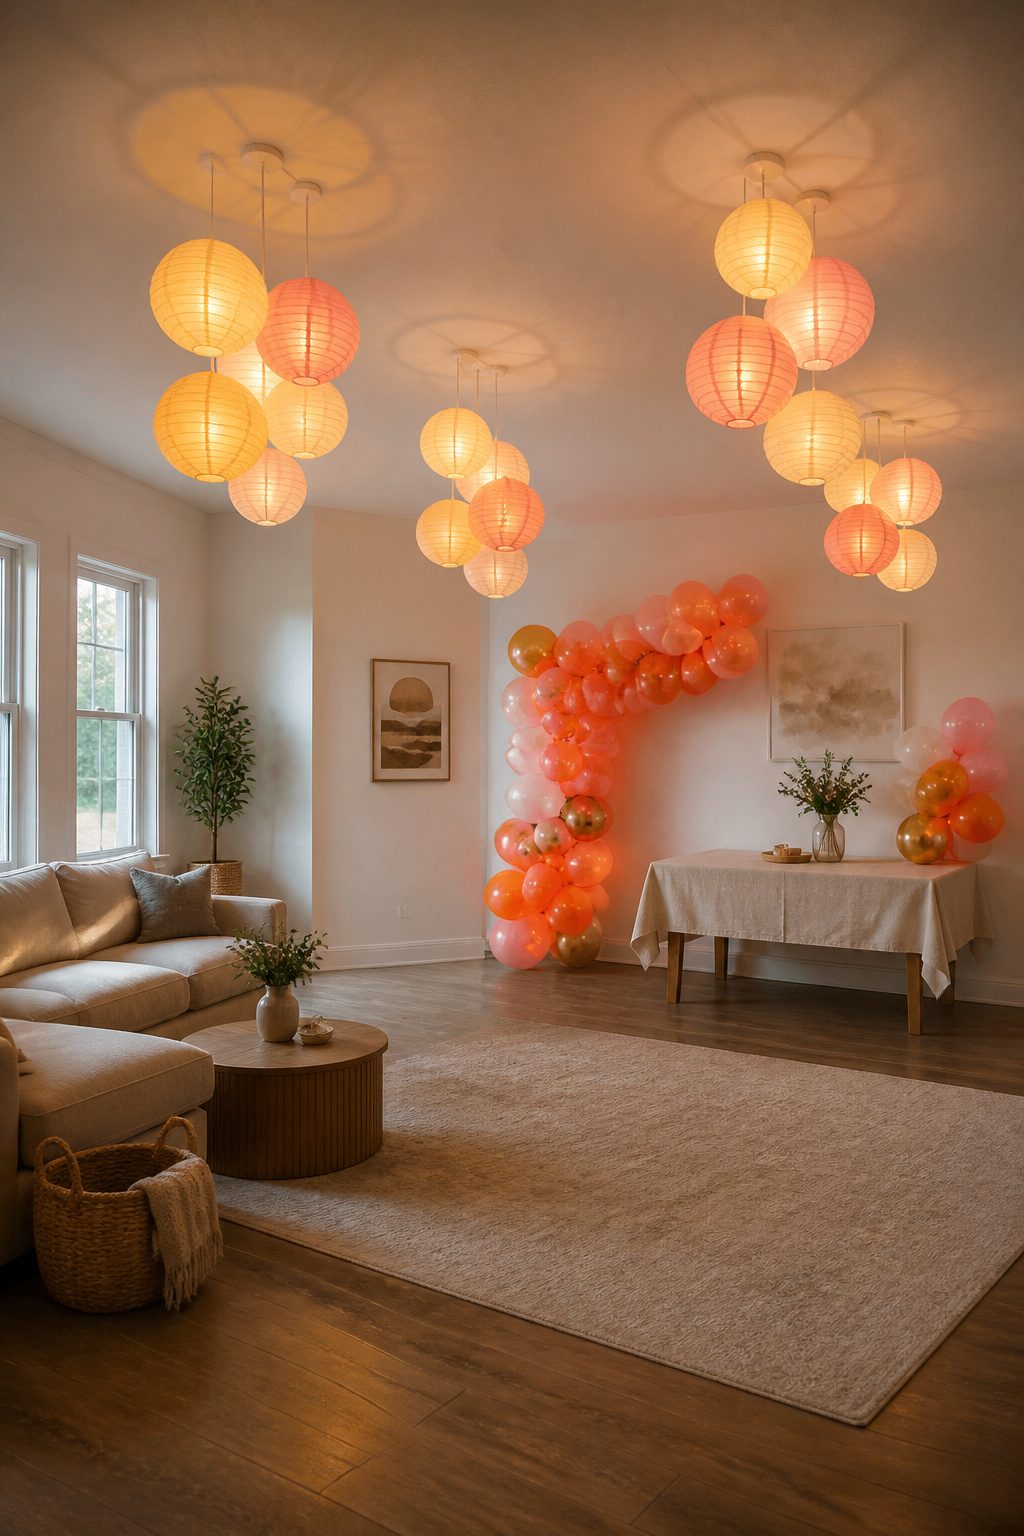
Transparent fishing line works better than ribbon if you want the lanterns to look like they are floating on their own.
I have tried both, and ribbon catches the light in a way that draws the eye to the string instead of the shape. The line disappears unless someone is standing almost underneath.
An 8-inch lantern fits the scale of a standard 8-foot ceiling without crowding the room. Hang them in odd-numbered clusters, three or five, spaced about a foot apart so they read as one unit rather than a scattered afterthought.
For anything over 9 feet, move up to 12-inch lanterns or the proportions start to feel mean, like you ran out of money halfway through the job.
The bigger diameter also carries farther across a larger room, which matters if you are trying to anchor a corner or define a dining area in an open space.
Battery-operated LED lights inside are worth the small extra step; the paper glows instead of just sitting there, and the effect holds after the daylight fades.
Vary the lengths of the lines by a few inches so the cluster moves in air currents and does not freeze into a rigid formation.
7. Dessert Table Display
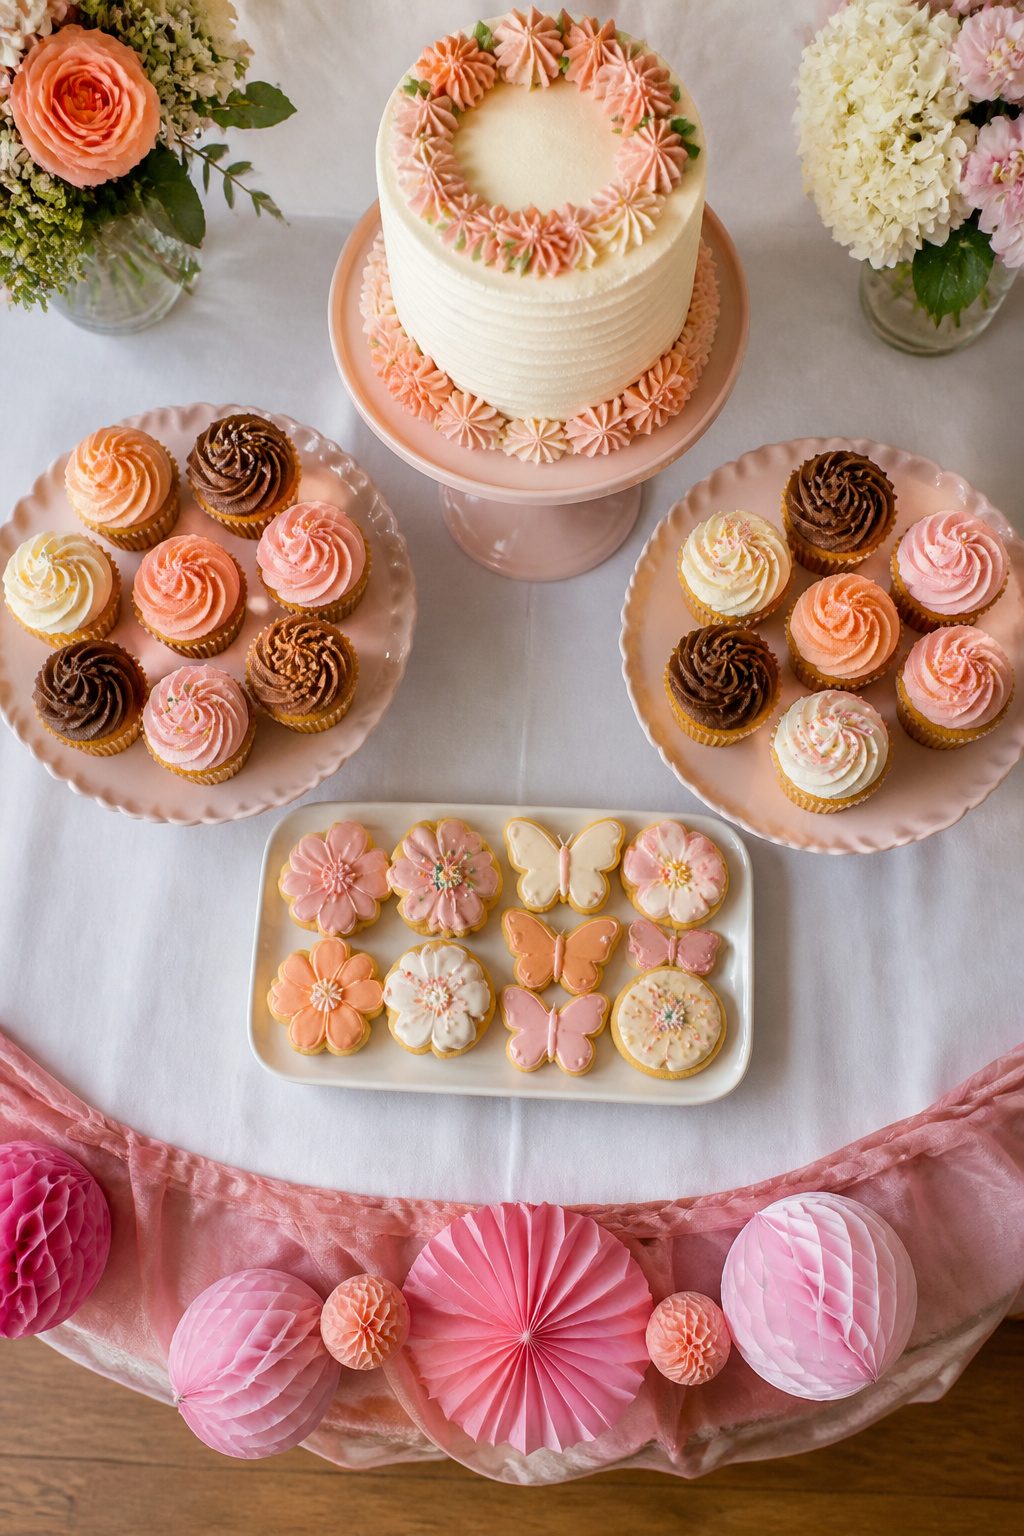
Tiered trays and cake stands turn a spread of cupcakes and cookies into something a guest actually pauses to look at.
The trick is varying the heights so the eye keeps moving: one tall cake stand, two medium, and a flat platter at the front.
Without that flat piece down low, the back of the table disappears visually and the whole arrangement feels like a wall of dessert instead of a display you can read from a distance.
I learned this the hard way at a party where everything sat at roughly the same level and guests ended up walking past without noticing half the treats.
Themed decorations or a personalized birthday sign pulled forward on that lowest tier also help anchor the scene without blocking what’s behind it.
If you are short on cake stands, a sturdy inverted bowl with a plate on top works fine for the medium height; the tall one is worth owning since it carries the visual weight.
8. Streamers
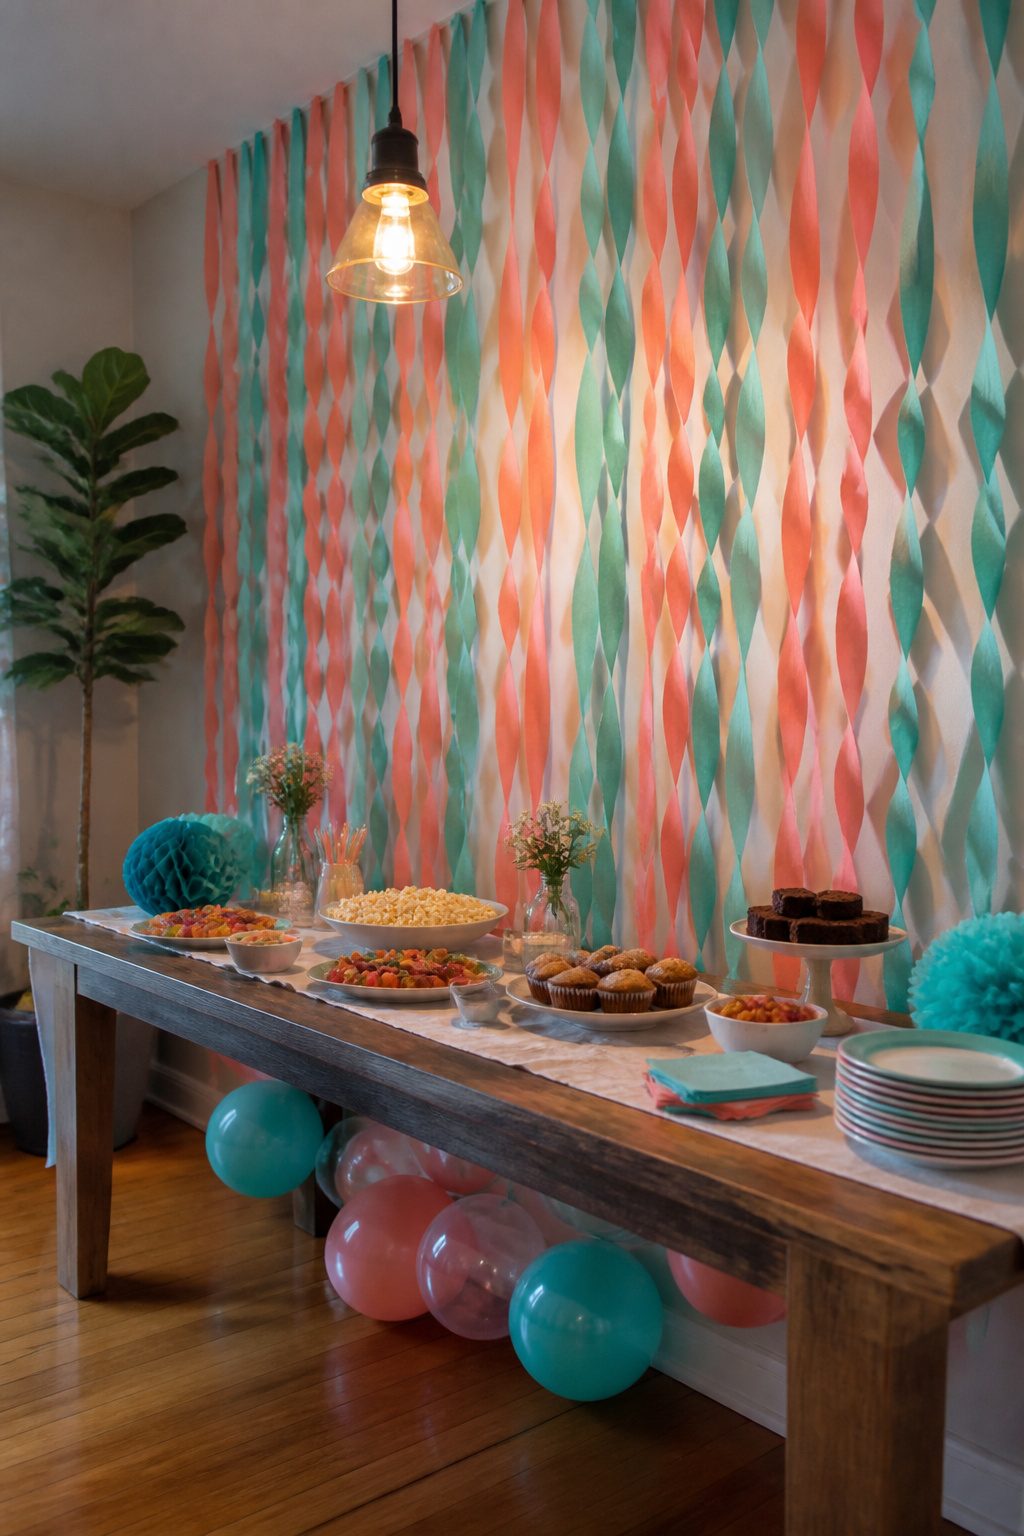
Crepe paper streamers still do the most work for the least money of any decoration I know.
A single roll runs about a dollar at party stores or the seasonal aisle at Walmart, and the trick that makes them look like something is the twist: cut a strip to whatever length fits your wall, tape one end flat, give the paper one full twist in the middle, then tape the other end so it pulls slightly taut.
The loop catches light differently than flat paper, and the whole wall shimmers when someone walks past.
I set them up behind the food table last year for a friend’s thirtieth, alternating two colors in vertical columns from ceiling edge to table level.
The overhead fixture put a stripe of shadow inside each twist that looked almost like fringe.
Up close you can see the tape, which is why I keep the bottom ends level with the table surface; from party distance, the wall reads as woven color, and the birthday person gets a backdrop that actually photographs with some life in it rather than sitting like painted cardboard.
9. Customized Cake Toppers
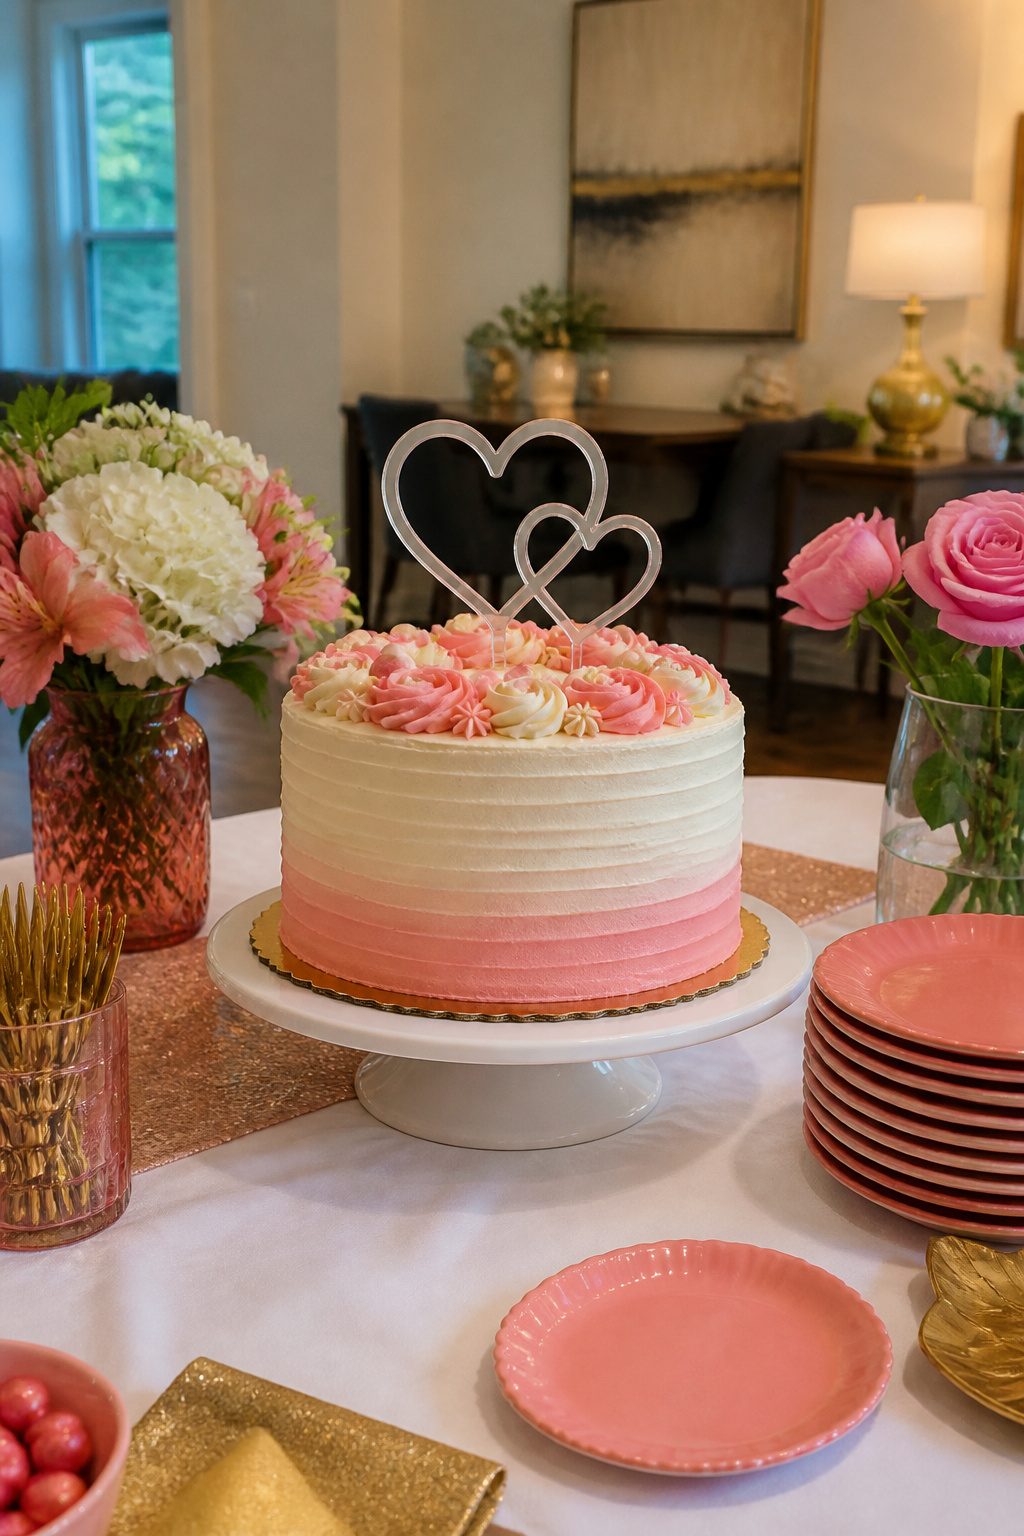
Acrylic holds up against humidity in a summer kitchen, wood warms up a rustic table, and glitter cardstock catches low light without costing much. The material shapes what the topper can do, not just how it looks.
Cardstock is the only one you can cut and rewrite if you misspell a name mid-afternoon; a slip with acrylic or wood means reordering and waiting.
A topper should stand 4–6 inches tall. That height reads clearly in photos without dwarfing the cake itself.
Much shorter and it disappears behind candles or flowers. Much taller and the proportion starts to look off in candids where the cake is supposed to anchor the shot.
I leaned toward acrylic for my sister’s thirtieth because it wipes clean if frosting smears the base, but I kept a cardstock backup on hand. The wood option I skipped only because her theme ran modern, not farmhouse.
Match the material to the party’s existing textures, then check the height before you commit.
10. Confetti Balloons
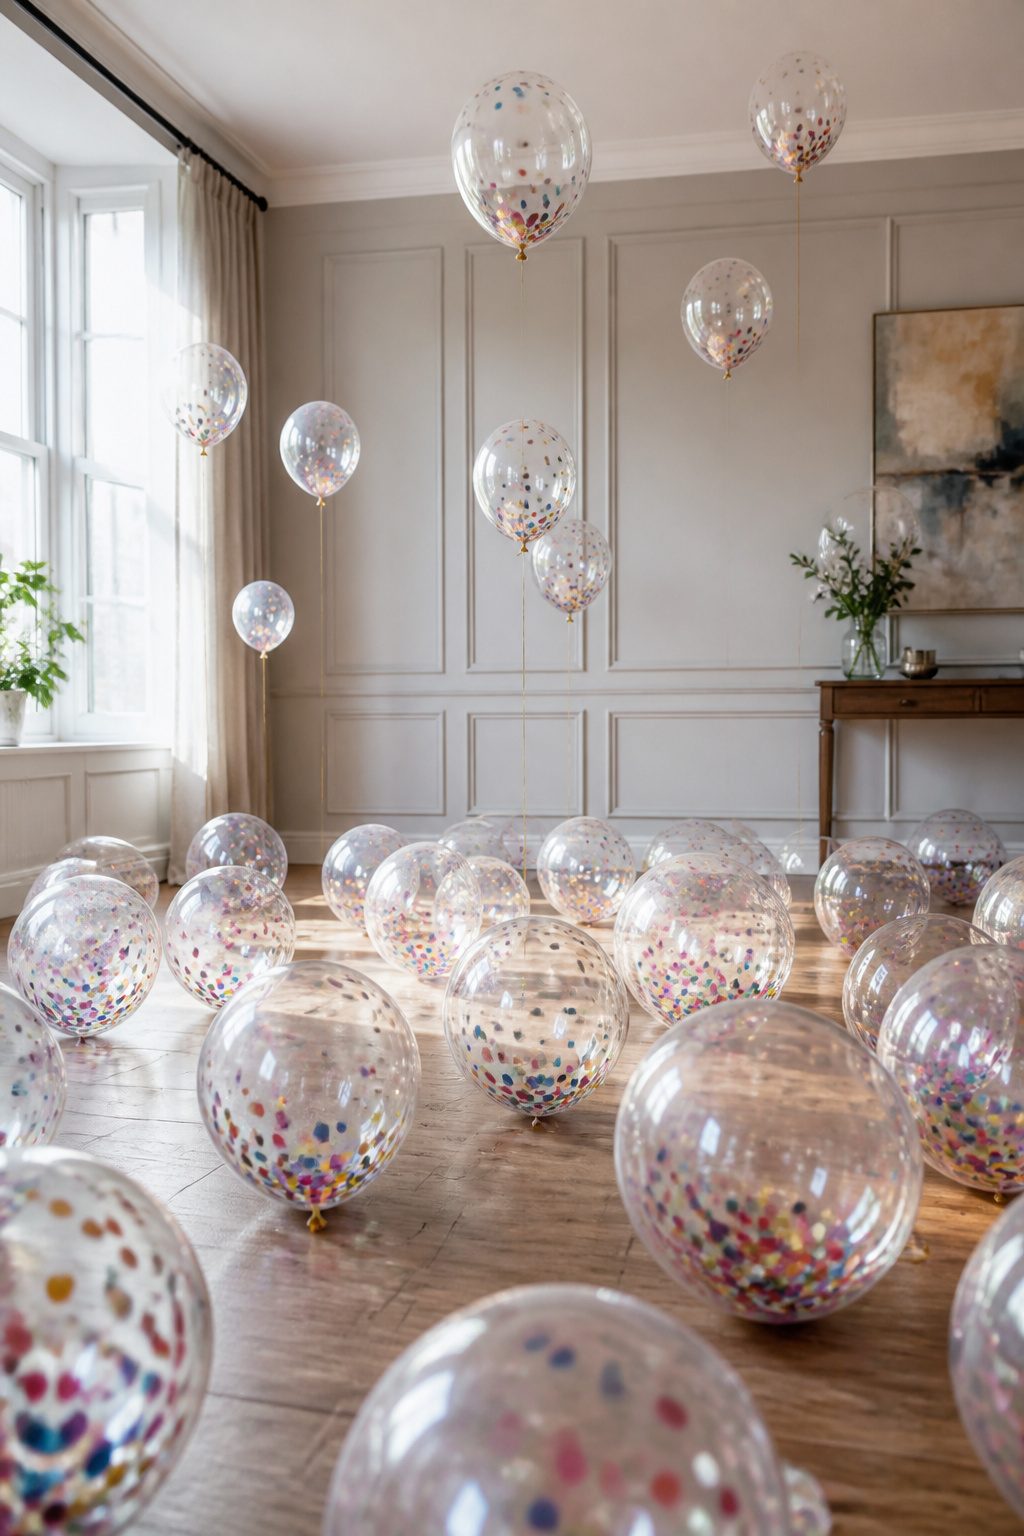
Clear latex balloons filled with confetti read as ordinary from far away and only show their color up close, which makes them more interesting to walk through than to look at from a doorway.
Rub the inflated balloon against wool or your own hair so static pulls the confetti onto the sides instead of letting it pool at the bottom where no one sees it.
A paper funnel helps get the confetti in dry; damp pieces stick to themselves and clump. The sources disagree on timing: one says funnel after inflation, the other stuffs confetti before the balloon takes air.
Both work, though pre-filling risks blowing confetti out the neck if you inflate too fast. Scatter them loose across the floor or cluster three at different heights where people will bump them.
11. DIY Party Hats
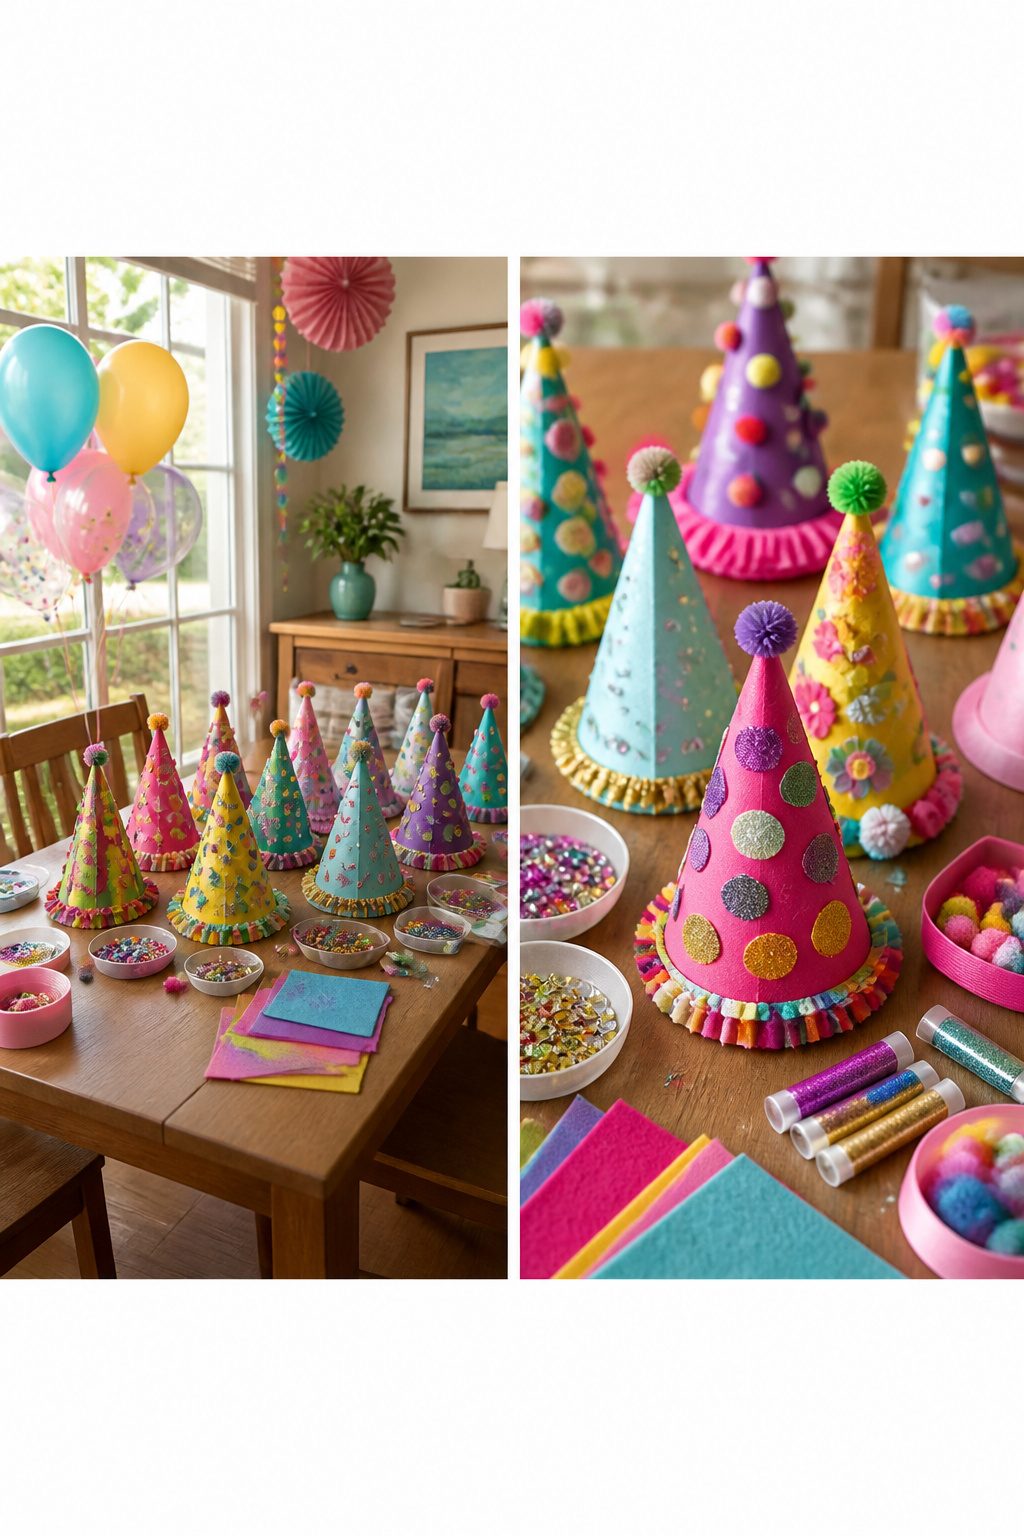
Colorful cardstock, glitter, ribbons, and whatever else catches your eye at the craft store are enough to get started. The real problem is the cone shape.
Most templates fit a child’s head and leave adults looking like they are wearing a novelty thimble.
A cereal box template solves this; the cardboard is already the right weight, and the back panel is wide enough to trace a cone that actually clears an adult skull.
Cut the shape, roll it into a cone, and secure it with hot glue or a strip of masking tape inside where it will not show. From there, embellishment is the easy part.
Glitter catches light across a room, and a ribbon chin strap keeps the hat on through an evening of leaning in to talk. Stickers and small pom-poms work too.
The point is to make the activity part of the party itself. Set supplies out on a table and let guests decorate their own, or finish a batch beforehand as a surprise.
Either way, the hats do more than mark the occasion. They give people something to fiddle with, laugh at, and take home.
12. Floral Arrangements
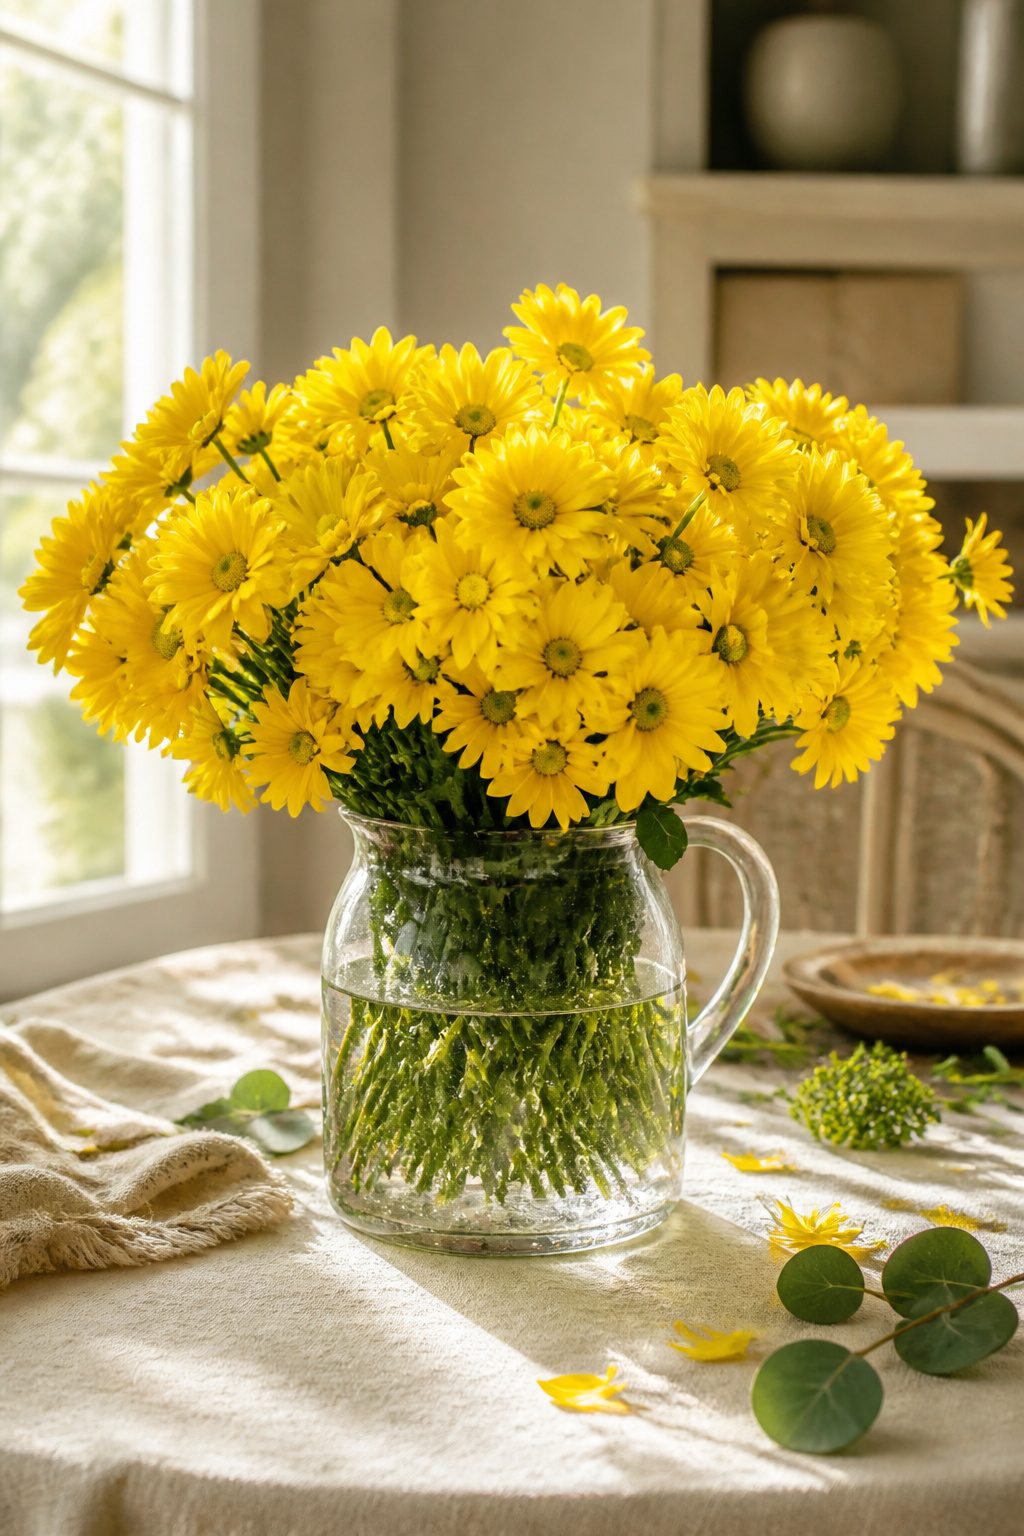
Flowers for a birthday party do not need a florist. The grocery store cooler near the produce section usually carries enough, and the trick is volume over variety.
Three bunches of one flower type, massed in a single vessel, reads as more deliberate than one bunch each of six scattered kinds.
I learned that the hard way at a spring gathering where my mixed bucket looked like an afterthought and my neighbor’s three simple white hydrangea bunches looked like she had planned for weeks.
Match the flower to whatever the party already established. If the napkins and candles are sage and cream, grocery-store chamomile or mini daisies in a low bowl continue that palette without demanding a new color.
For sharper contrast, one saturated tone against a neutral room, enough stems to fill the container to the edge, no foliage showing bare stems unless the jar itself is meant to be rustic.
Mason jars work, but so do the pitchers and tumblers already in the kitchen. A single lush arrangement on the table beats three thin ones competing for space.
Keep it simple, keep it full, and do not overthink the mechanics.
13. Candy Buffet
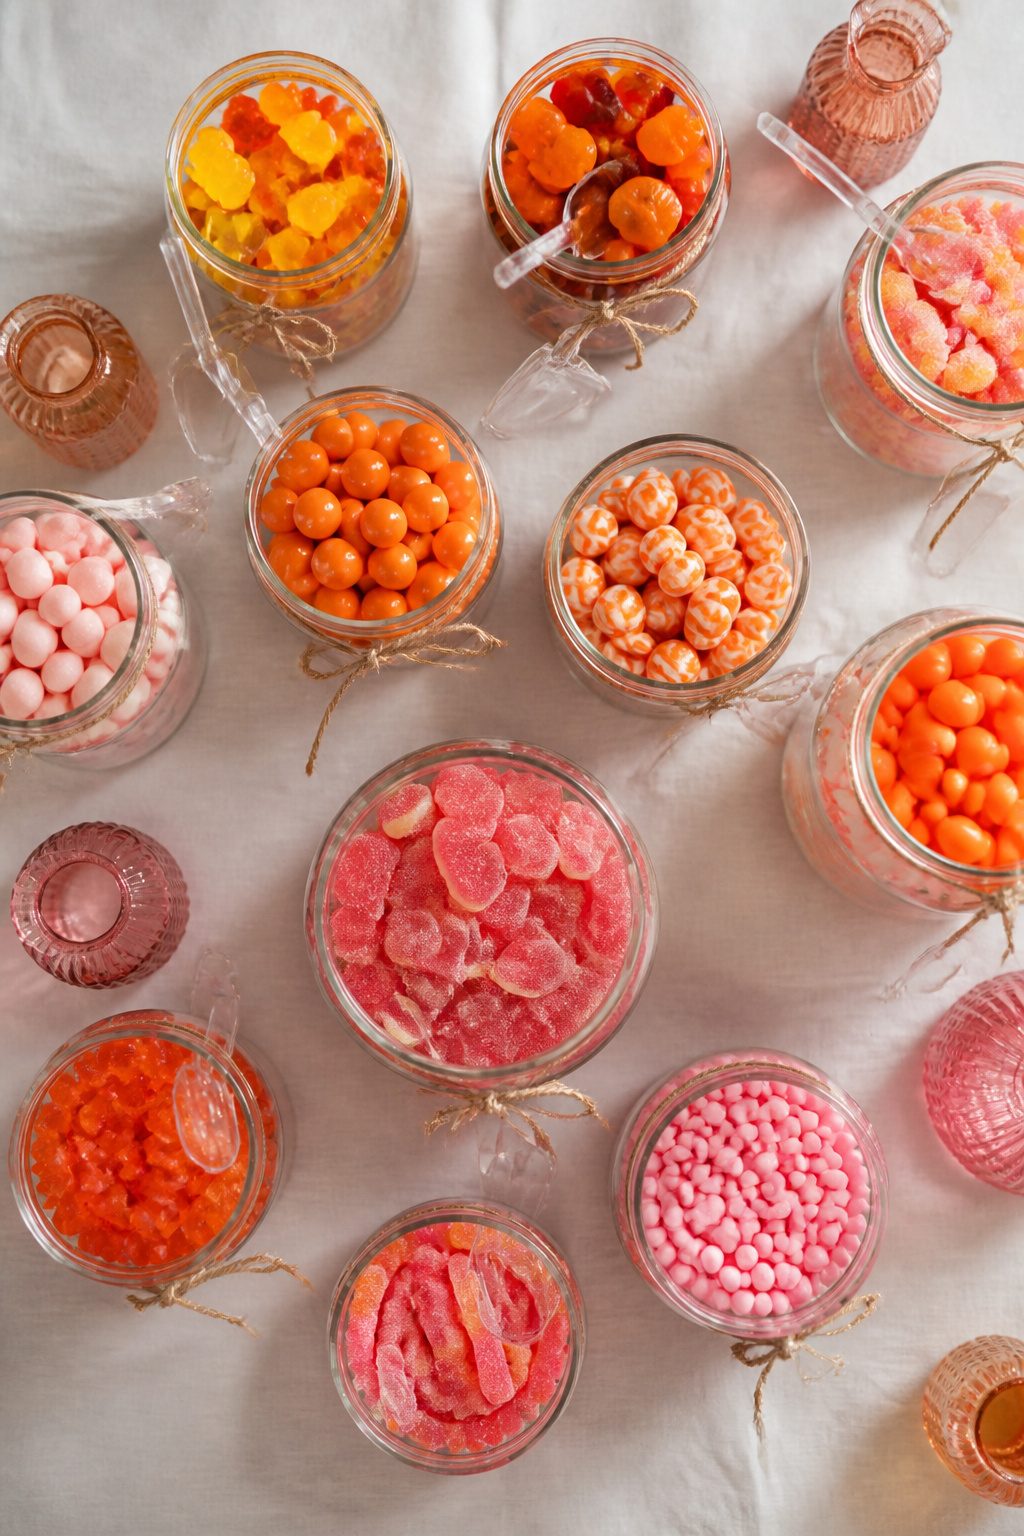
A candy buffet lives or dies by the vessels you put it in.
Glass jars at varying heights do the work of drawing the eye across the table, and the trick costs almost nothing: borrow from your own kitchen, raid thrift store shelves, or use what you already own. Scoops matter too.
Tie one to each jar with ribbon or twine so guests aren’t fishing around, and so the display stays tidy past the first round of visitors.
Color beats brand every time. A wall of mismatched wrappers looks like clutter; candy sorted into two or three chosen hues reads as intentional design.
I learned this the hard way at a niece’s party where the table held every shade under the sun and the result was visual noise, not celebration.
After that, I bought bulk candy by color from the same bin and the transformation was immediate. The specific candy barely registers; guests remember the glow of amber jars against cobalt, or the soft punch of all-pink against white linen.
The scoops are the detail that separates a buffet from a bowl on a counter. Without them, hands go in, lids tilt, and the hygiene question gets awkward fast.
Apothecary jars with their wider mouths handle bulk items, slender cylinders work for narrow candies like licorice straws, and a low bowl for wrapped pieces fills the gap between heights.
If you coordinate the candy color to your tablecloth or banner, the whole table becomes a backdrop guests pose in front of, not just something they graze from.
14. Popcorn Bar
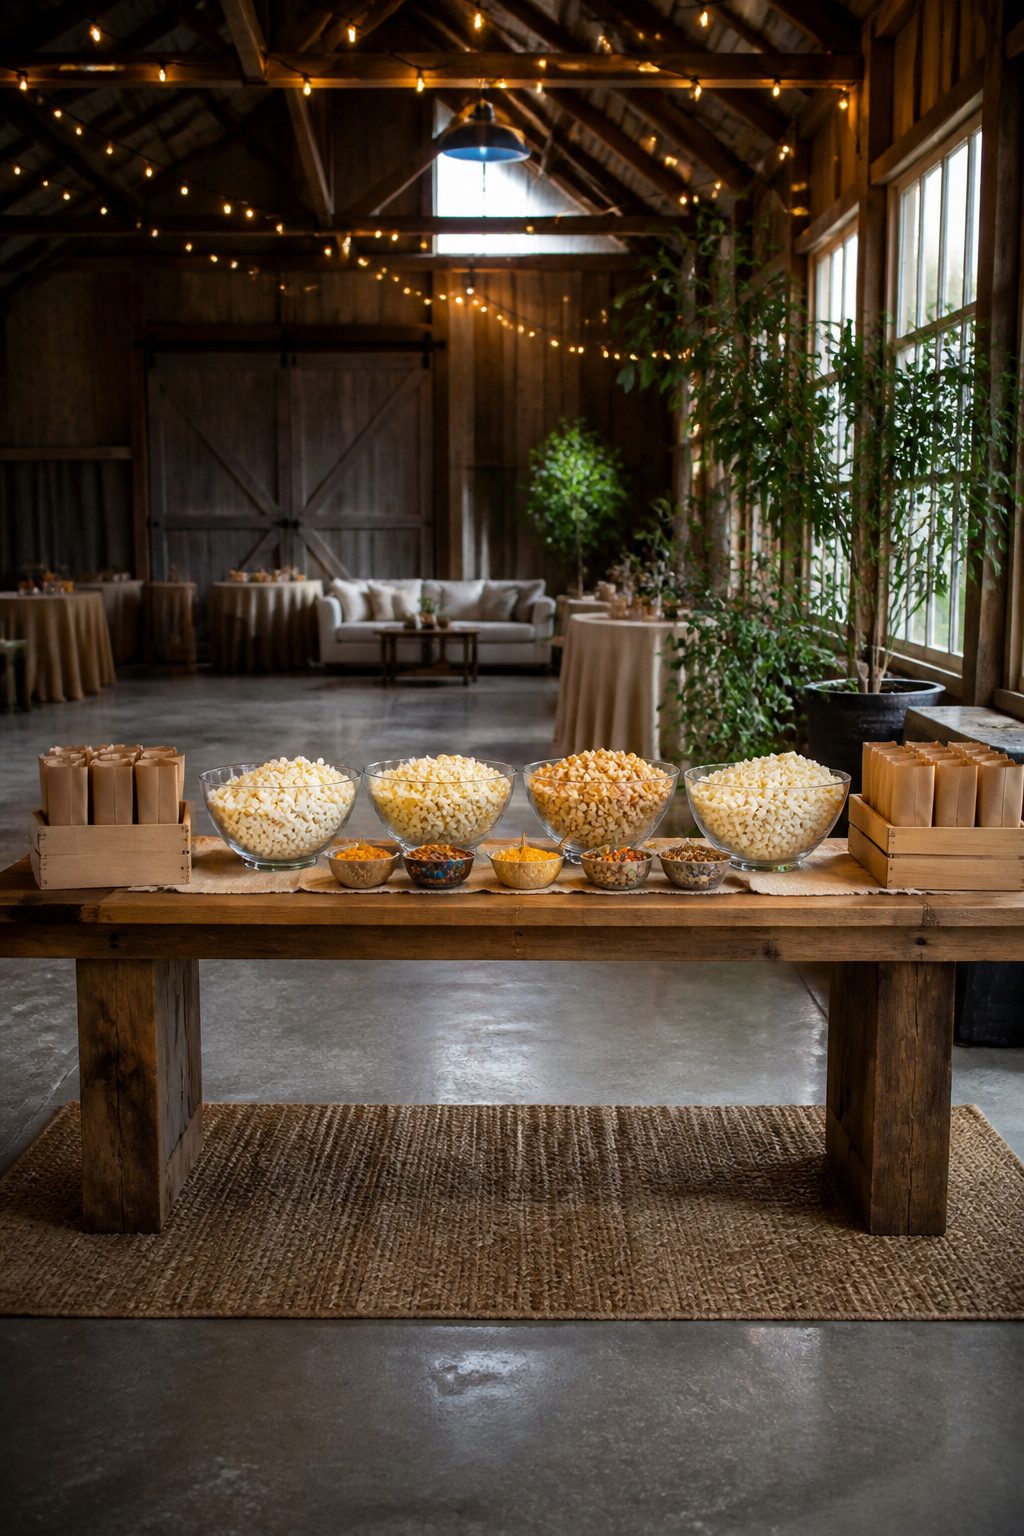
Popcorn works for every age group, and a self-serve bar costs less than most pre-made centerpieces.
I set out plain popcorn in large glass bowls with small dishes of seasonings alongside, from cheddar powder and ranch to cinnamon sugar or dark chocolate shavings. The room fills with a smell better than any candle.
Guests mix their own, which turns the station into something people gather around naturally. Small paper bags or cones keep portions reasonable and clean-up quick.
A popcorn bar fills space, feeds people, and gives them something to do with their hands while they mingle.
Skip the themed signage if you are trying to keep the budget lean: plain white or kraft containers look intentional enough on their own after dark.
15. DIY Pinwheels
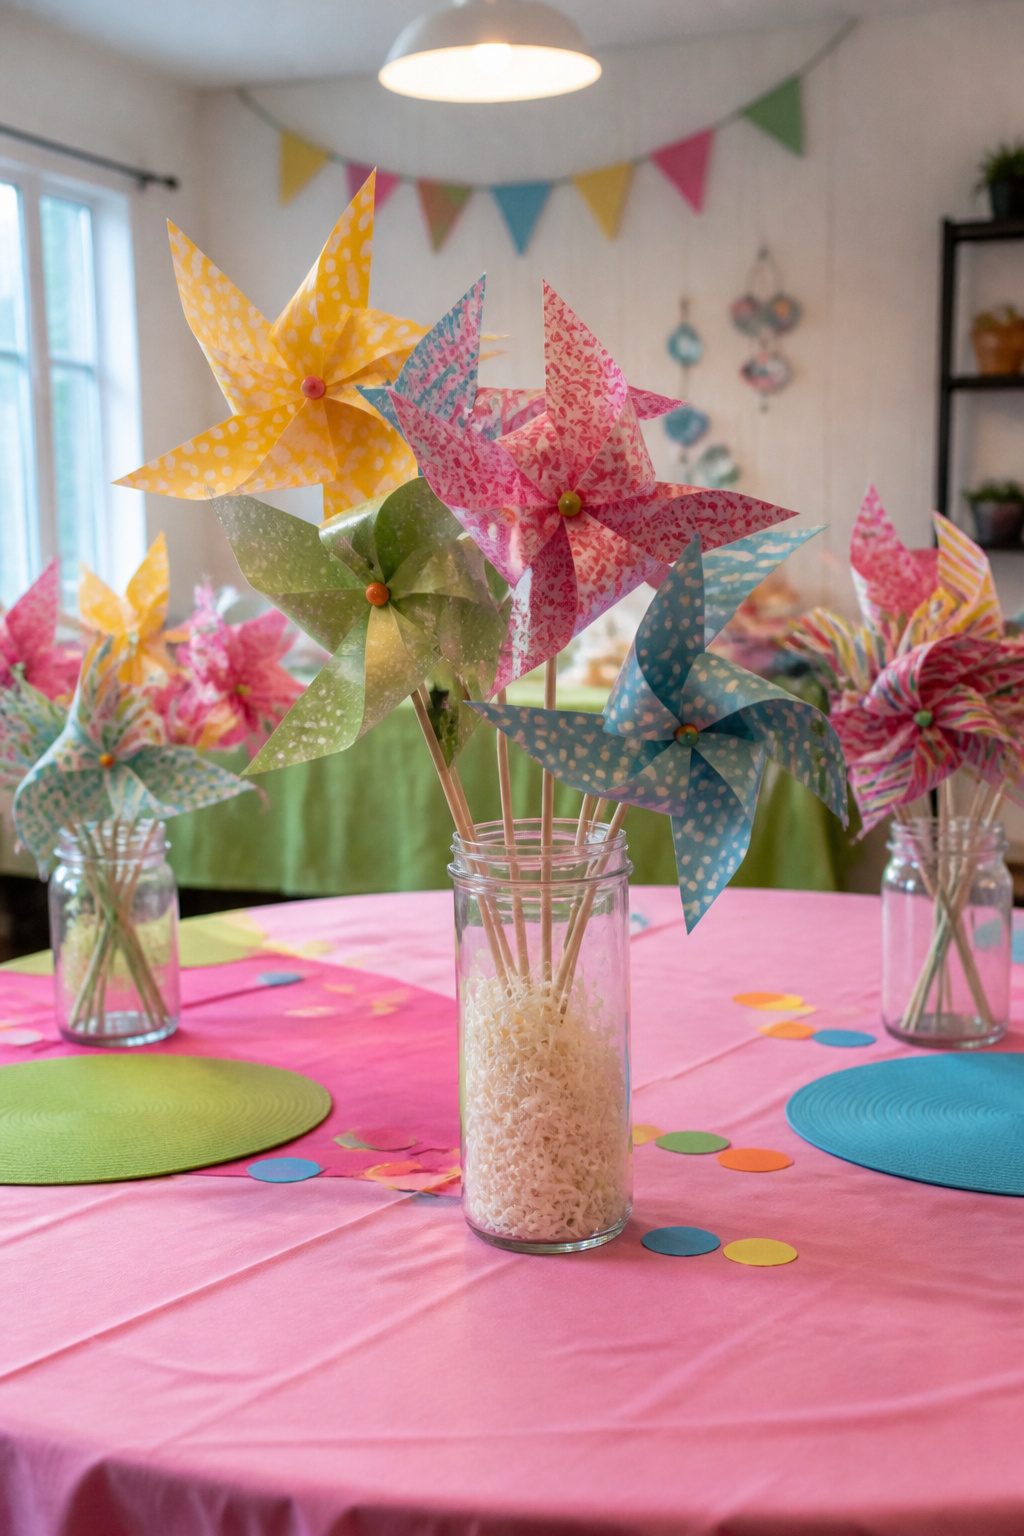
A square of scrapbook paper, cut to six inches, folds into a pinwheel in about two minutes.
Snip from each corner toward the center, stopping short of the middle, then bring every other point to the center and secure with a pushpin through the front.
The pin needs to push into the eraser end of a pencil behind it so the blades catch air and actually spin, either from an open window’s breeze or a guest leaning in to blow.
They work as singles taped to walls, but a cluster of eight standing in a mason jar reads as a centerpiece because the whole group trembles and turns together when someone walks past.
The motion matters more than any pattern you choose. Plain cardstock spins easier than heavy patterns, and a single staple through the center holds longer than glue on a humid afternoon.
I have had guests pick one up and blow at it like a birthday candle, which felt like the decoration was doing its job.
16. Hanging Ribbons
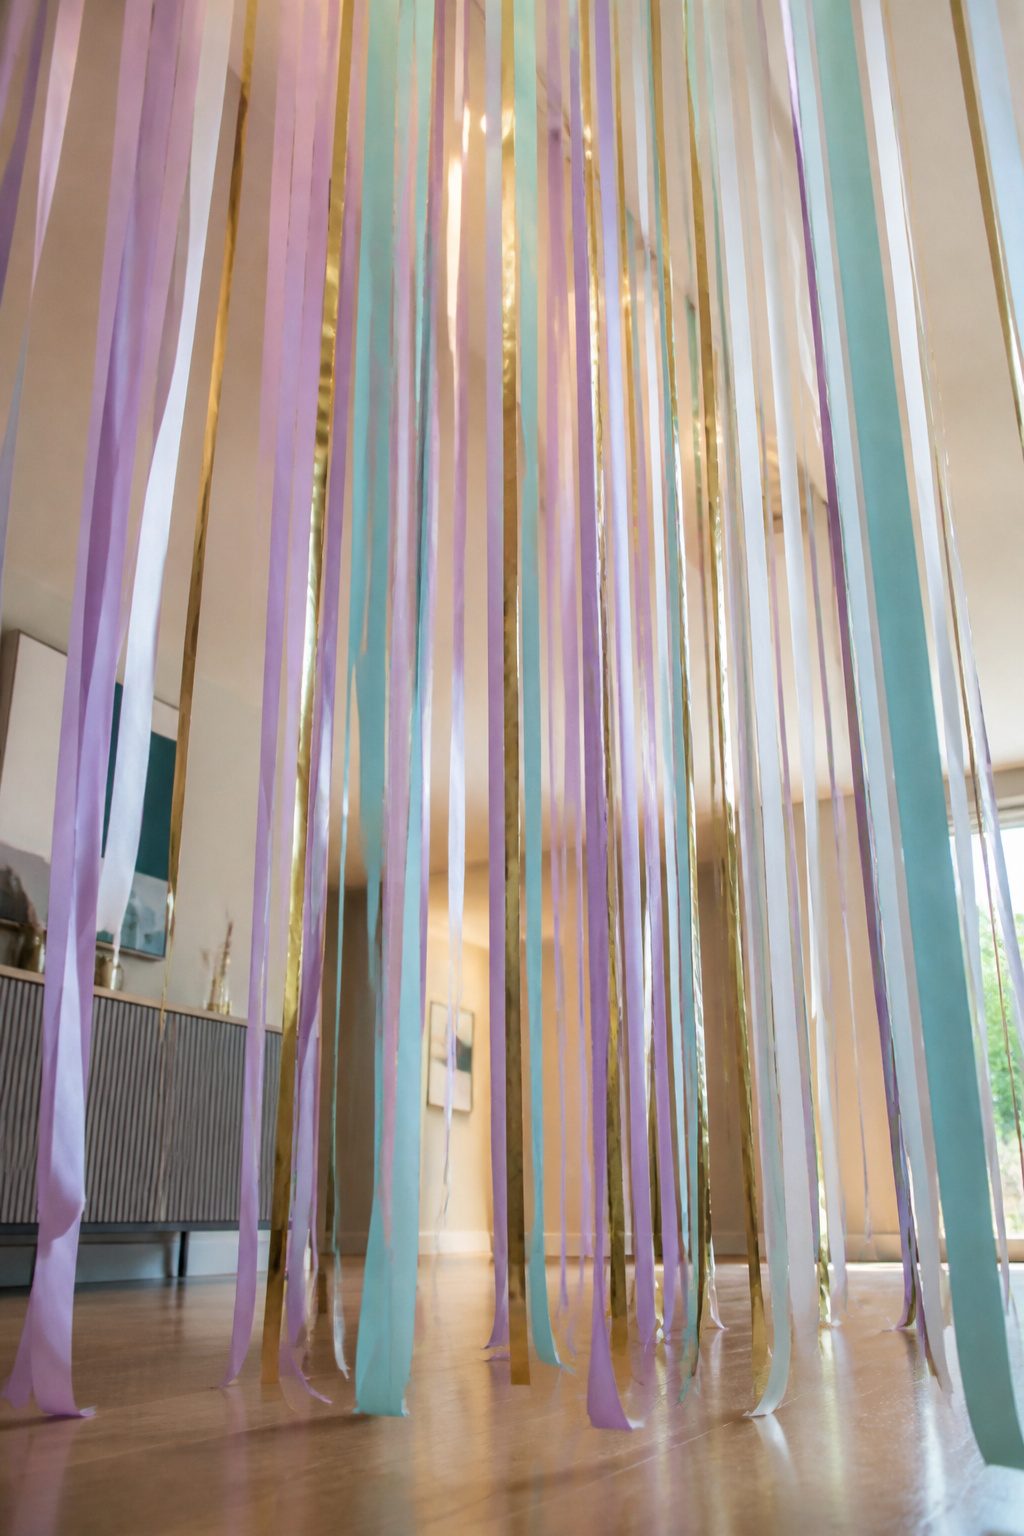
Ribbons hung from the ceiling frame a room better than any store-bought border.
I cut them in staggered lengths, from about twelve inches down to a full six-foot drop, and space them close enough that guests walk through without quite knowing where the wall ends and the air begins.
My ceiling fan warning cost me a ribbon tangle and a burned motor once: tape them to the blade housing, never tie anything that knots, and keep every strip short enough that a standing adult could not close a fist around it without ducking first.
Four or five feet is the honest ceiling for most living rooms. The tape residue cleans off with a warm cloth the next morning, which matters when you are renting and the deposit is still yours to lose.
17. Customized Drink Labels
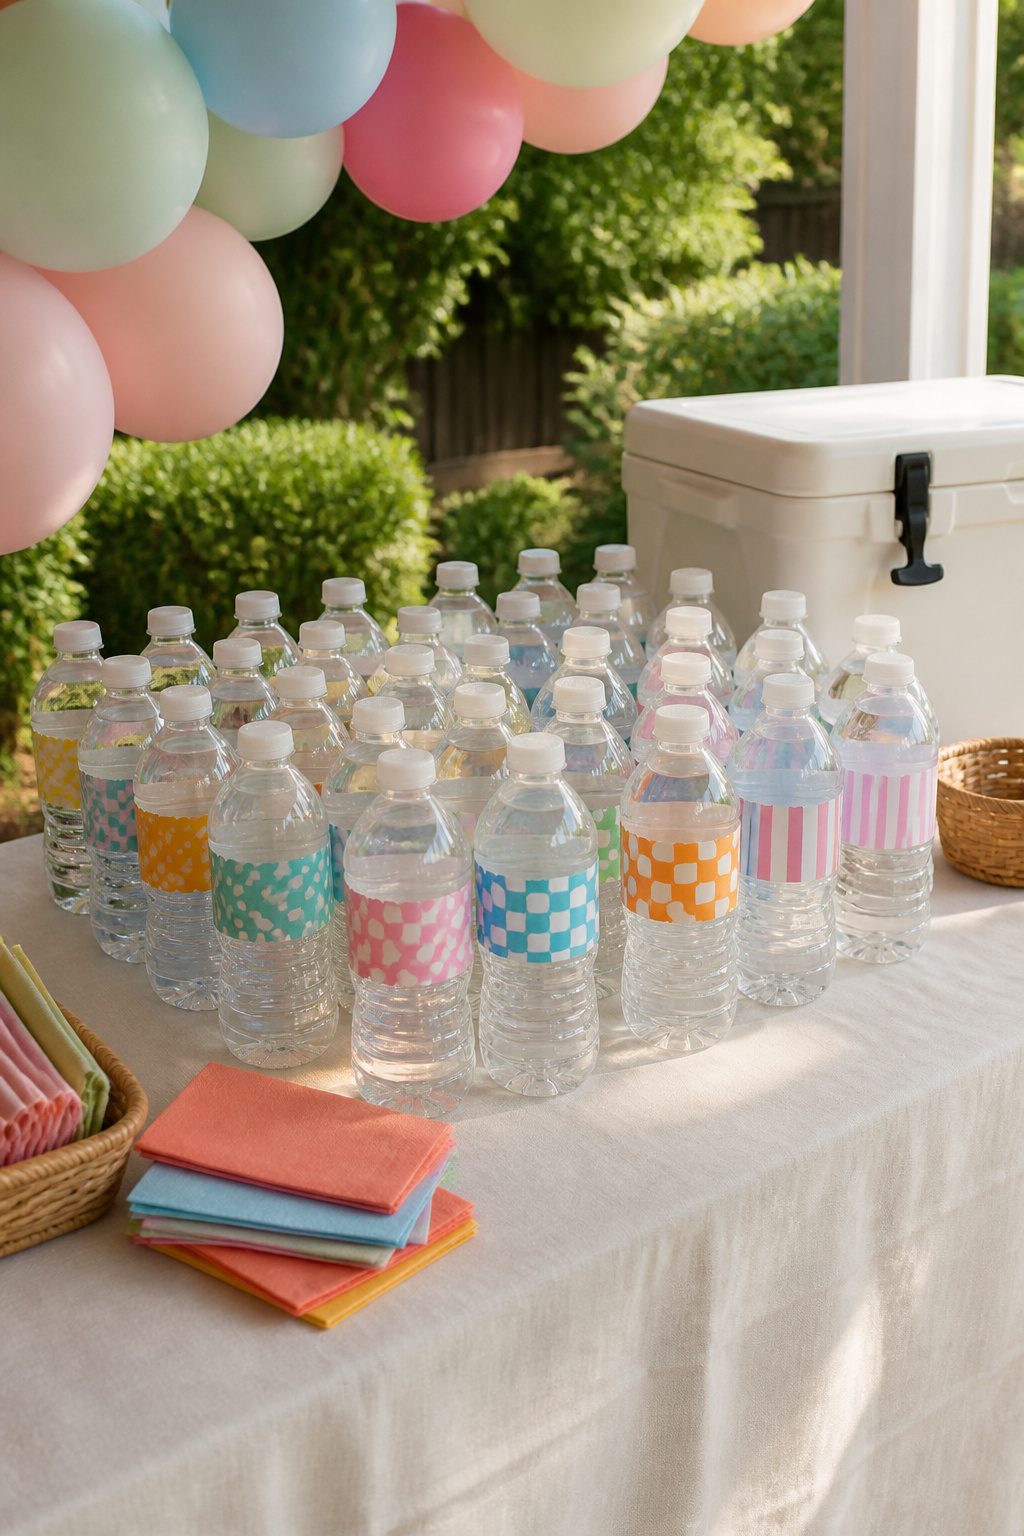
A twelve-pack of plain water bottles looks like a vending machine mistake in the middle of a decorated table. Printable drink labels fix that in about ten minutes of effort.
I use regular copy paper, nothing special, and seal it front and back with clear packing tape. It survives a single party fine; guests are holding bottles for twenty minutes, not submerging them.
Waterproof label paper exists and cuts cleaner, but I have never bothered for an at-home party where the drinks vanish in a few hours anyway.
The design lives on your computer. I pull the birthday person’s name, the year, or a one-line joke into a basic rectangle, print, trim with a paper cutter, and tape straight onto the existing label.
For a mocktail station, the same treatment works on soda bottles, mixers, even the creamer if you are doing a coffee bar. The tape seal keeps syrup from bleeding the ink if someone drips.
The mistake I made once was skipping the back seal. A guest set a bottle on a ring of condensation, the paper wicked water up the edge, and the whole label went soft and gray by hour two.
Tape both sides, or do not do it at all.
18. Glittered Mason Jars
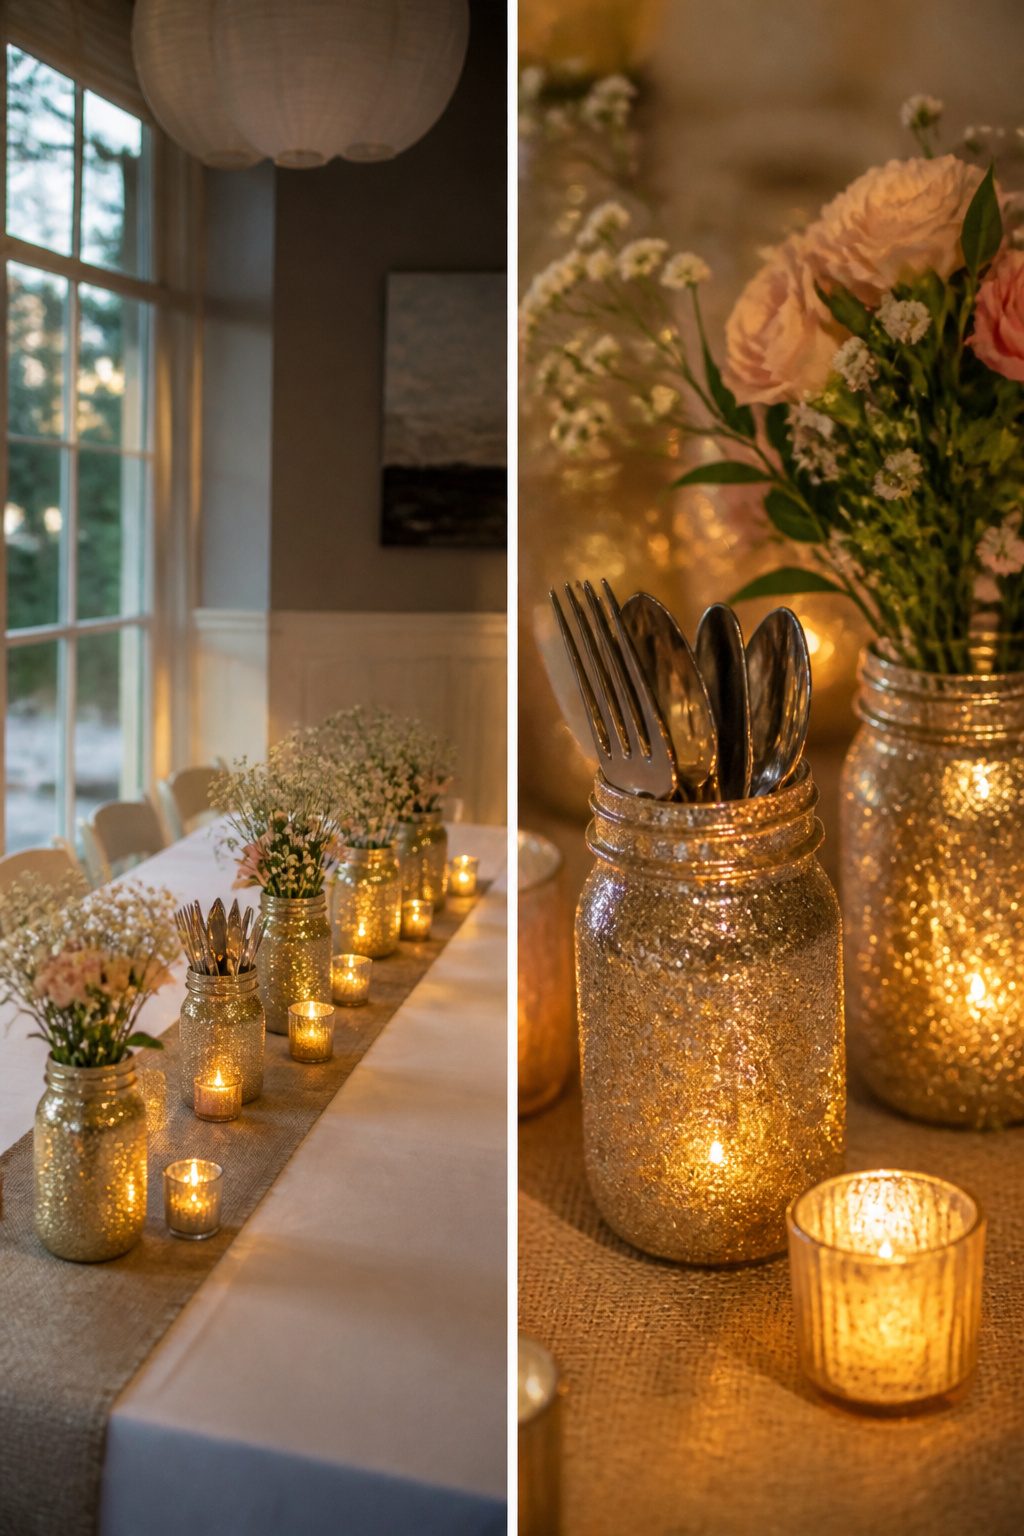
Regular mason jars take glitter better than you’d expect. I coat the outside with Mod Podge or any white craft adhesive, then sprinkle the glitter while it still drips.
The mess lands everywhere unless you work glitter-side down over a paper plate, tapping the excess straight back onto the plate and into the jar.
Once dry they work as utensil holders for a buffet line or as centerpieces with a tea light dropped inside. The glass catches light through the gaps where adhesive stayed thin, so a single votive does the work of three.
Drying time matters more than thickness; a tacky jar collecting fingerprints ruins the finish.
19. Tassel Garland
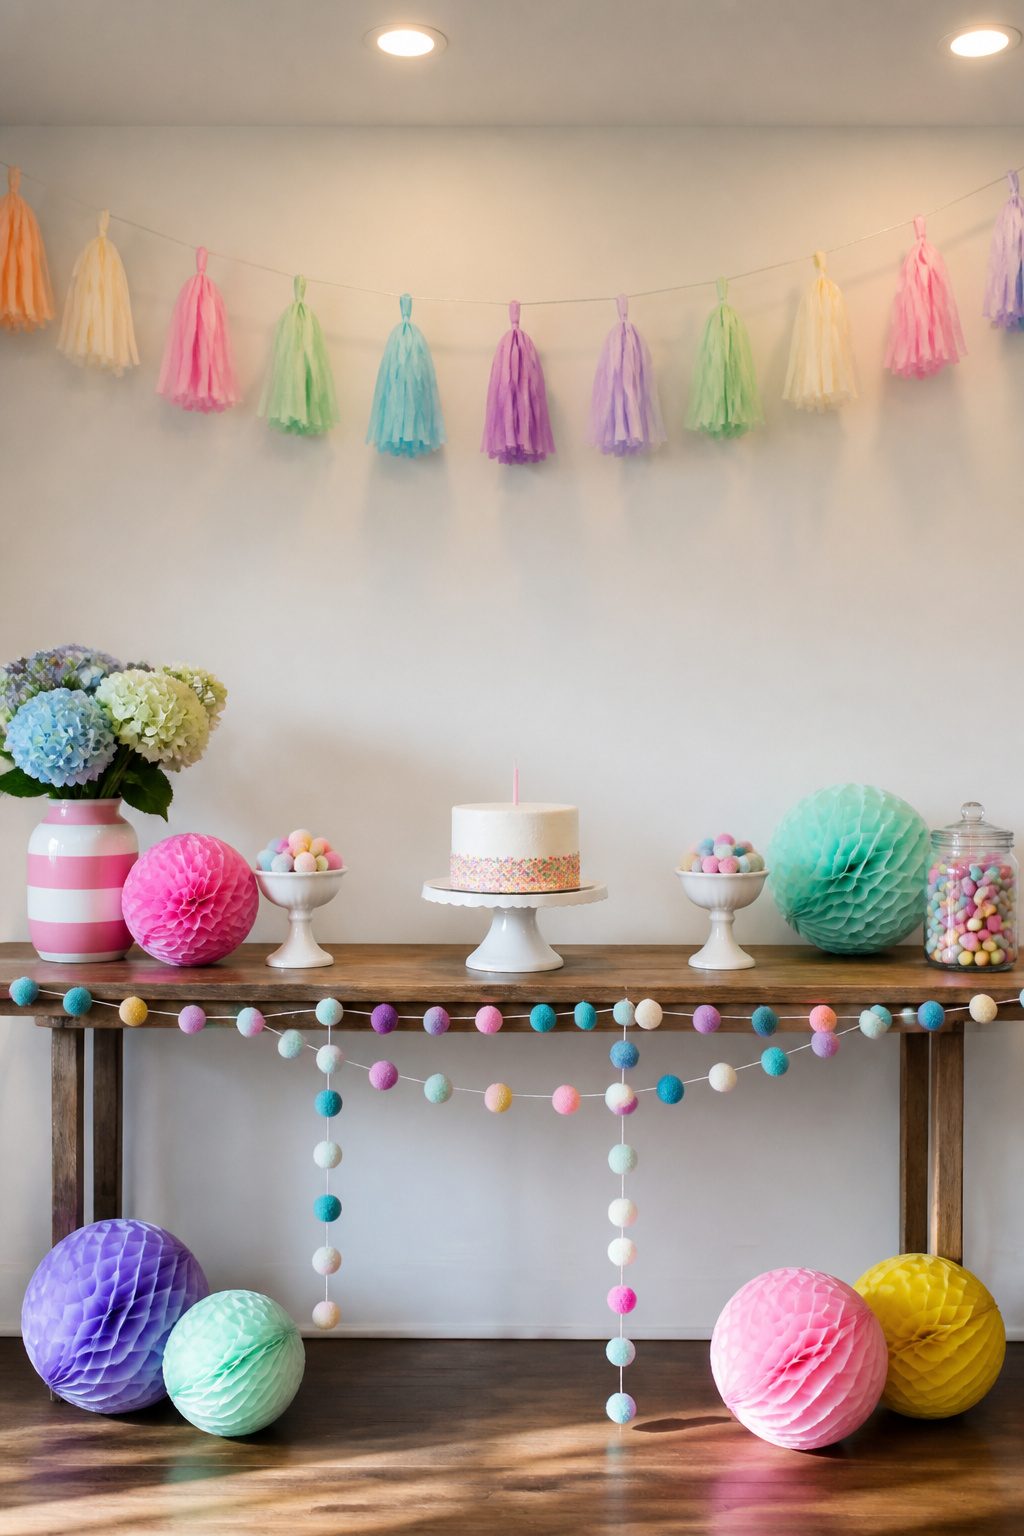
Tissue paper tassels are what I actually hang now, after watching mylar catch every overhead light and read cheap from across the room.
Ten tassels to six feet of twine is the density that looks full without closing in like a curtain, and that spacing matters more than the material choice.
I cut sheets in half lengthwise, stack six layers, fold like a paper fan, and slit the looped ends before twisting the center with a short wire to form a hanging loop.
That loop goes over the twine; the tassel hangs free and spins with any air movement. Tissue frays softer at the edges, mylar stays crisp, so the choice is really between movement and flash.
I keep the tassels roughly six inches apart on the string, which hits that ten-per-six-feet ratio on a standard eight-foot table span.
They hang about a foot below the twine line, low enough to read as decoration, high enough that tall guests don’t take one to the forehead.
20. DIY Confetti
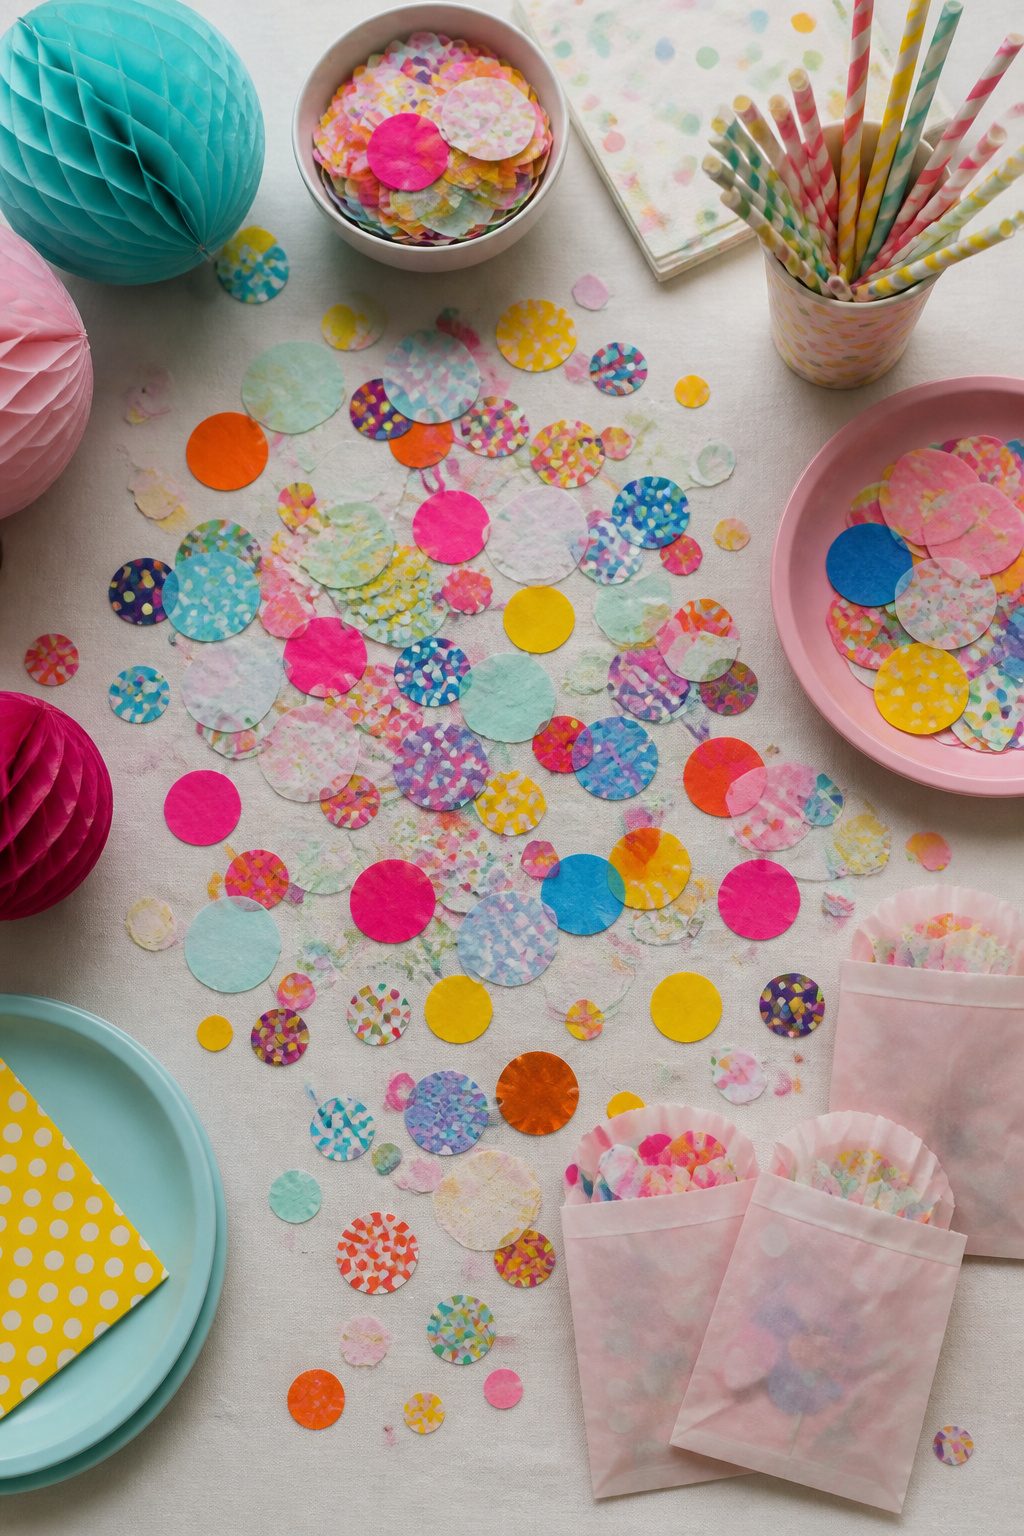
Leftover wrapping paper and tissue paper from holidays or gifts are the raw material for confetti that actually matches your party palette. A single hole punch turns them into clean circles, and a paper shredder makes strips fast.
Mixing the two sizes together photographs better than uniform pieces, because the light catches differently on the edges. Magazines work too if the colors suit your theme, though the glossy stock does not scatter as softly.
I have skipped mixing sizes before and the table looked flat in every photo, even when it seemed fine in person.
A single batch takes maybe ten minutes once the paper is out, and storage is as simple as a sandwich bag pressed flat in a drawer.
Picking a Theme First
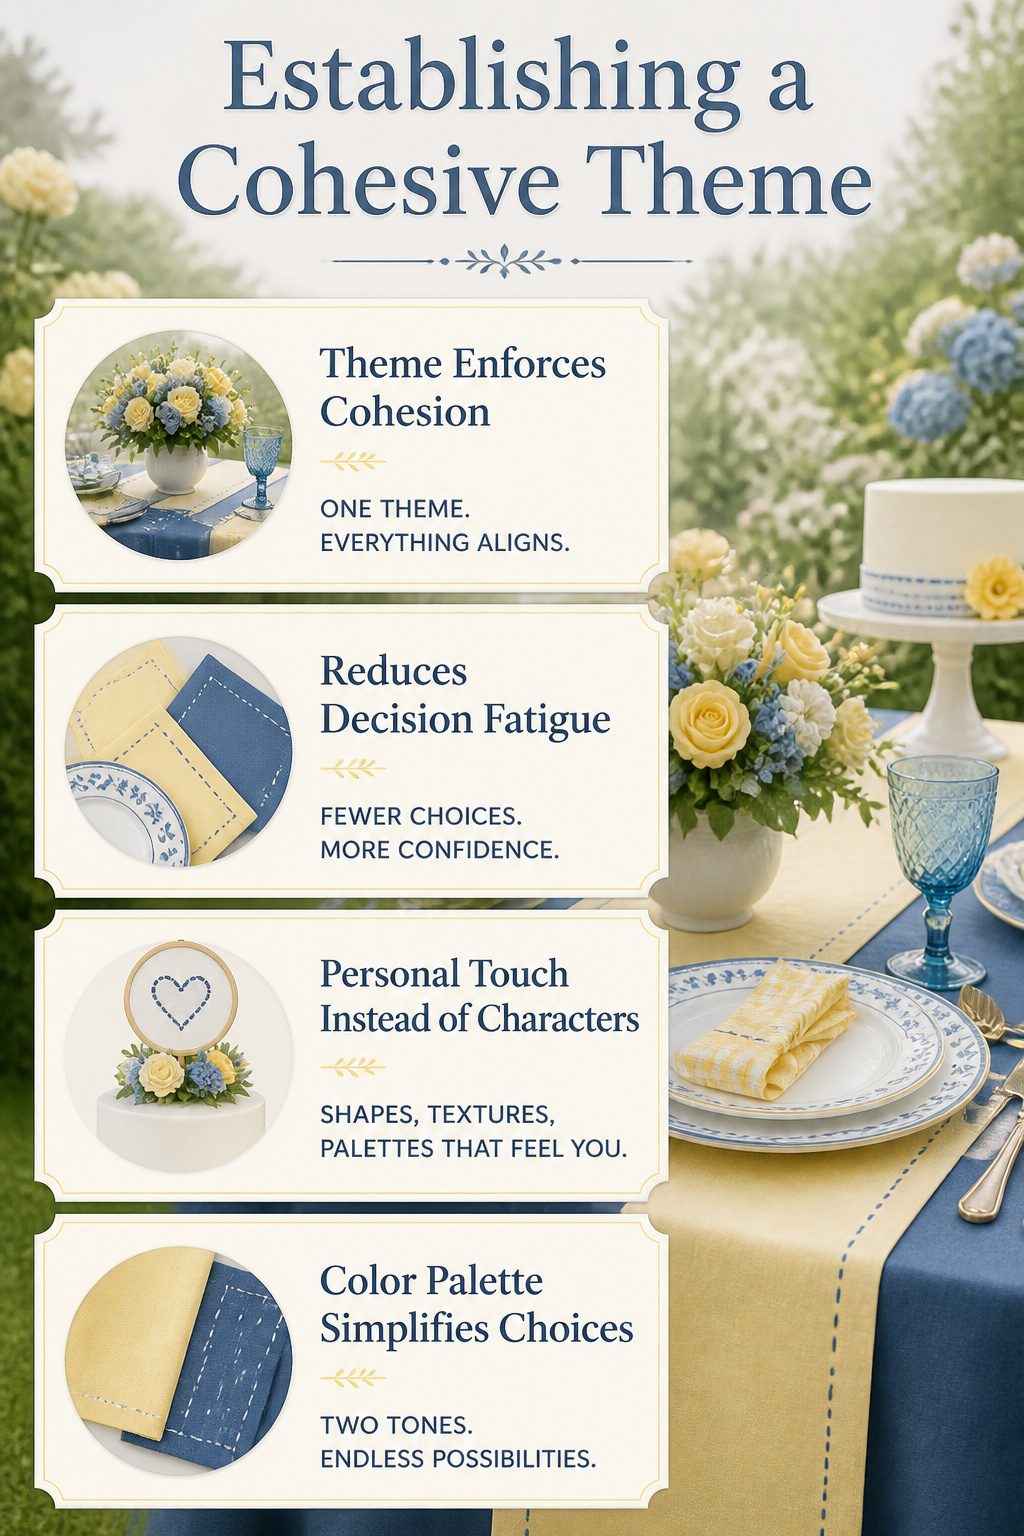
A loose theme acts like a filter. Last spring I watched a neighbor turn her patio into a disaster of mismatched chevron, tropical leaves, and rose gold because each aisle at the party store sold her something she liked.
The morning of the event she had scatter, not cohesion.
A single color scheme or motif keeps that from happening: once you decide on, say, butter yellow and faded navy with a running stitch detail, the decision between two table runners narrows to one.
The same rule holds whether you are buying paper goods or cutting your own. A themed table runner, floral arrangements that repeat the same two tones, even the cake topper, all settle into the same quiet logic.
You spend less time deciding and more time building. The motif does not need a licensed character or a movie tie-in.
A shape, a texture, or a palette you already own works fine and usually looks more personal.
What I Spend and Where I Shop
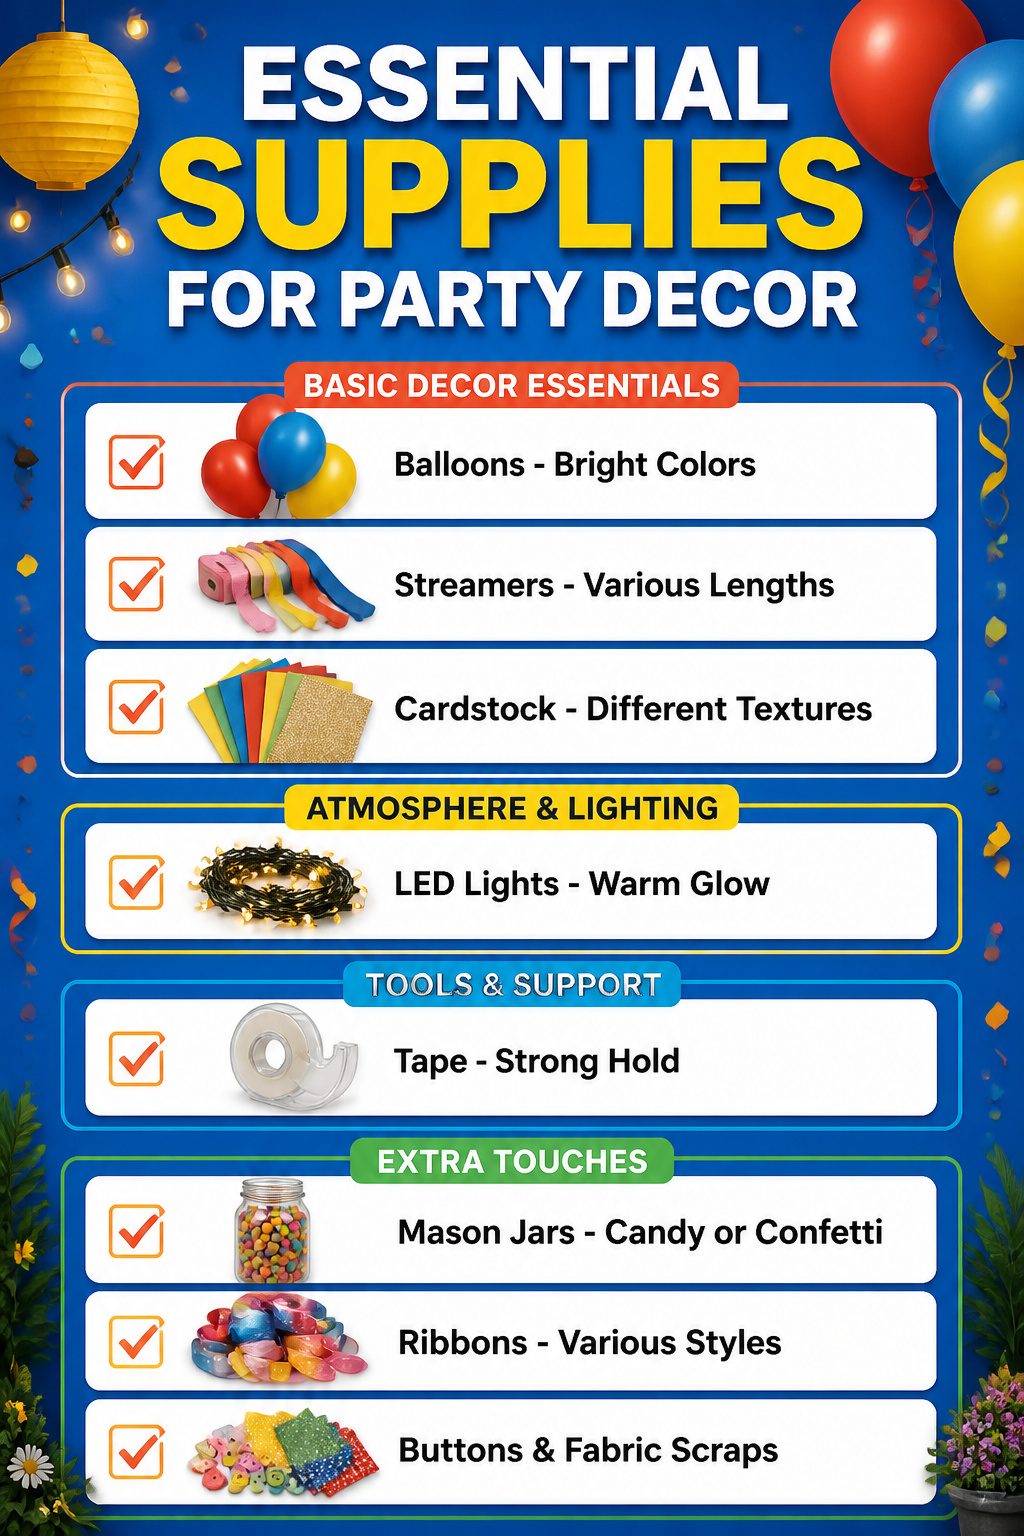
Balloons, streamers, cardstock, and tape form the backbone of most setups I have seen work, and buying those basics in bulk keeps the per-party cost low enough that you can spend deliberately on the one element guests actually photograph.
LED lights or a single paper lantern cluster over the table beats scattering small, forgettable pieces across every surface.
Mason jars from your pantry do the heavy lifting once you fill them with candy or confetti. Ribbons, buttons, and fabric scraps lying around the house cut the material list further without looking like an afterthought.
I buy most of this from craft stores, dollar stores, or Amazon basics.
Those three sources cover almost every item on the lists I draw up, and skipping the specialty shops means I am not paying a theme tax for the same cardstock.
Interactive Stations That Keep Guests Busy
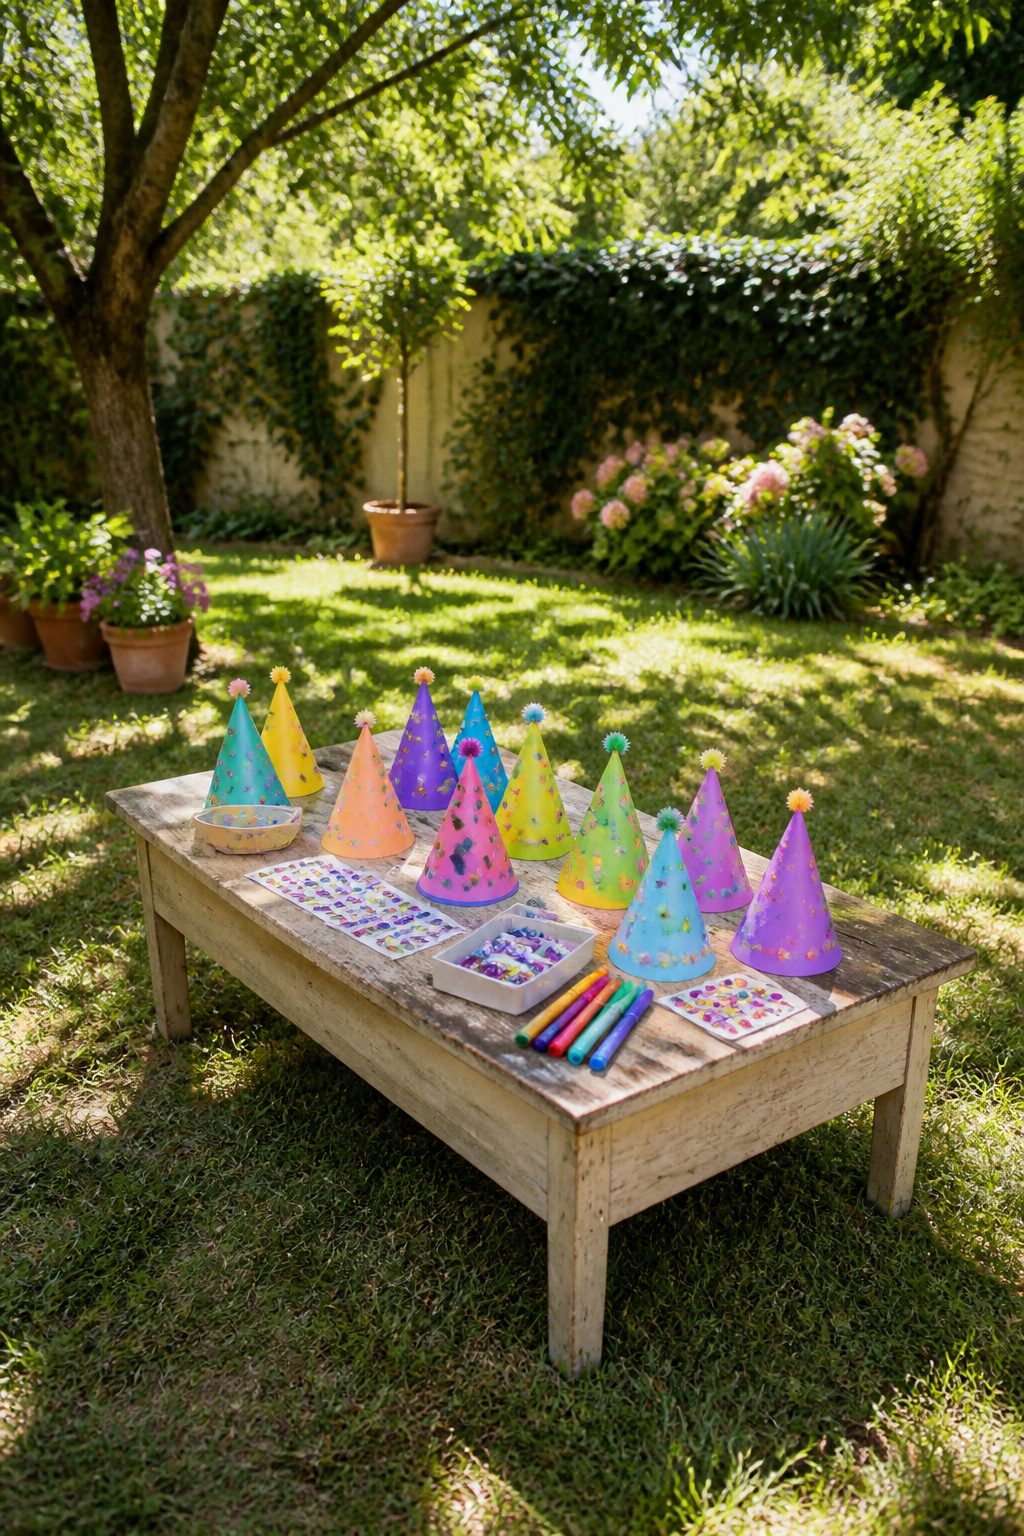
A station shifts the work of entertaining off you and onto the guests themselves. Last year I set out plain cardstock party hats with markers, stickers, and adhesive gems on a card table near the door and walked away.
By the time cake came out, fourteen adults were wearing hats they had bedazzled into personal sculptures, and two of them had made seconds for friends who arrived late.
The materials sat out for forty-five minutes and cleaned themselves up as guests carried their work home.
The photo booth works the same way. A curtain or stretched fabric for a backdrop plus a box of props, hats, masks, and signs keeps hands busy and starts conversations between people who did not arrive together.
An instant camera changes the math: guests leave with a print instead of you hustling to share photos later. That print becomes the favor, which is one less thing to plan and one less expense on a tighter party budget.
Make the station produce the favor and you trim both your to-do list and your spend. Confetti, stickers, or decorated hats cost less than bagged gifts and matter more because guests made them.
Lighting Setup Order
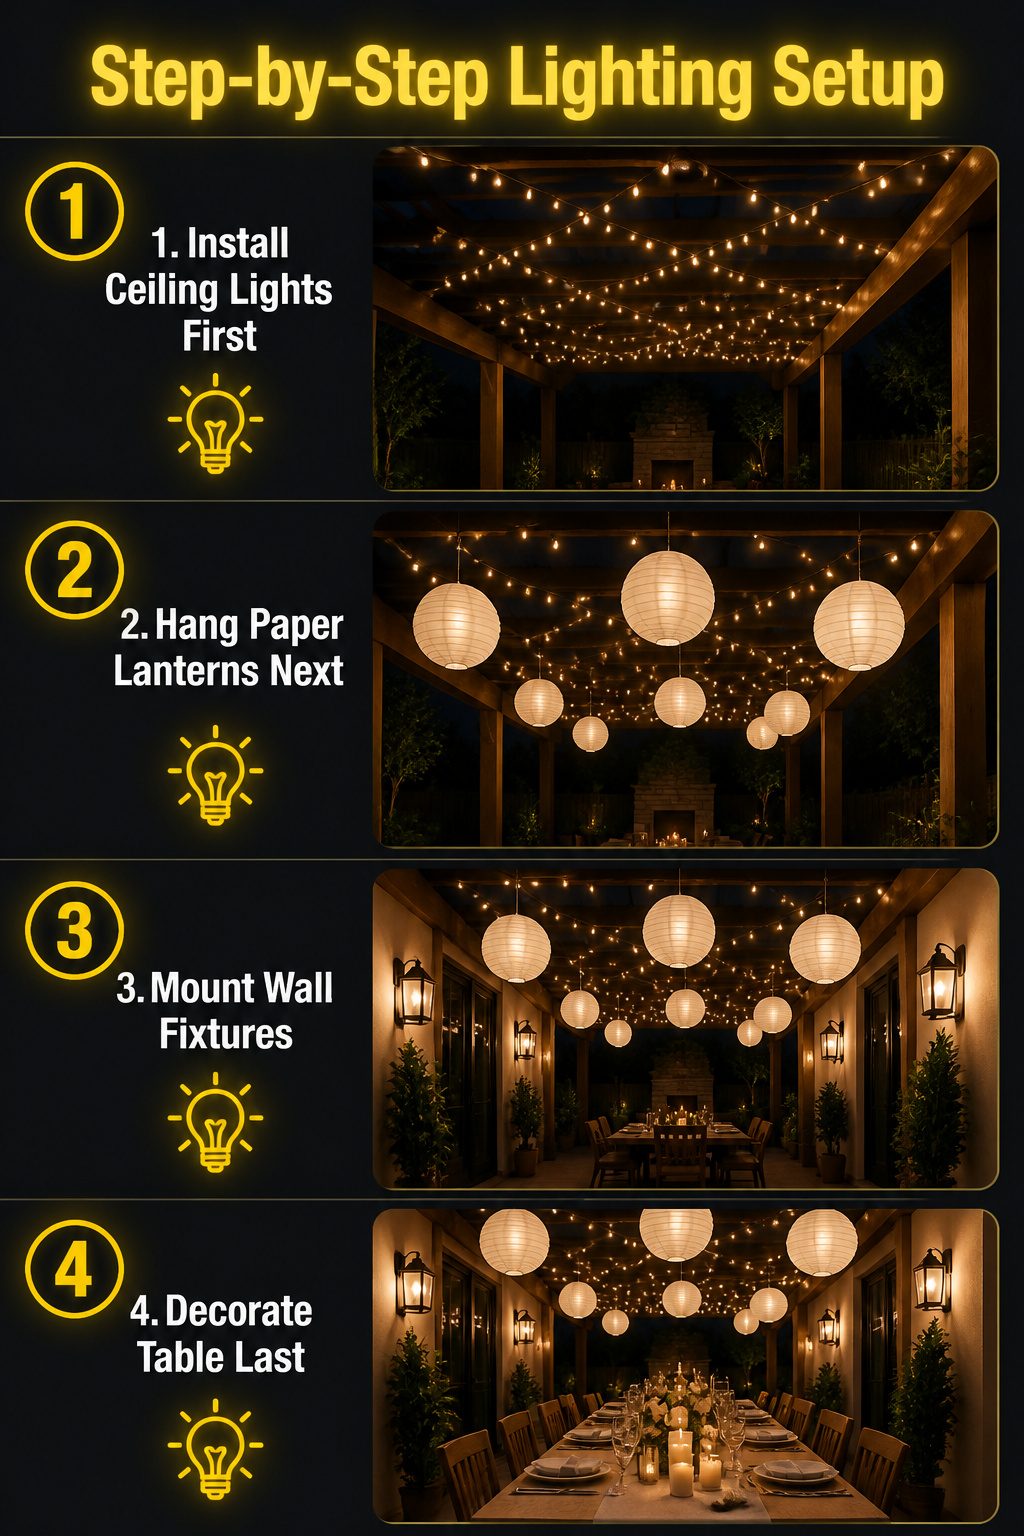
Ceilings, then walls, then tables.
That is the order that keeps you from working around your own work, and I learned it the hard way after draping a tablecloth first and then trying to thread lights overhead without dragging the fabric through dust.
Start the light install before any cloth or paper goes down.
String the fairy lights in their crisscross pattern overhead while the ceiling is still open, hang paper lanterns with fishing line or ribbon next, and only then move to wall-mounted pieces. Table décor comes dead last.
The one dead strand will happen. Plug in every strand and each battery-operated lantern before guests arrive and the room is half torn apart.
A single faulted set, discovered at dusk when the main lights go dim, undoes the whole effect you hung for. Test while you still have time to swap or reroute.
Frequently Asked Questions
What are some easy DIY birthday decorations?
A balloon arch built from 100–120 latex balloons, a personalized banner cut from cardstock or fabric, and a photo booth made from a curtain rod and thrifted frames all come together with minimal supplies.
Tissue paper tassels, twisted crepe paper streamers, and glittered mason jars round out the list of projects that take under an hour each. Most need only scissors, tape, glue, and paper goods you likely already own.
How can I create a themed birthday party?
Pick a single color scheme or motif before buying anything, then let it filter every choice. Two colors plus one metallic, repeated across tablecloths, napkins, flowers, and the cake topper, keeps the room from sliding into visual noise.
The article’s sage-and-cream-with-gold example shows how this rule turns even paper plates into something intentional.
What materials do I need for DIY decorations?
Stock up on balloons, crepe paper, cardstock, glue, tape, and scissors as your base kit. Add LED fairy lights, floral wire, Mod Podge, glitter, and clear packing tape if you want the fuller range of projects.
Fishing line beats ribbon for hanging lanterns and anything else you want to appear floating.
When should I start decorating for the birthday party?
Begin a few hours before guests arrive so you have time to adjust without rushing. The sources note this window leaves room for fixes if a banner hangs crooked or lights need repositioning.
Balloon arches and tiered dessert displays both benefit from the buffer, since neither tolerates last-minute improvisation well.
How can I make decorations suitable for different age groups?
Match the tone to the guest rather than the calendar age.
Playful pinwheels and DIY party hats with glitter and pom-poms keep younger kids busy as an activity, while adults respond to subtler details like copper-wire fairy lights or a popcorn bar with custom seasonings.
Always check that materials such as small pins or latex balloons stay safe for the youngest guests present.